> ## Documentation Index
> Fetch the complete documentation index at: https://docs.cloudify.biz/llms.txt
> Use this file to discover all available pages before exploring further.

# One-click Invoices/Orders/Quotes

> Access the manual sync window directly within HubSpot through UI Extensions to create and sync invoices, orders, or quotes to e-conomic.

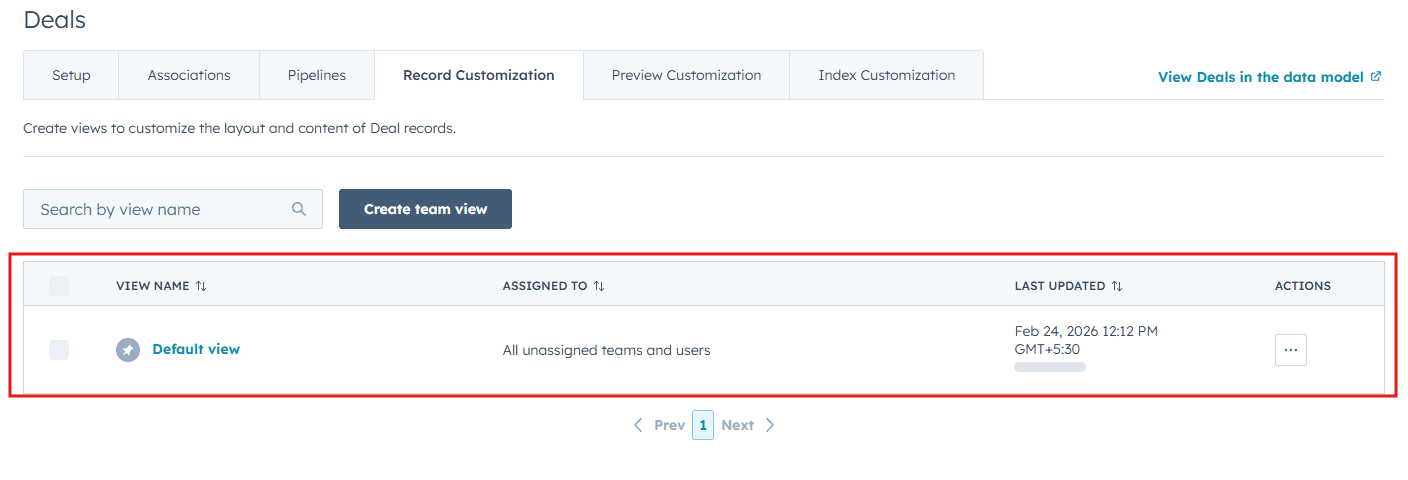
You can access the manual sync window directly within HubSpot through UI Extensions. Follow the steps below to add this panel to your HubSpot view.

***

## Setting Up the UI Extension
<Steps>
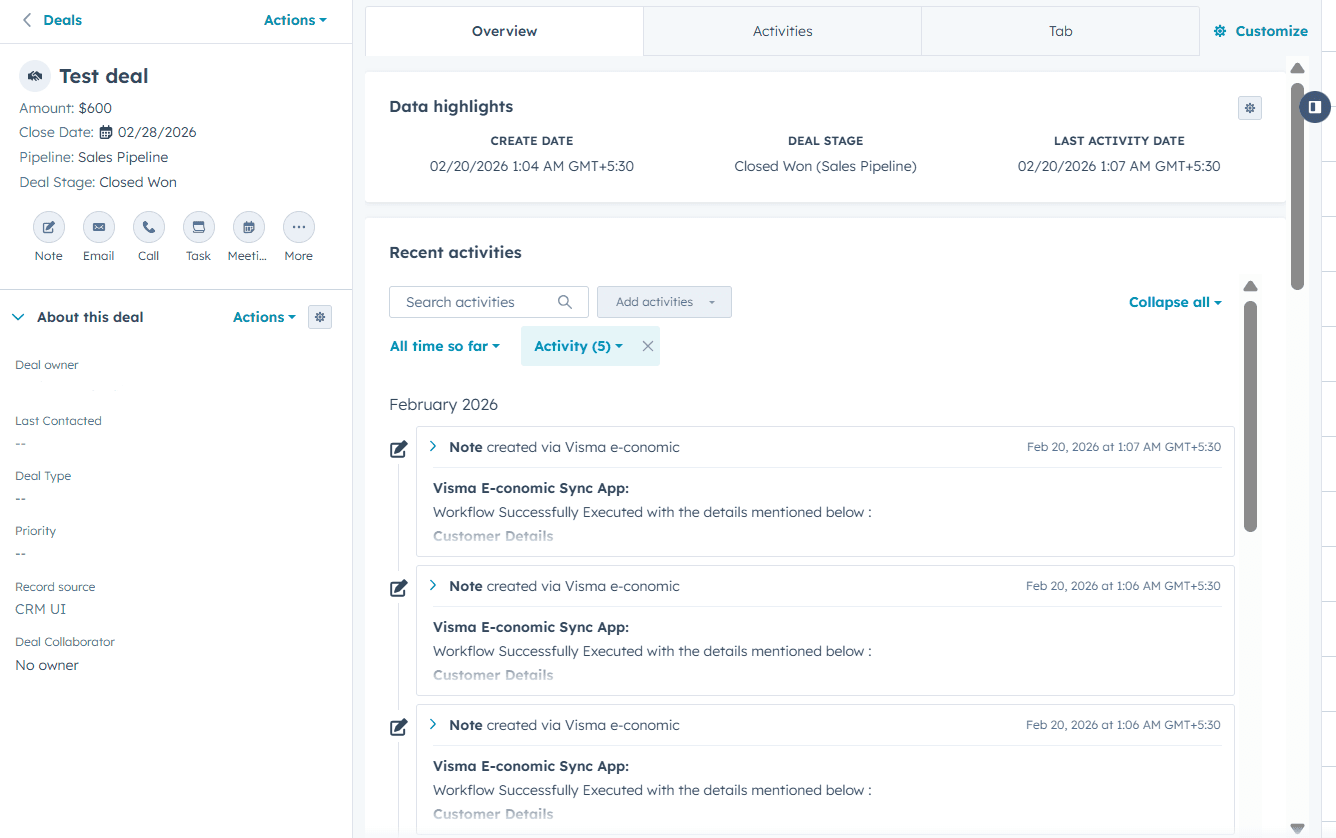
  <Step title="Open a Deal in HubSpot">
    <Frame>
      ![Open any Deal in HubSpot](https://framerusercontent.com/images/vbZbHpsgoeQtut0KAEPoBXfqoI0.png)
    </Frame>
  </Step>

  <Step title="Customize the Default view">
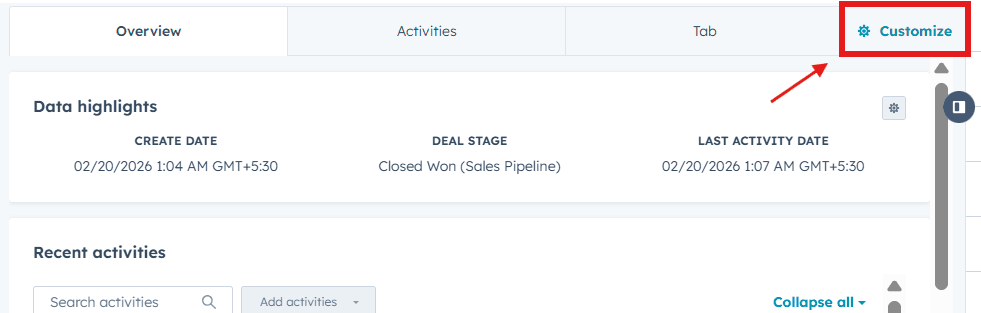
    Click **Customize** and select **Default view**.
    <Frame>
      ![Click Customize in the Deal view](https://framerusercontent.com/images/vK9i7hqnnQlTHgfZcC6SygPOgc.png)
    </Frame>

    <Frame>
      ![Select Default view from the Customize menu](https://framerusercontent.com/images/UdMaxpY16KX8hEEFjSK12Rbtcw8.png)
    </Frame>
  </Step>

  <Step title="Add a new card">
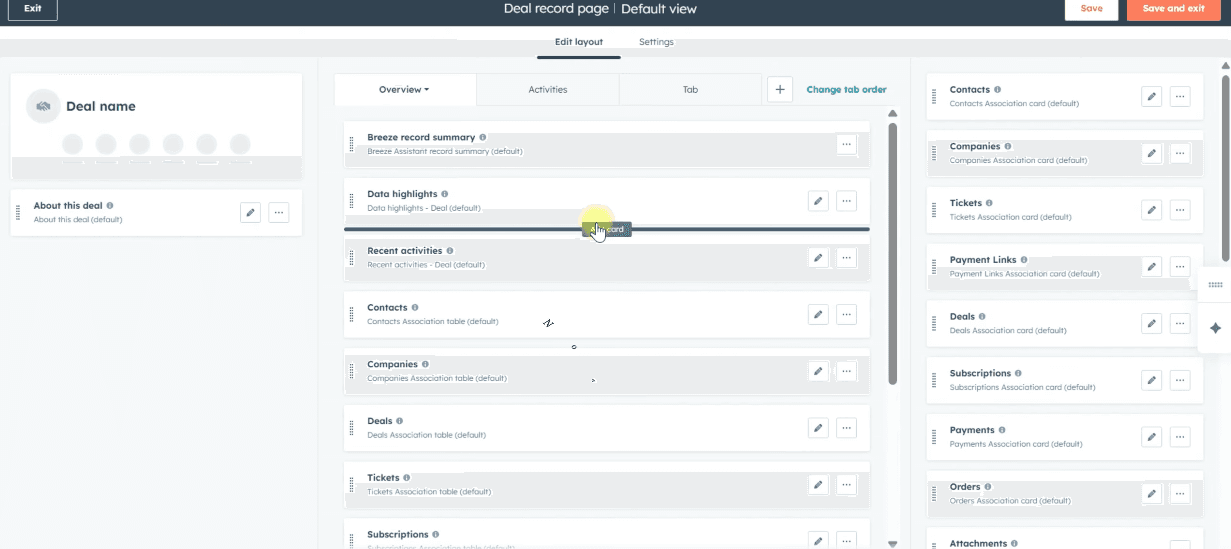
    Under **Edit layout**, click the **+** icon where you want to place the card.
    <Frame>
      ![Click the + icon in Edit layout to add a new card](https://framerusercontent.com/images/7Q6GYJUVE4n01fKTpXA6KeLKY.png)
    </Frame>
  </Step>

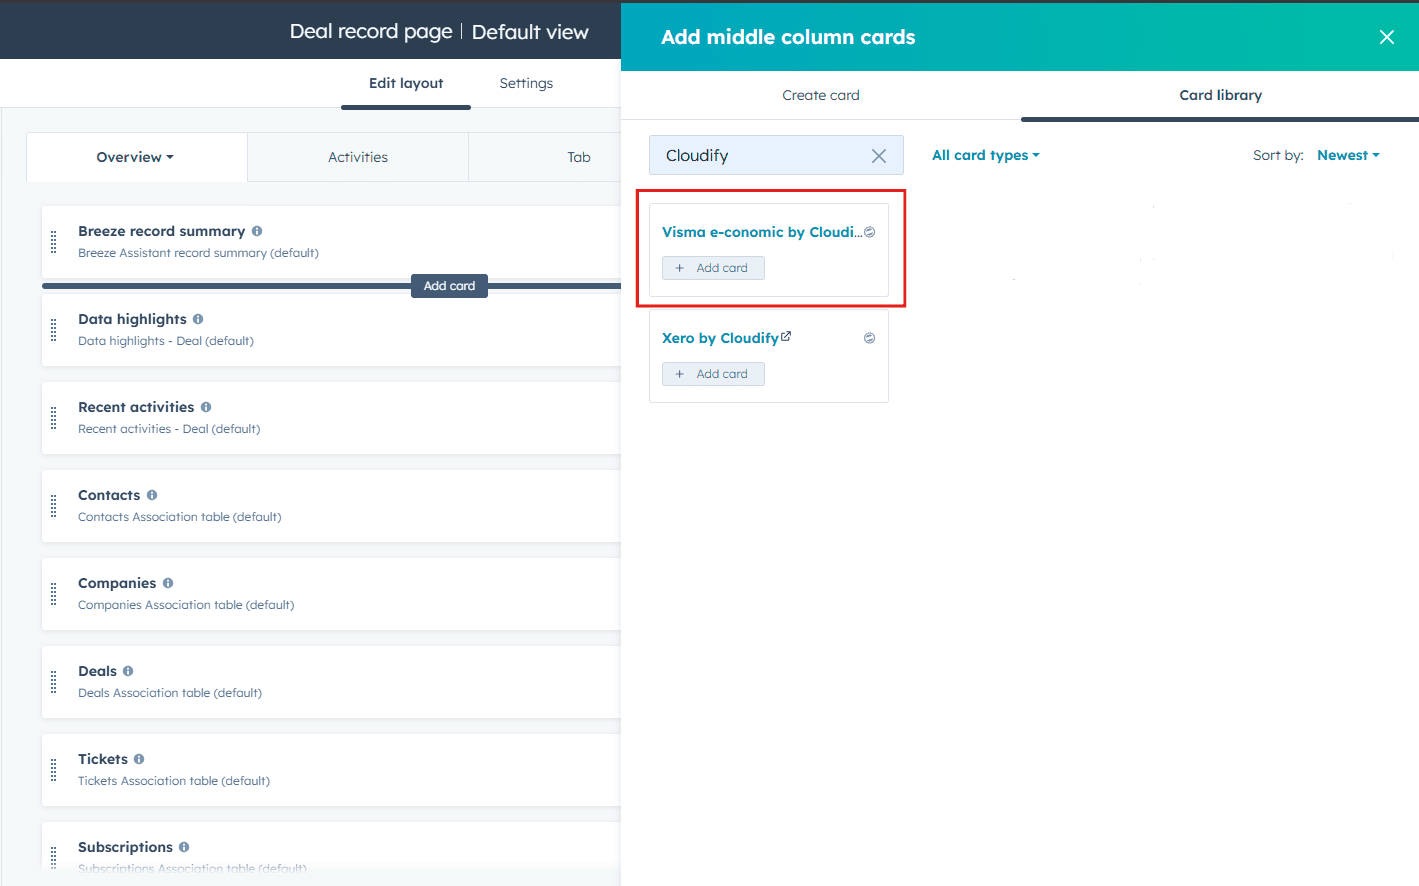
  <Step title="Search for and add the Cloudify card">
    Search for **Visma e-conomic by Cloudify** in the Card Library, then click **Add card**.
    <Frame>
      ![Search for Visma e-conomic by Cloudify in the Card Library and click Add card](https://framerusercontent.com/images/hKaNpiG5iKpY50AmTHOSme3tJpE.png)
    </Frame>
  </Step>

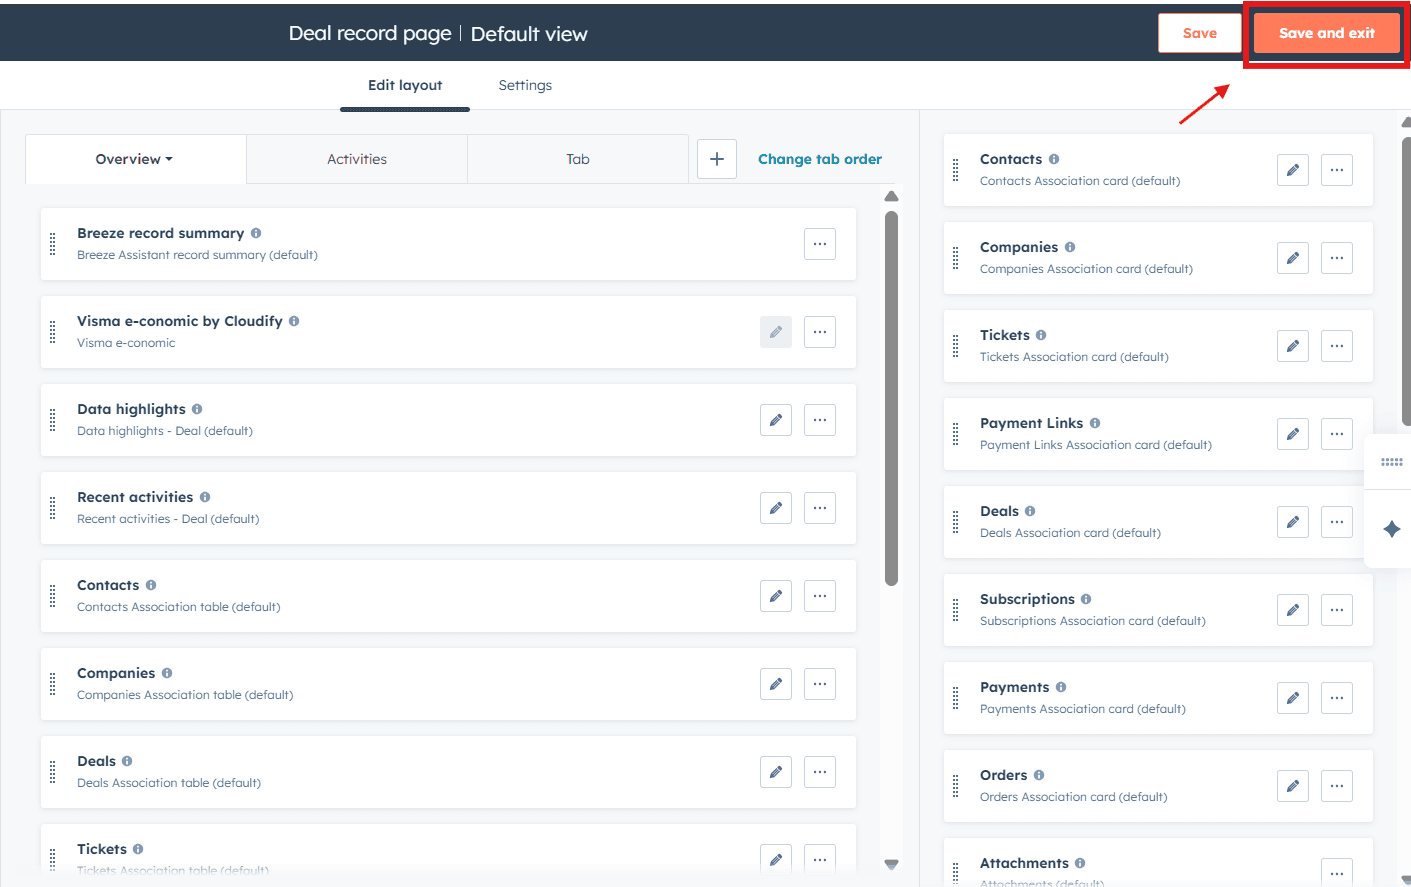
  <Step title="Save and Exit">
    Click **Save and Exit** to apply the layout changes.
    <Frame>
      ![Click Save and Exit to save the layout](https://framerusercontent.com/images/m79OClGDgBuamarXVwMUwUDOWLo.png)
    </Frame>
  </Step>
</Steps>

***

## Creating an Invoice, Order, or Quote

<Steps>
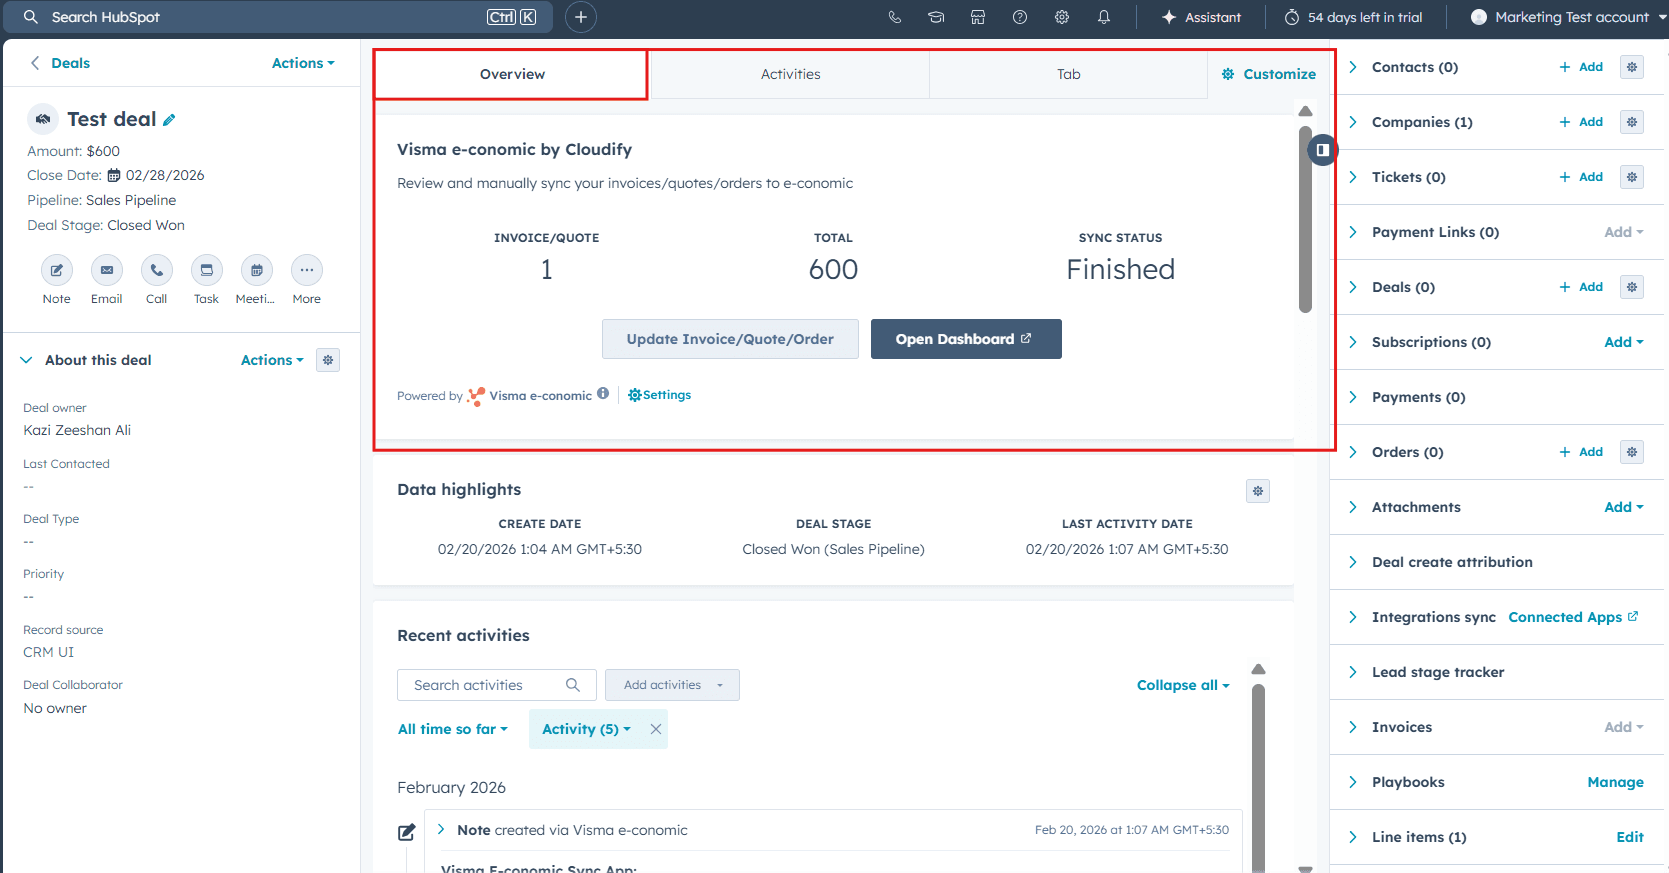
  <Step title="Access the UI extension">
    Access the UI extension under the **Overview** tab of any Deal.
    <Frame>
      ![Access the Visma e-conomic by Cloudify UI extension under the Overview tab](https://framerusercontent.com/images/o2ppeC2e1WS6ABs3U05GchylZc.png)
    </Frame>
  </Step>

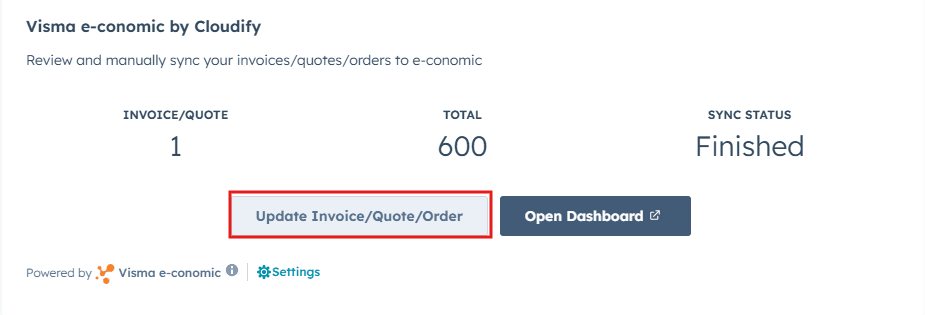
  <Step title="Create or update a record">
    Use **Update** or **Create Invoice, Order or Quote** to manually sync your records to e-conomic.
    <Frame>
      ![Use Update or Create Invoice, Order or Quote to sync records to e-conomic](https://framerusercontent.com/images/It17yfpKmby14sCNaYd1rUDJafY.png)
    </Frame>
  </Step>

  <Step title="Finalize and sync">
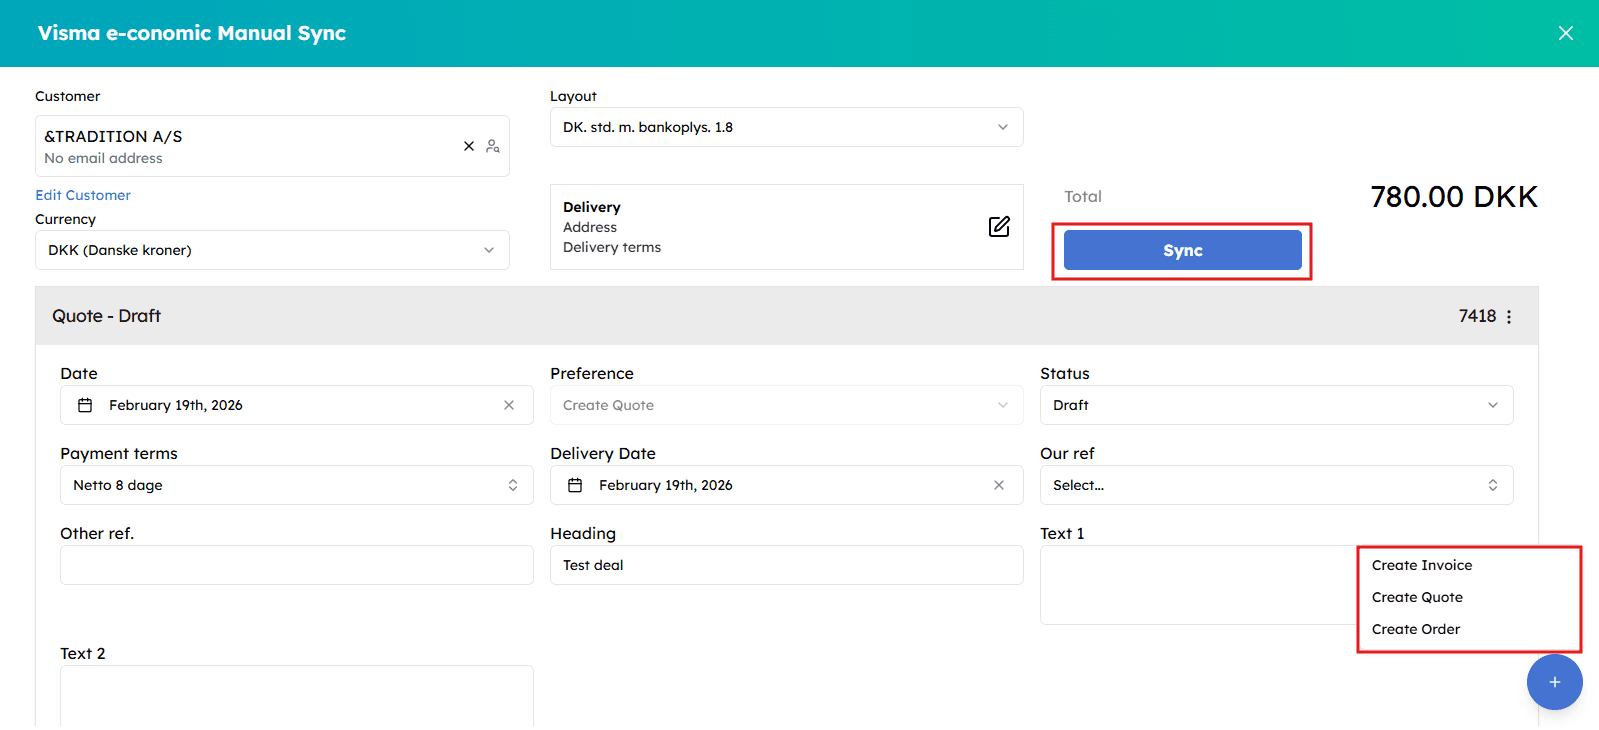
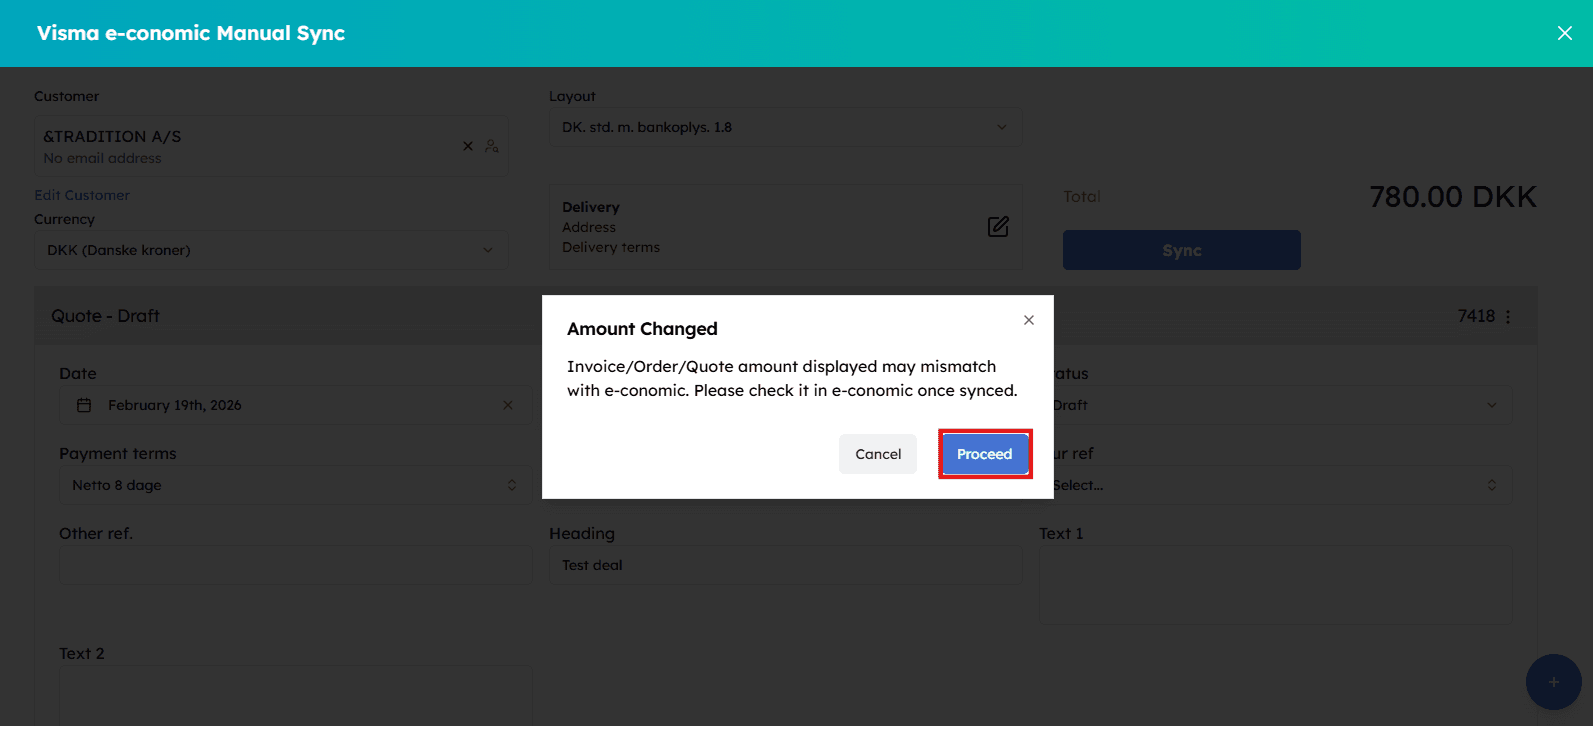
    Finalize the changes, select **Sync** to synchronize the invoice, order, or quote, then select **Proceed**.
    <Frame>
      ![Select Sync to synchronize the record](https://framerusercontent.com/images/DmEH1SX0VNUTFiEX4R0Dy88eQB8.png)
    </Frame>

    <Frame>
      ![Click Proceed to confirm the sync](https://framerusercontent.com/images/XiqYw7ohxHIP9k8a2ybfRVfY4.png)
    </Frame>
  </Step>

  <Step title="Confirm success">
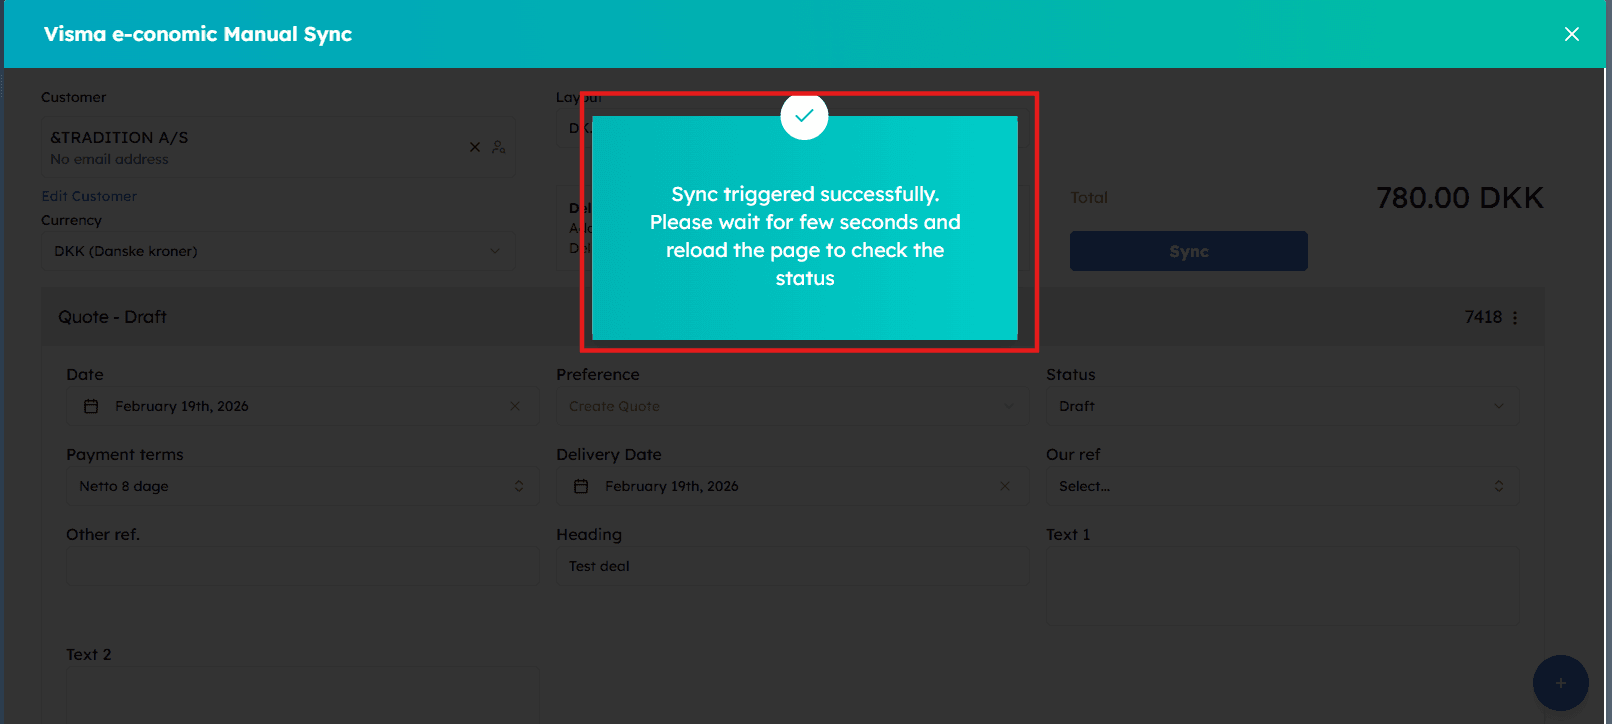
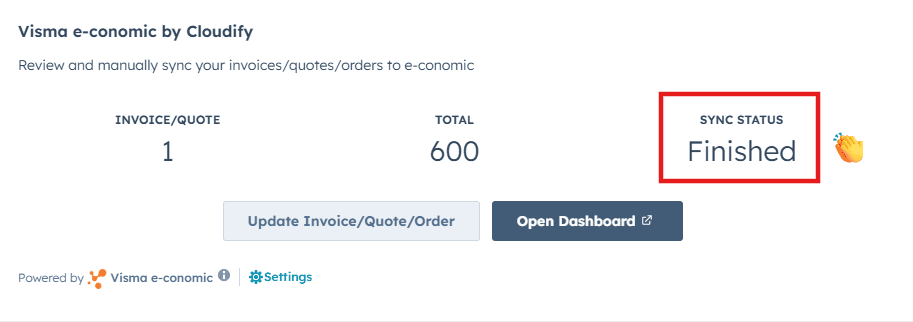
    A success window will appear confirming that the sync has been triggered. Wait a few seconds and reload the page to check the updated status.
    <Frame>
      ![Success window confirming the sync has been triggered](https://framerusercontent.com/images/IAUwuVaTd0RI75D3liqSAMG5Y.png)
    </Frame>

    <Frame>
      ![Reload the page to see the updated sync status](https://framerusercontent.com/images/67nWowtfblOouq7GGwBGW7BBSOg.png)
    </Frame>

    Your invoice, quote, or order has been successfully created in e-conomic!
  </Step>
</Steps>

***