> ## Documentation Index
> Fetch the complete documentation index at: https://docs.cloudify.biz/llms.txt
> Use this file to discover all available pages before exploring further.

# Assign Template to a Customer on BC

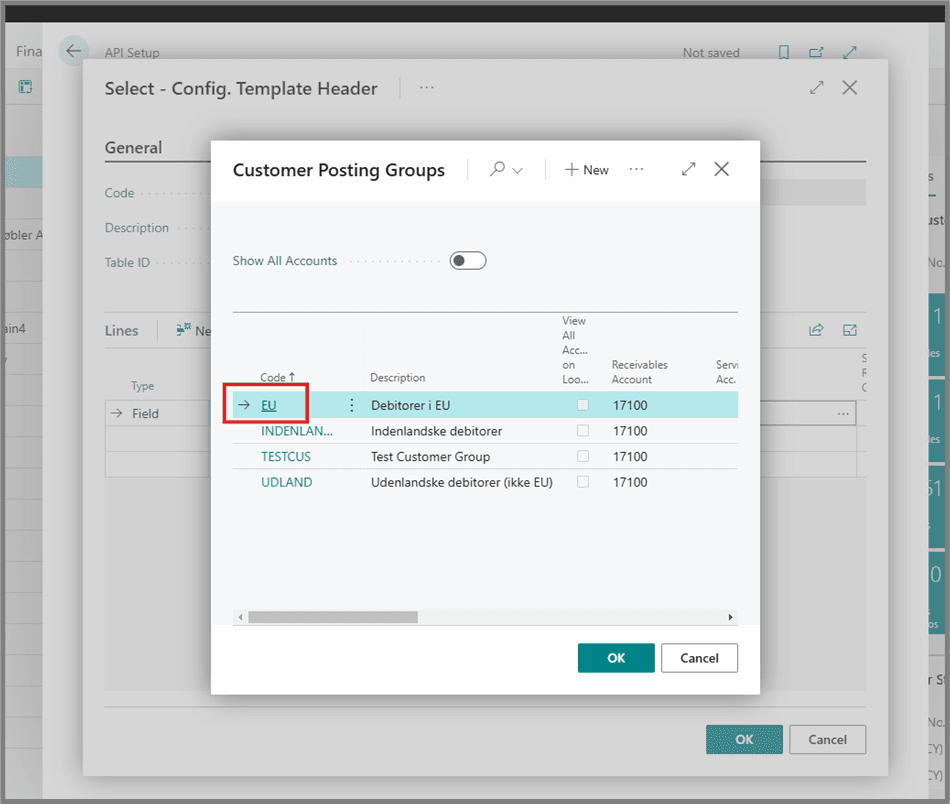
Watch the video below to understand how to assign a template to a customer when it is created in Business Central. This process ensures that all required posting group fields are set correctly for the integration to work.

<iframe src="https://www.youtube.com/embed/J-zdGHaIjkk" title="YouTube video player" frameborder="0" className="w-full aspect-video rounded-xl" allow="accelerometer; autoplay; clipboard-write; encrypted-media; gyroscope; picture-in-picture; web-share" allowfullscreen />

<Note>
  Setting these default values is mandatory for the integration to run. If these values are already configured, you do not need to repeat the setup. Otherwise, follow the steps below.
</Note>

***

### Step-by-Step Instructions

<Steps>
  <Step>
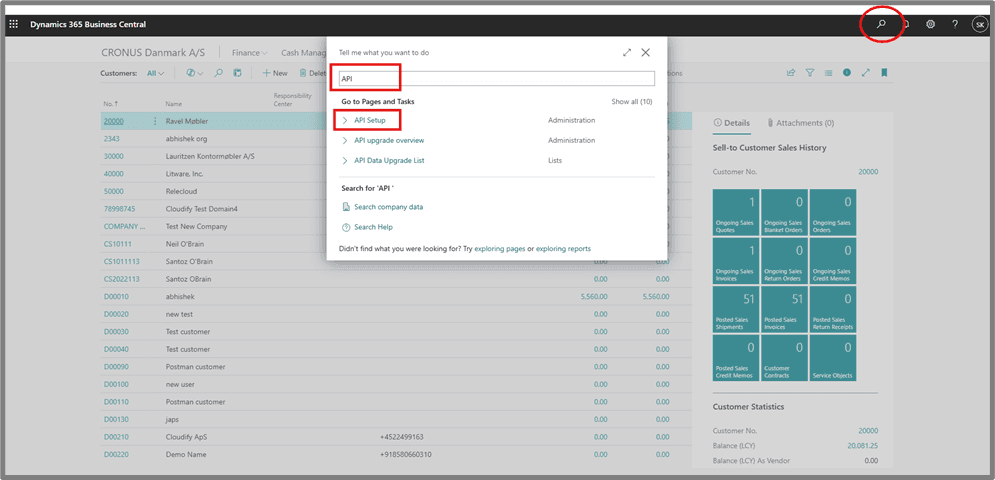
    Click on the search bar and type **API**. Select **API Setup** from the search results.
    <Frame>
      ![Search API Setup](https://framerusercontent.com/images/AUFsq7sBPO4DdDfa1rKV1V418.png)
    </Frame>
  </Step>

  <Step>
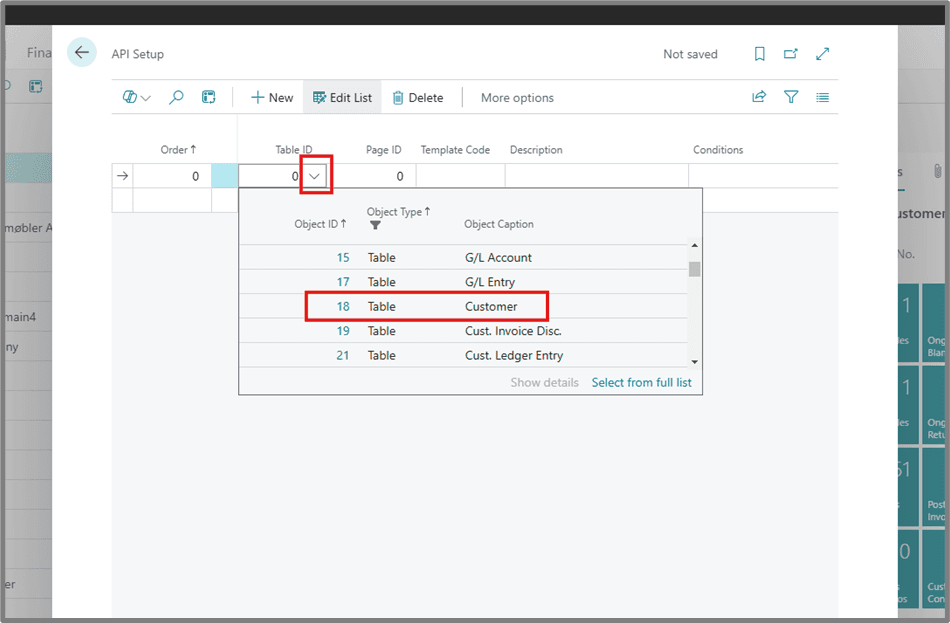
    Click on the drop-down next to **Table ID** and select **Customer**.
    <Frame>
      ![Select Customer Table](https://framerusercontent.com/images/RUc2PHzvj8hllmZrDpUiCOXpSiM.png)
    </Frame>
  </Step>

  <Step>
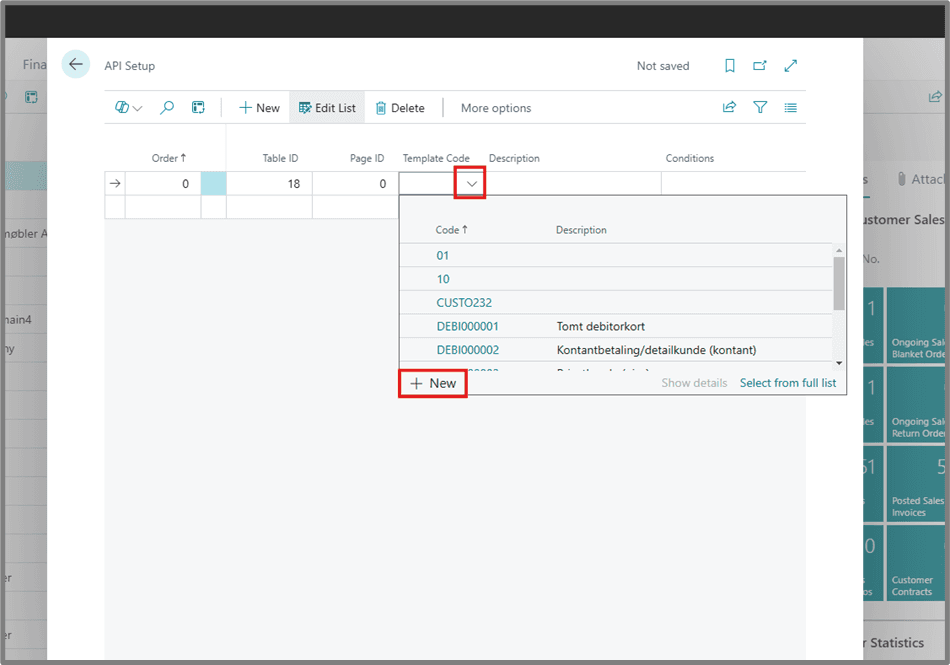
    Click the drop-down in **Template Code** and select **+ New**.
    <Frame>
      ![Create Template](https://framerusercontent.com/images/m4rQFRMUQbczOUkOEfMeh37eHo.png)
    </Frame>
  </Step>

  <Step>
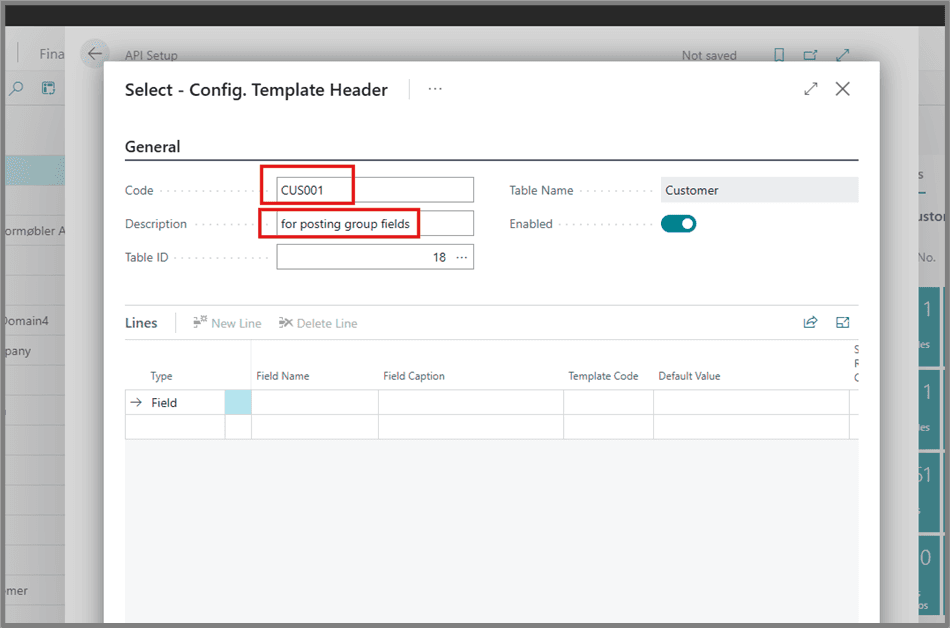
    Enter a **Code** (e.g. CUS001) and a **Description** (e.g. for posting group fields).
    <Frame>
      ![Enter Code and Description](https://framerusercontent.com/images/IOLIgnEoG2szpMO1eWGV6NHXuNM.png)
    </Frame>
  </Step>

  <Step>
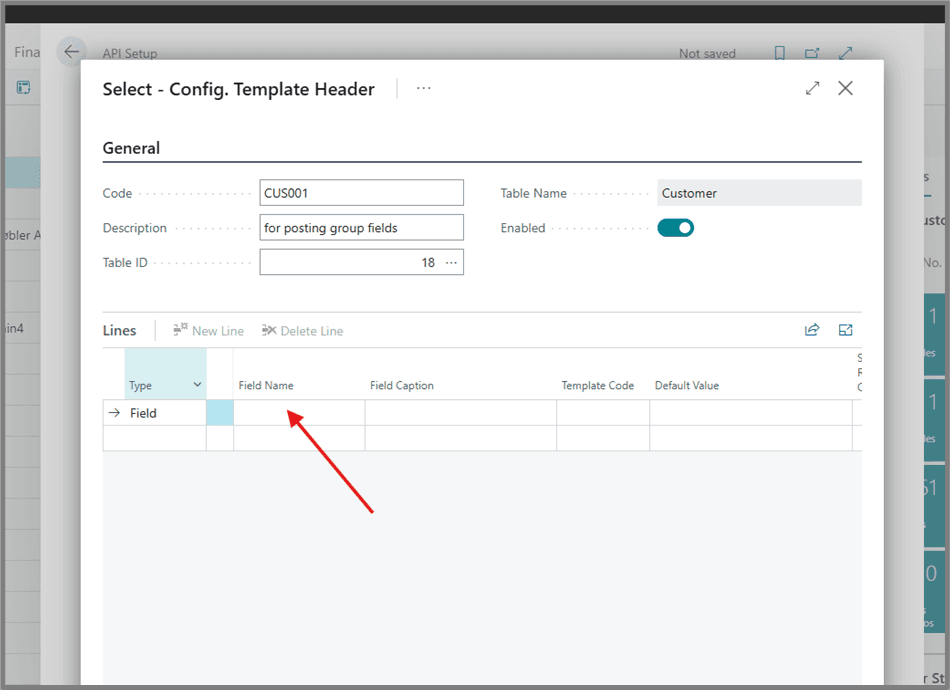
    Click on the empty space under **Field Name**.
    <Frame>
      ![Select Field Name](https://framerusercontent.com/images/LRP4XQdHFin1r7Djn9v9lkEPUs.png)
    </Frame>
  </Step>

  <Step>
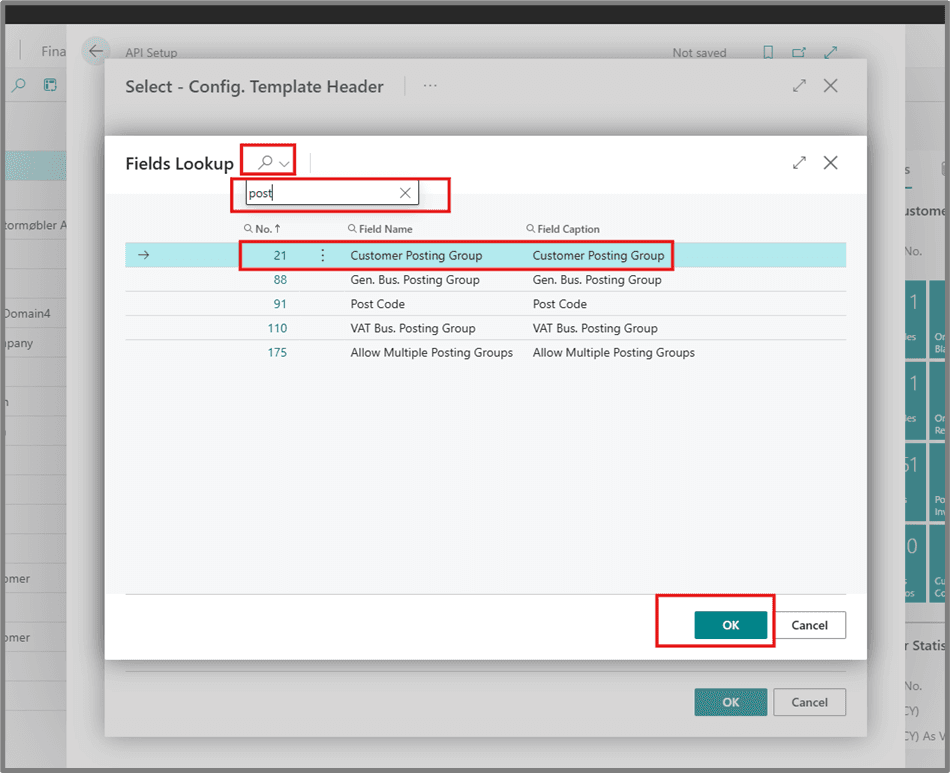
    Search for **post** and select **Customer Posting Group**, then click **OK**.
    <Frame>
      ![Customer Posting Group](https://framerusercontent.com/images/IZC92RaNxz0phnyhLeofamte8s.png)
    </Frame>
  </Step>

  <Step>
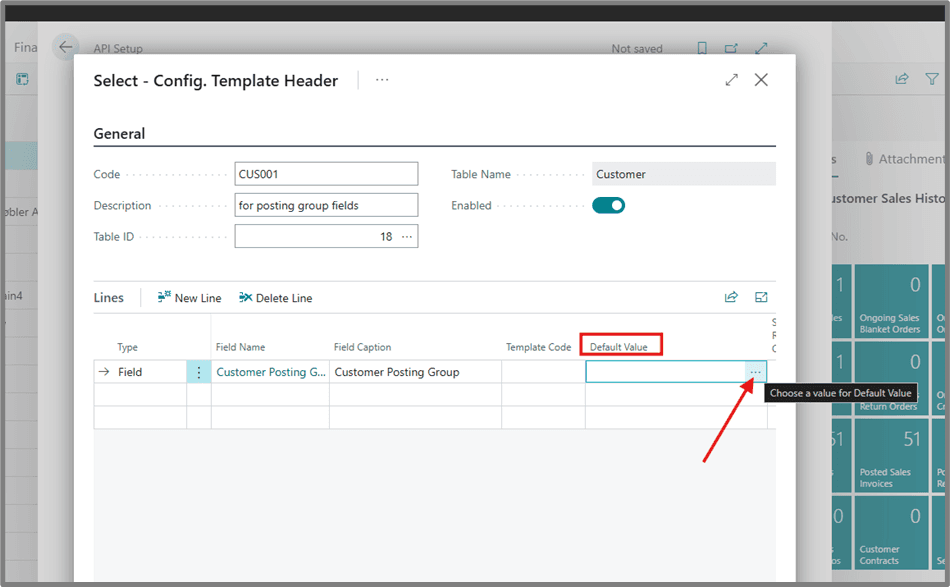
    Click the three dots under **Default Value**.
    <Frame>
      ![Default Value Options](https://framerusercontent.com/images/wDkt2Ryud7H5vWNhKgGz3zXWY.png)
    </Frame>
  </Step>

  <Step>
    Select a value from the list.

    <Frame>
      ![Select Default Value](https://framerusercontent.com/images/6uyhzhMJCP44fEdIPM1AO8wyNw.png)
    </Frame>
  </Step>

  <Step>
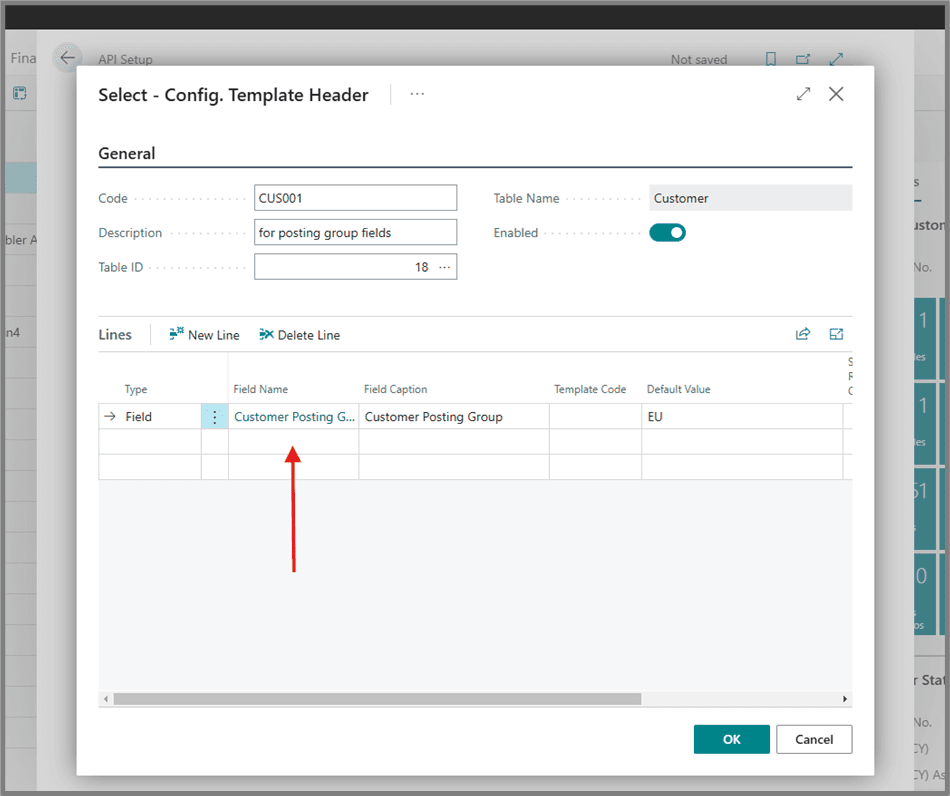
    The selected value will appear in the template.
    <Frame>
      ![Value Added](https://framerusercontent.com/images/IlIxSYijqxlFquFMYgANftsoA.png)
    </Frame>
  </Step>

  <Step>
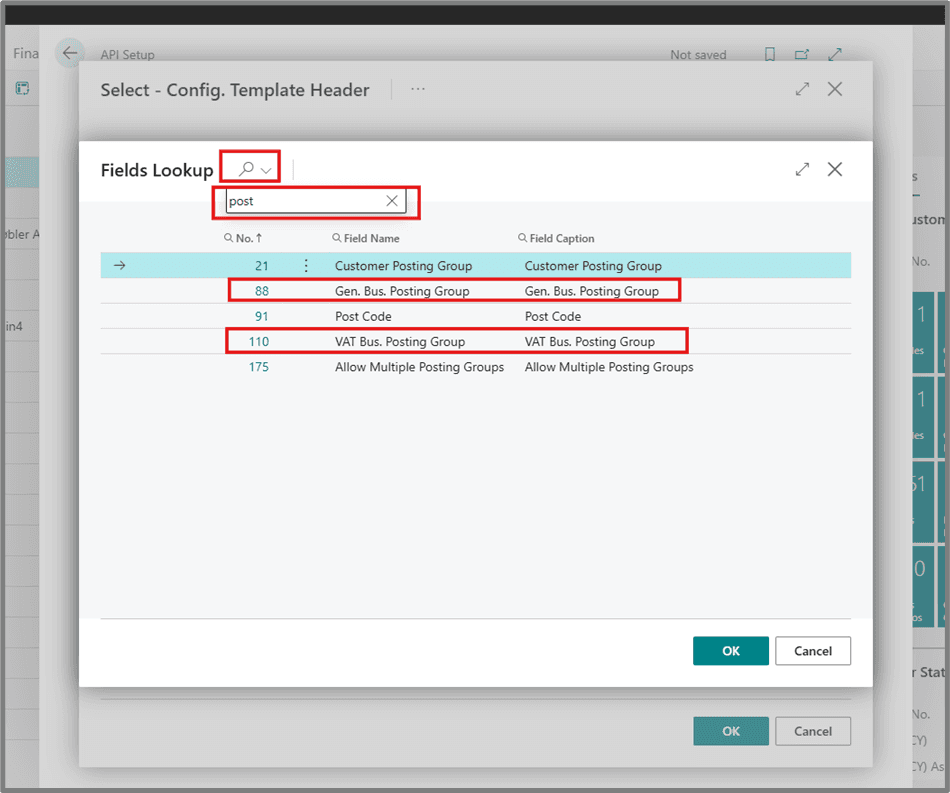
    Repeat the process for the remaining fields. Add:

    * **Gen. Bus. Posting Group**
    * **VAT Bus. Posting Group**
    <Frame>
      ![Add Remaining Fields](https://framerusercontent.com/images/XS4YRZgQdxIW4SvF80SyrYjqok.png)
    </Frame>
  </Step>

  <Step>
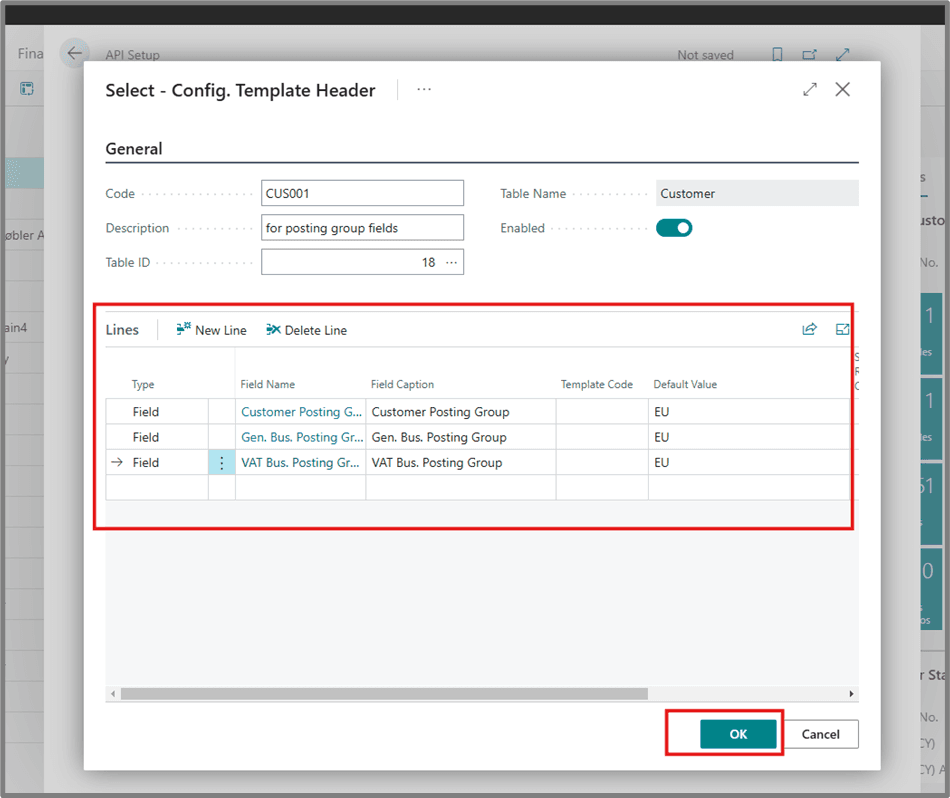
    Once all fields are added, click **OK**.
    <Frame>
      ![Final Template Setup](https://framerusercontent.com/images/a9rHYodk50hWCPHWTDmRLWUqDs.png)
    </Frame>
  </Step>

  <Step>
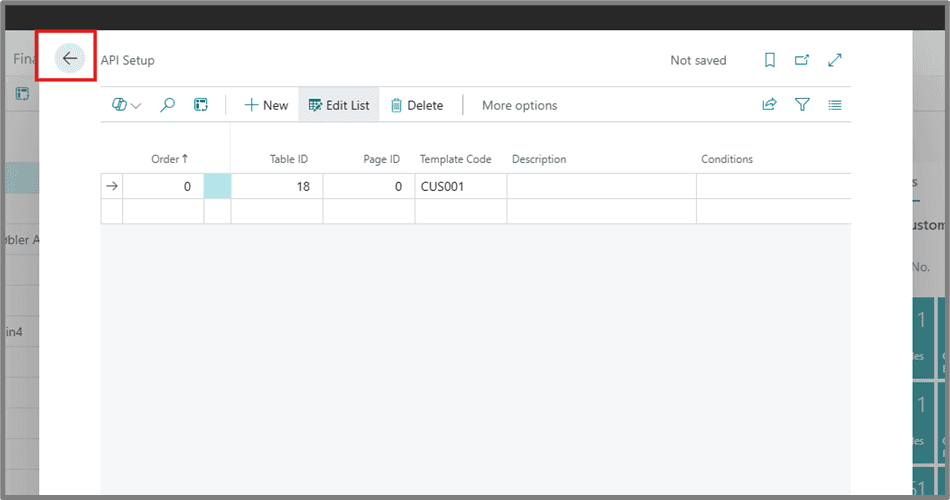
    Click the back button or outside the window to close it.
    <Frame>
      ![Close Window](https://framerusercontent.com/images/xrG1F97wOrWqRR9HGJSaC21FoY.png)
    </Frame>
  </Step>
</Steps>

***

For any questions or issues during setup, contact [support@cloudify.biz](mailto:support@cloudify.biz).

<Tip>
  **Got unique integration needs?**\
  Our custom team can build tailored integrations, specialized data mappings, and workflow automations to perfectly match your specific business processes.

  [Advanced Integration Setting](https://custom.cloudify.biz/)
</Tip>