> ## Documentation Index
> Fetch the complete documentation index at: https://docs.cloudify.biz/llms.txt
> Use this file to discover all available pages before exploring further.
# Financial Data Update
This section outlines the steps to update financial data from your Xero invoices directly within HubSpot deals using UI extensions.
Additionally, you can also perform the above financial data synchronization using a contact/company-based workflow-action within HubSpot.
## Steps to Setup "Xero Sales Information" card
###### In order to fetch financial data from Xero, you first need to enable the "**Xero Sales Information**" card.
###### Please follow the steps provided below:
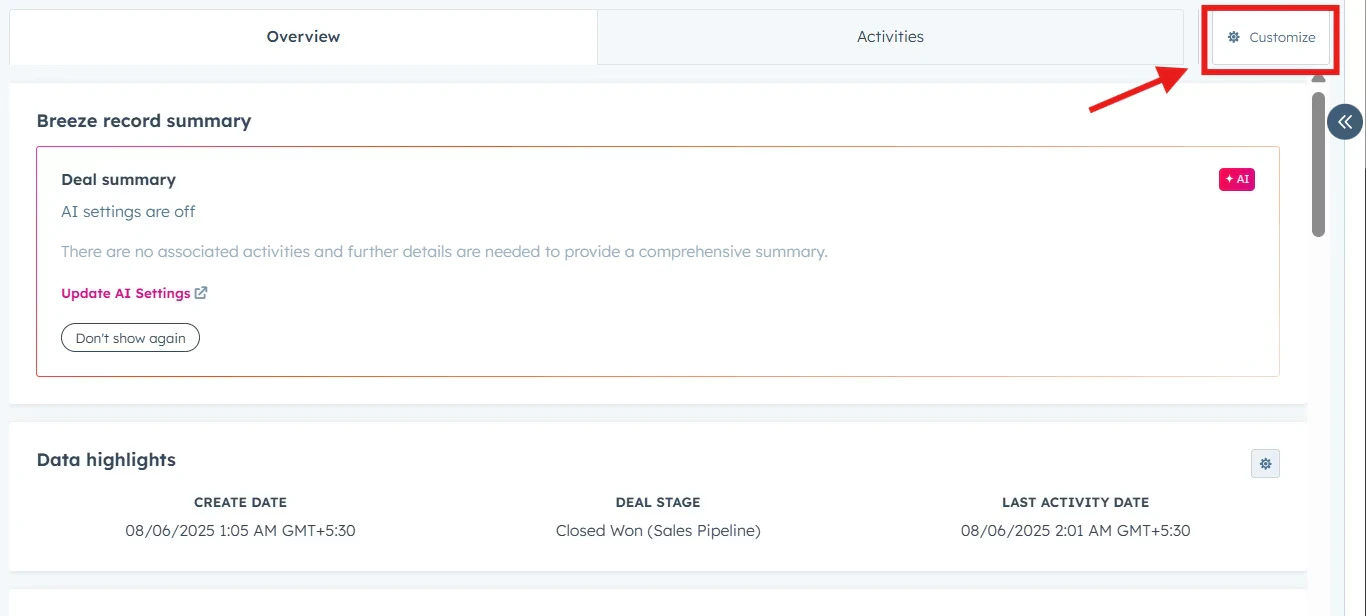
Navigate to any deal within your HubSpot account > Click on the **"Customize"** button on top:
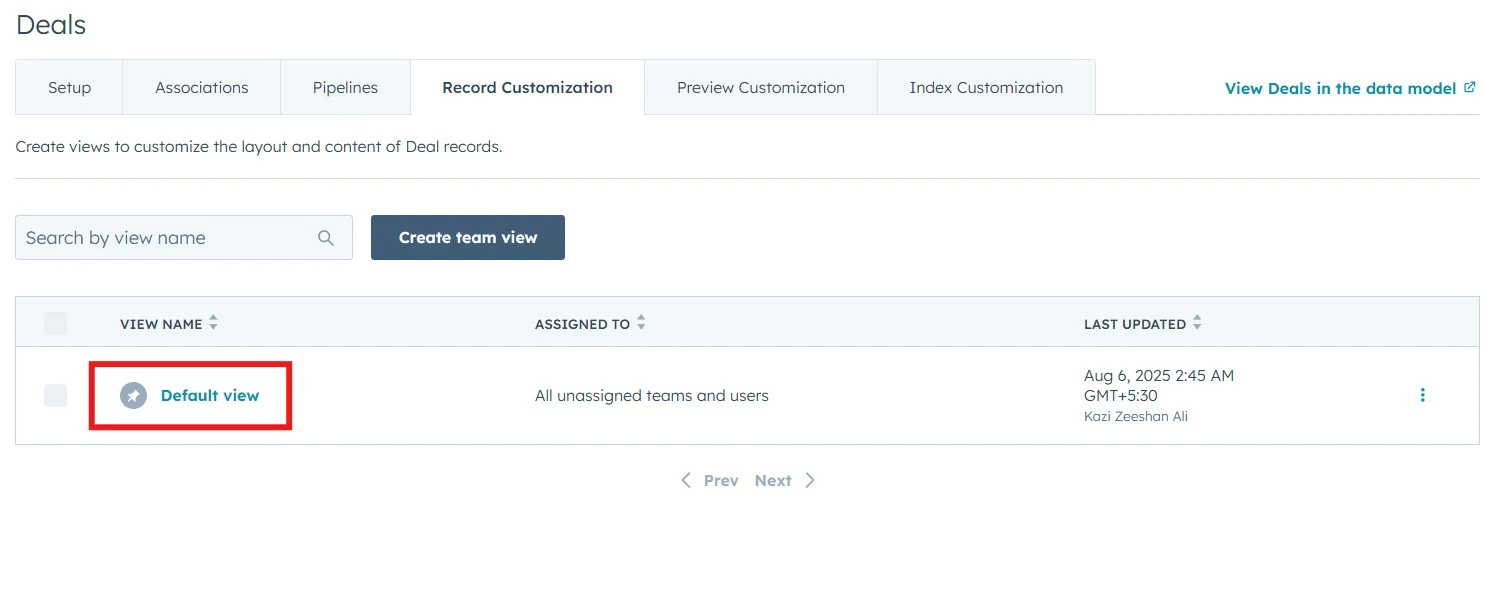
 Select '**Default view**' from the customization options.
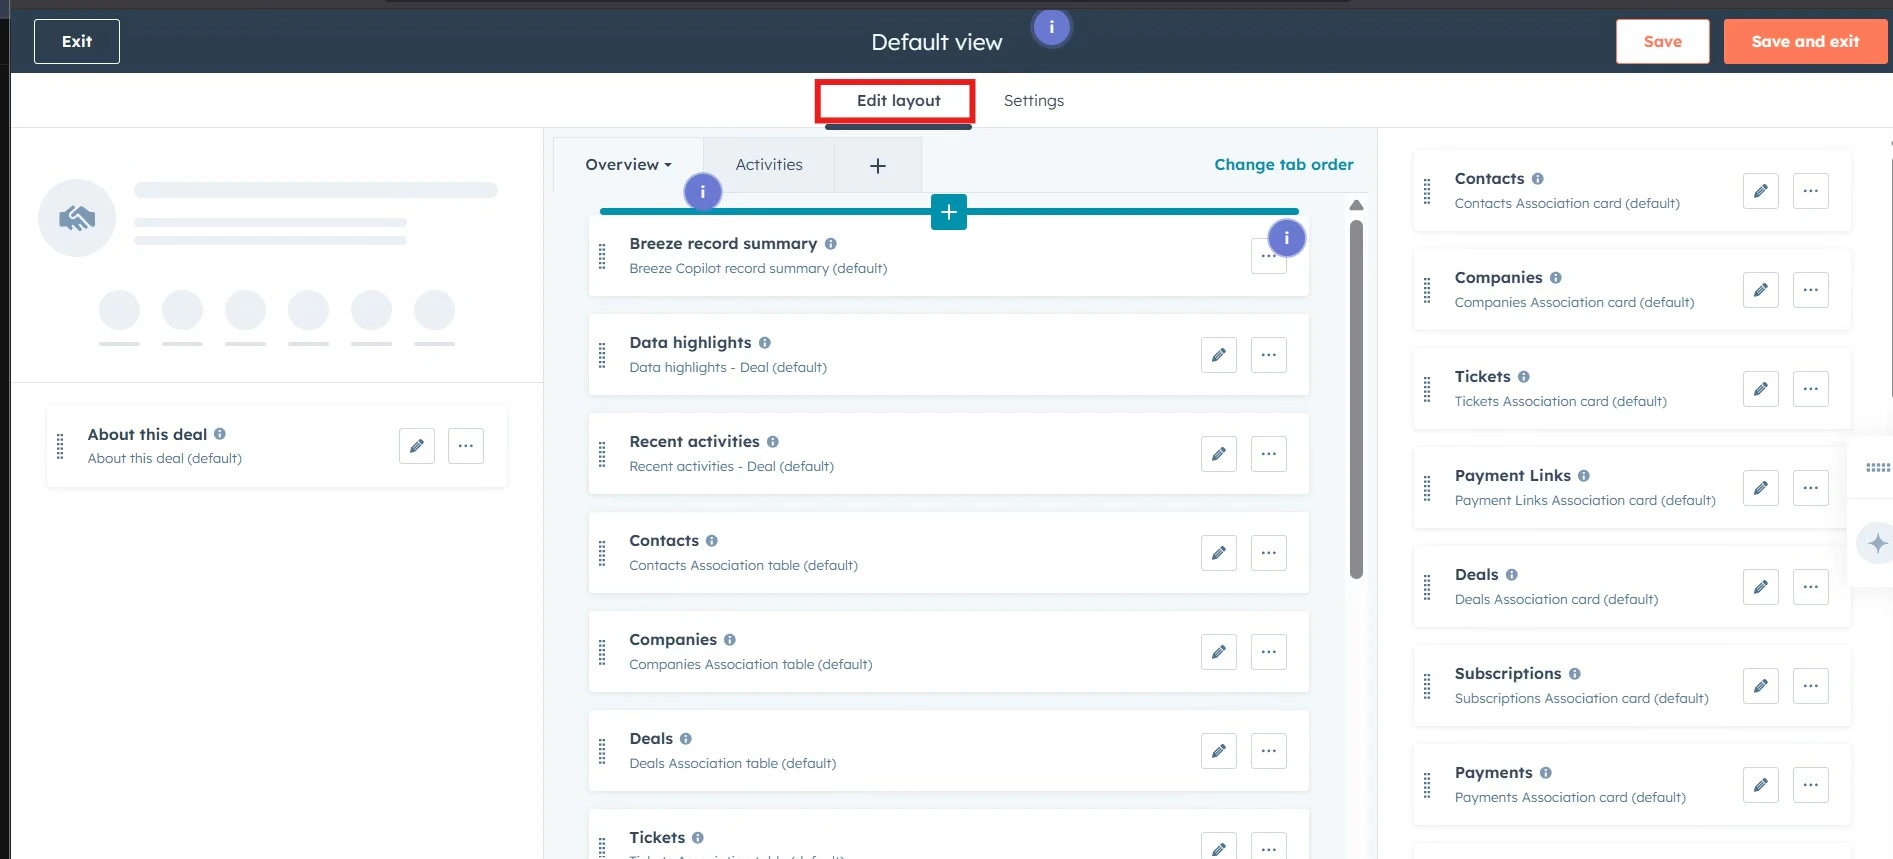
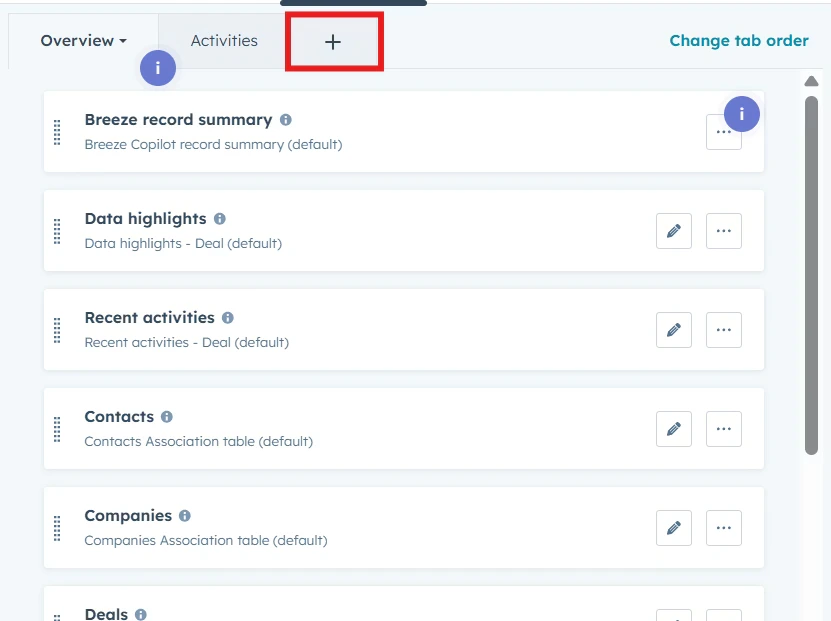
 You will see various cards displayed under the “**Edit layout**” tab:
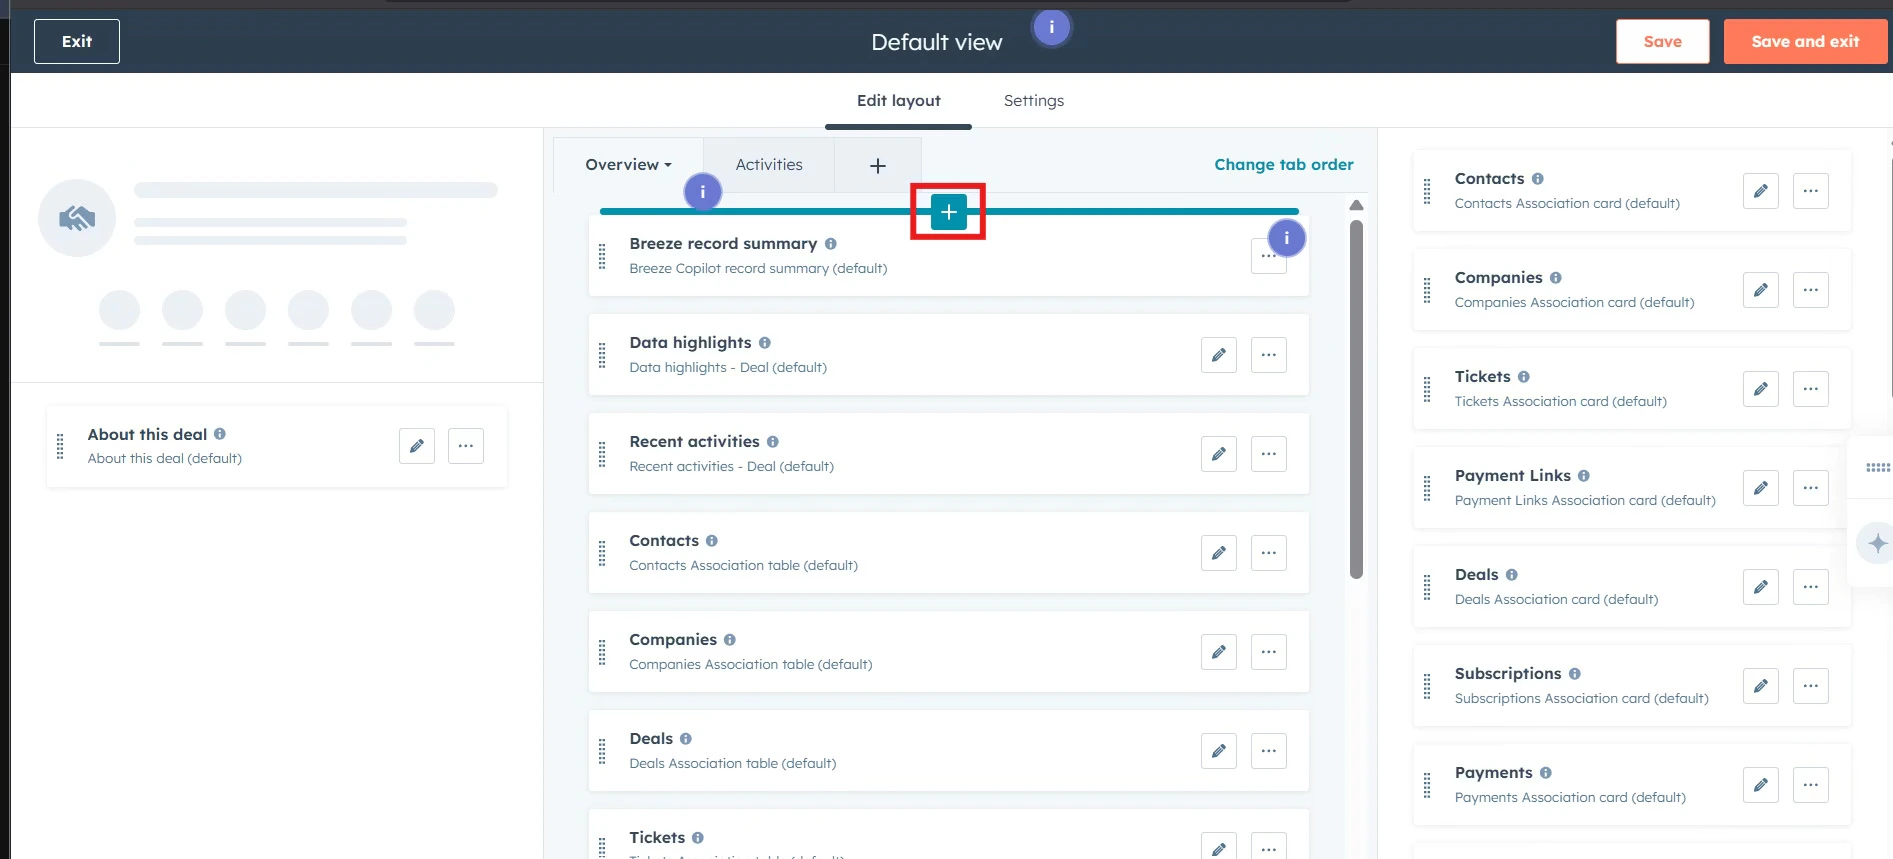
 Click on the plus sign **(+)** in between any two cards where you want to place the **Xero Sales Information** card.
 **Note**: You can also add a new tab according to your preference, specifying where you want your card to appear.
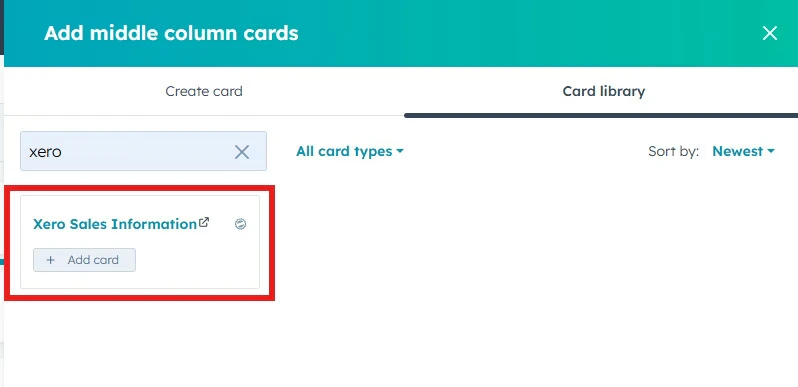
 A new window titled **“Add middle column cards**” will appear. Click on **“Card library**” and search for “**Xero Sales Information**”card. Click the “**Add card**” option to add it to your overview tab.
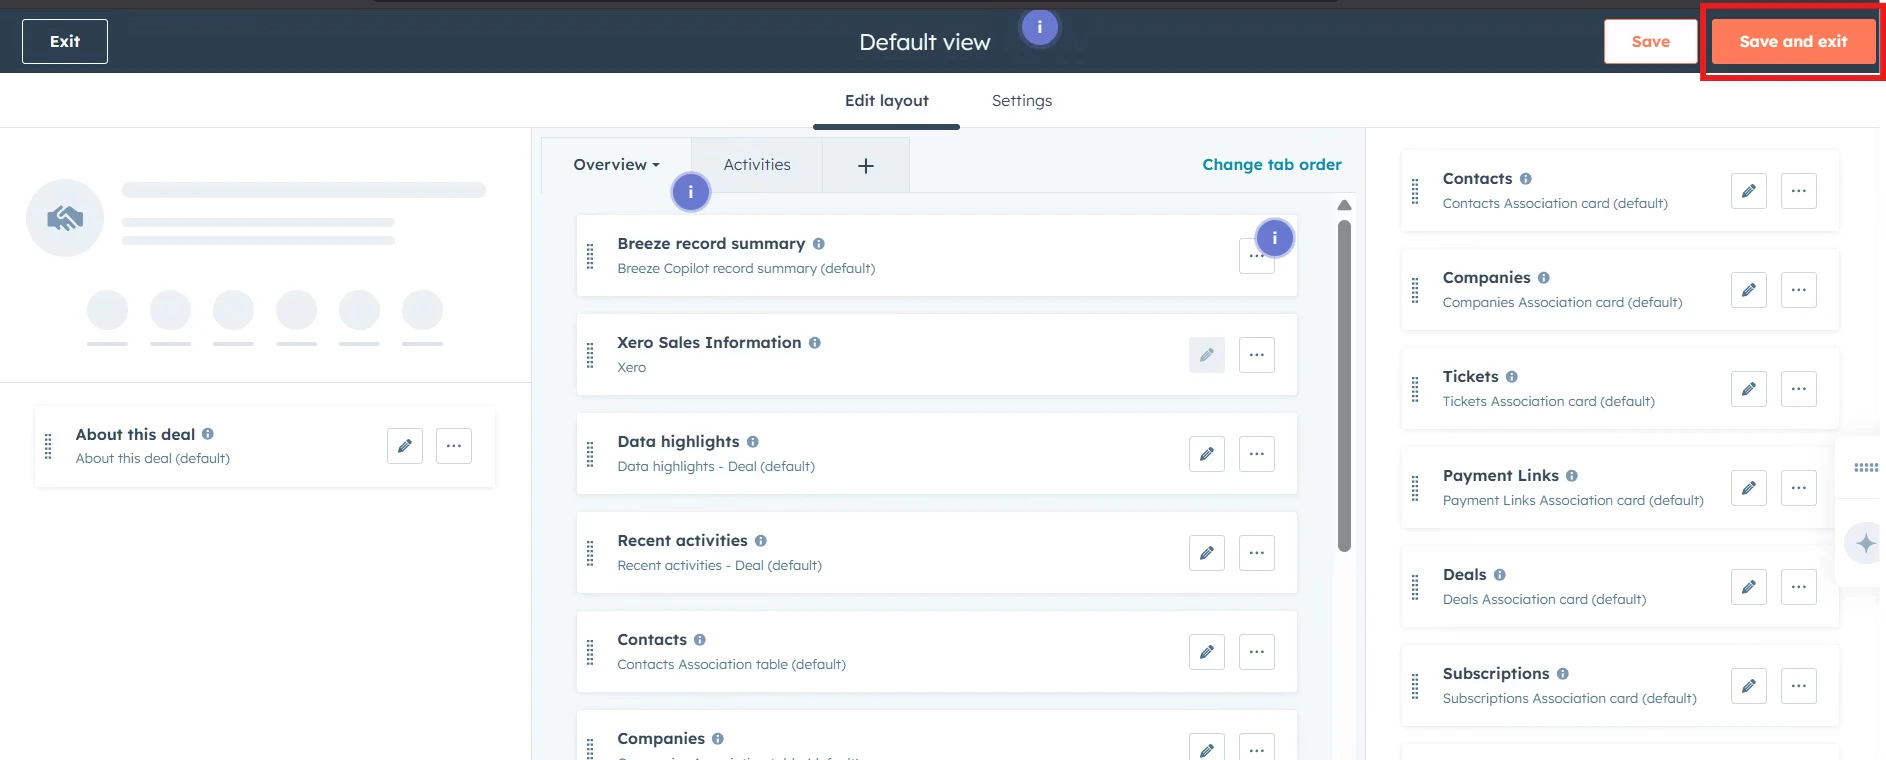
 Click on "**Save and exit**" to apply the changes to your HubSpot layout.
 ## Steps to Sync Xero data (One-time setup)
You will now see the "**Xero Sales Information**" card within your overview tab.
## Steps to Sync Xero data (One-time setup)
You will now see the "**Xero Sales Information**" card within your overview tab.
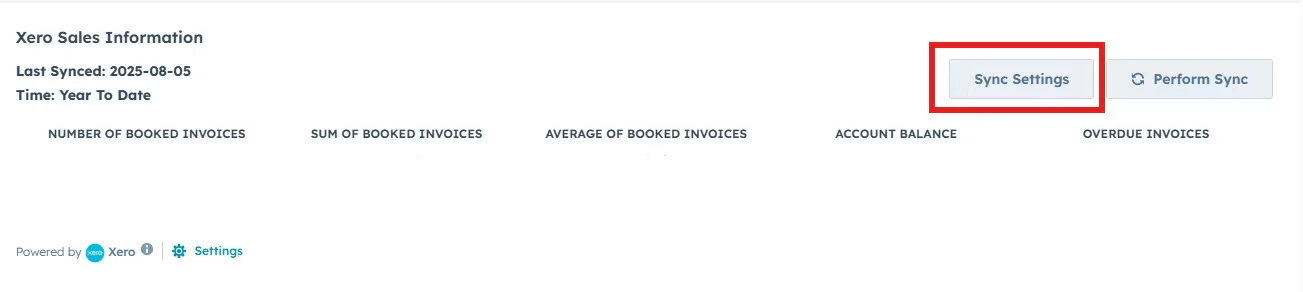
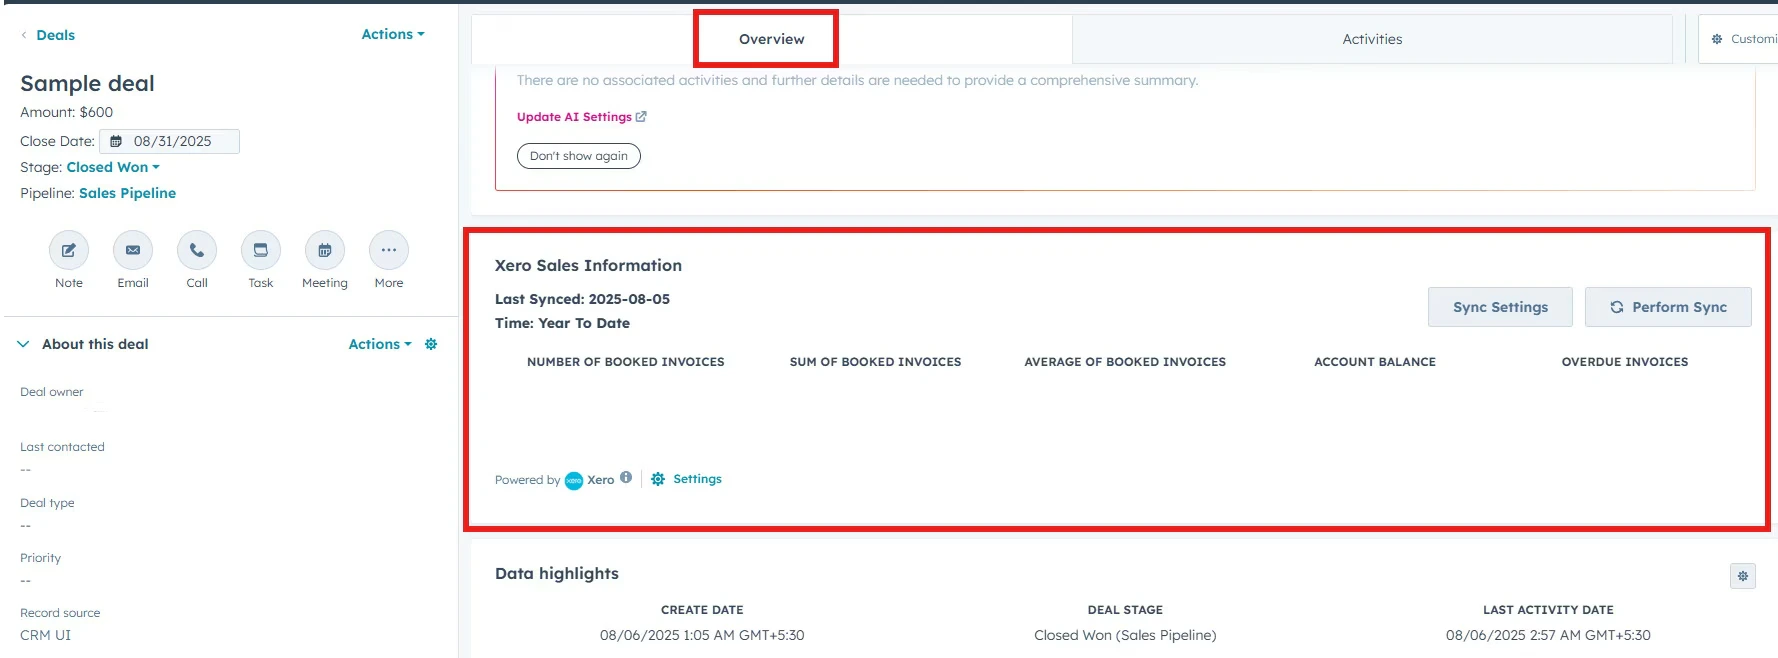 To view the financial data directly from your deal, click on "**Sync Settings**" to do one-time settings.
 A popup window titled **"Financial Report**" will appear.
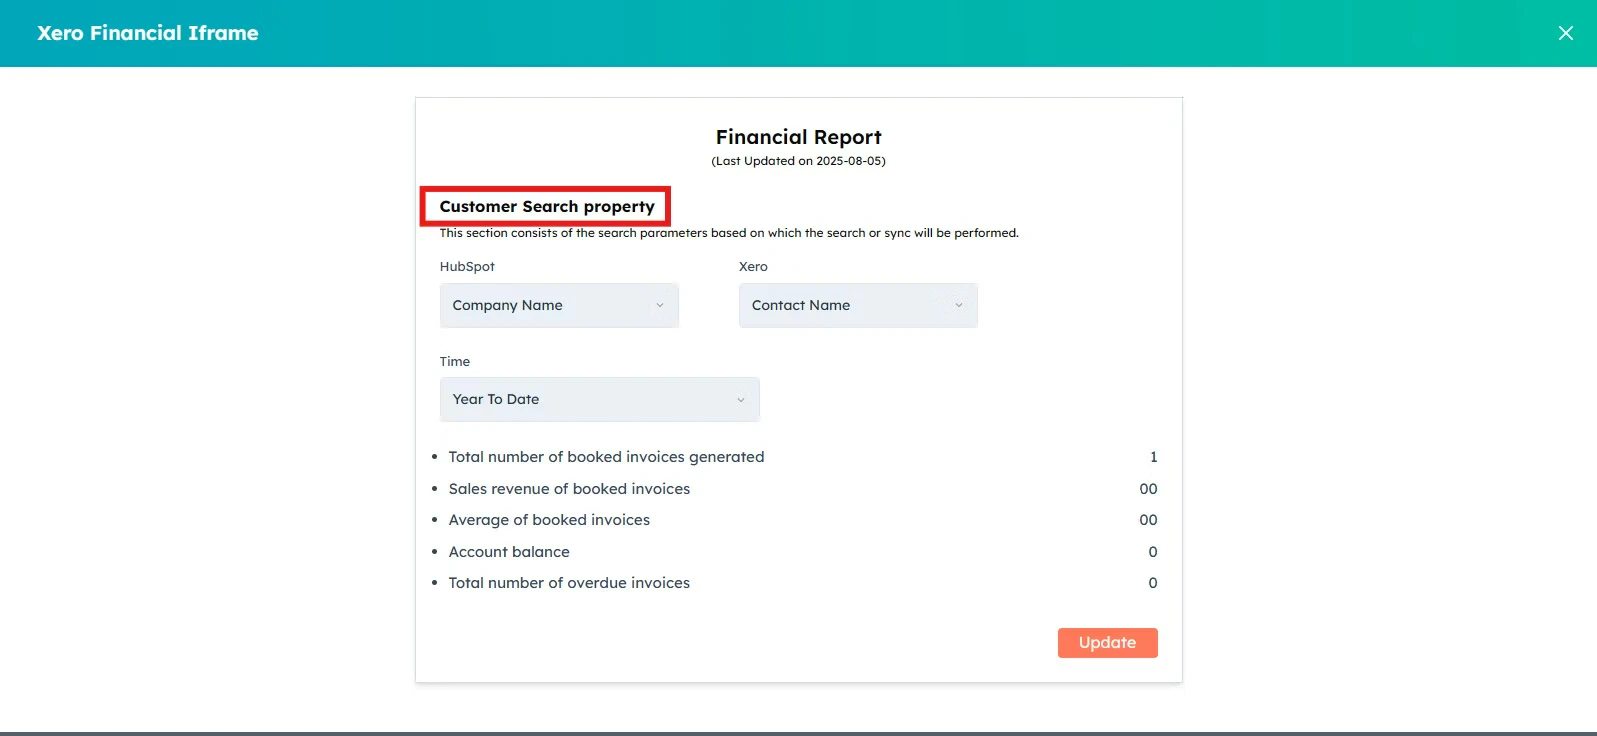 This section consists of the search parameters based on which the search or sync will be performed. You can select your preferred parameters.
Select the time range you want to see.
This section consists of the search parameters based on which the search or sync will be performed. You can select your preferred parameters.
Select the time range you want to see.
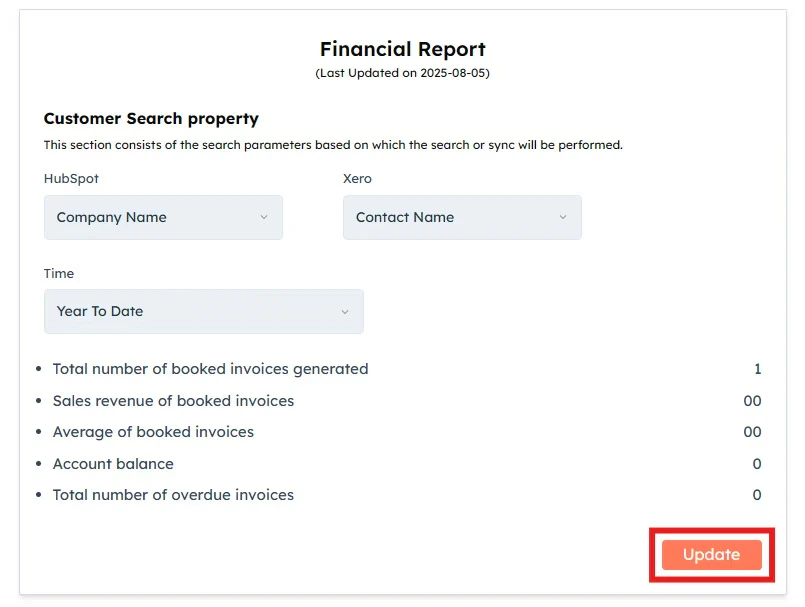
 Click on "**Update"**.
 ## Perform Sync for updated financial report
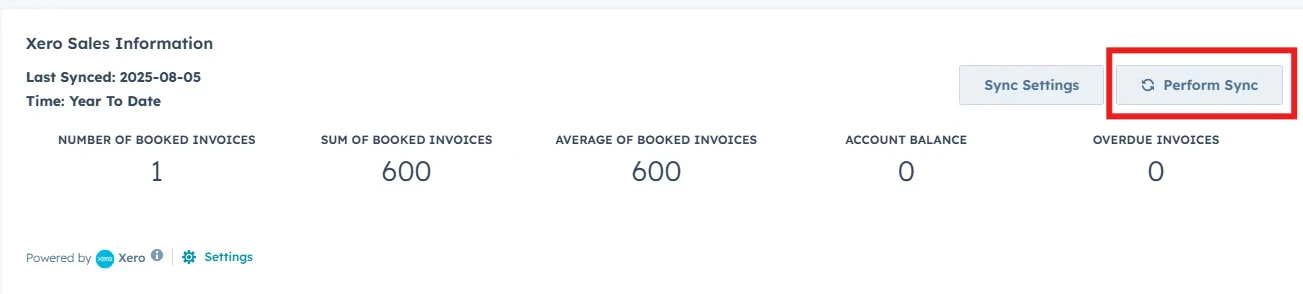
Every time you need to have the updated financial report, just click on **"Perform Sync"**.
## Perform Sync for updated financial report
Every time you need to have the updated financial report, just click on **"Perform Sync"**.
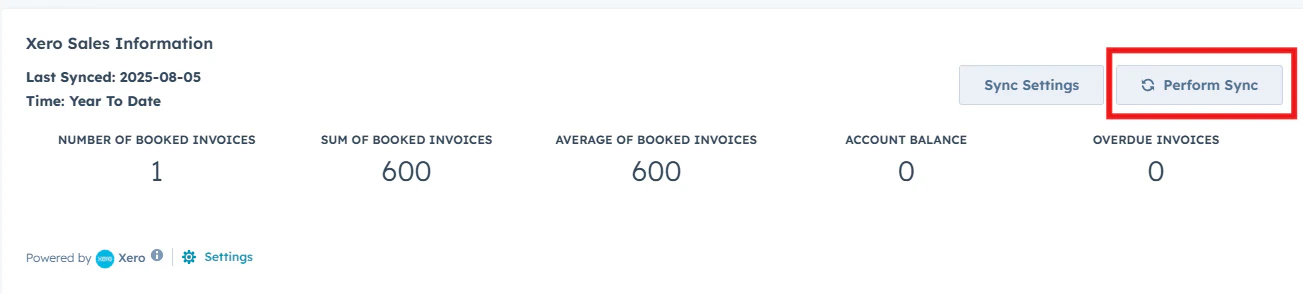 You will see the updated data including:
* Last Synced Date
* Time
* Number Of Booked invoices
* Sum of Booked invoices
* Average of Booked invoices
* Account Balance
* Overdue invoices
All this data will be available right in your HubSpot deal without even switching your screens.
**Got unique integration needs?**\
Our custom team can build tailored integrations, specialized data mappings, and workflow automations to perfectly match your specific business processes.
[Advanced integration settings](https://custom.cloudify.biz/)
You will see the updated data including:
* Last Synced Date
* Time
* Number Of Booked invoices
* Sum of Booked invoices
* Average of Booked invoices
* Account Balance
* Overdue invoices
All this data will be available right in your HubSpot deal without even switching your screens.
**Got unique integration needs?**\
Our custom team can build tailored integrations, specialized data mappings, and workflow automations to perfectly match your specific business processes.
[Advanced integration settings](https://custom.cloudify.biz/)