> ## Documentation Index
> Fetch the complete documentation index at: https://docs.cloudify.biz/llms.txt
> Use this file to discover all available pages before exploring further.
# Company/Contact Workflows
> Let's start with Contact/Company-Based Workflows. These triggers when something happens with a contact/company in your database.
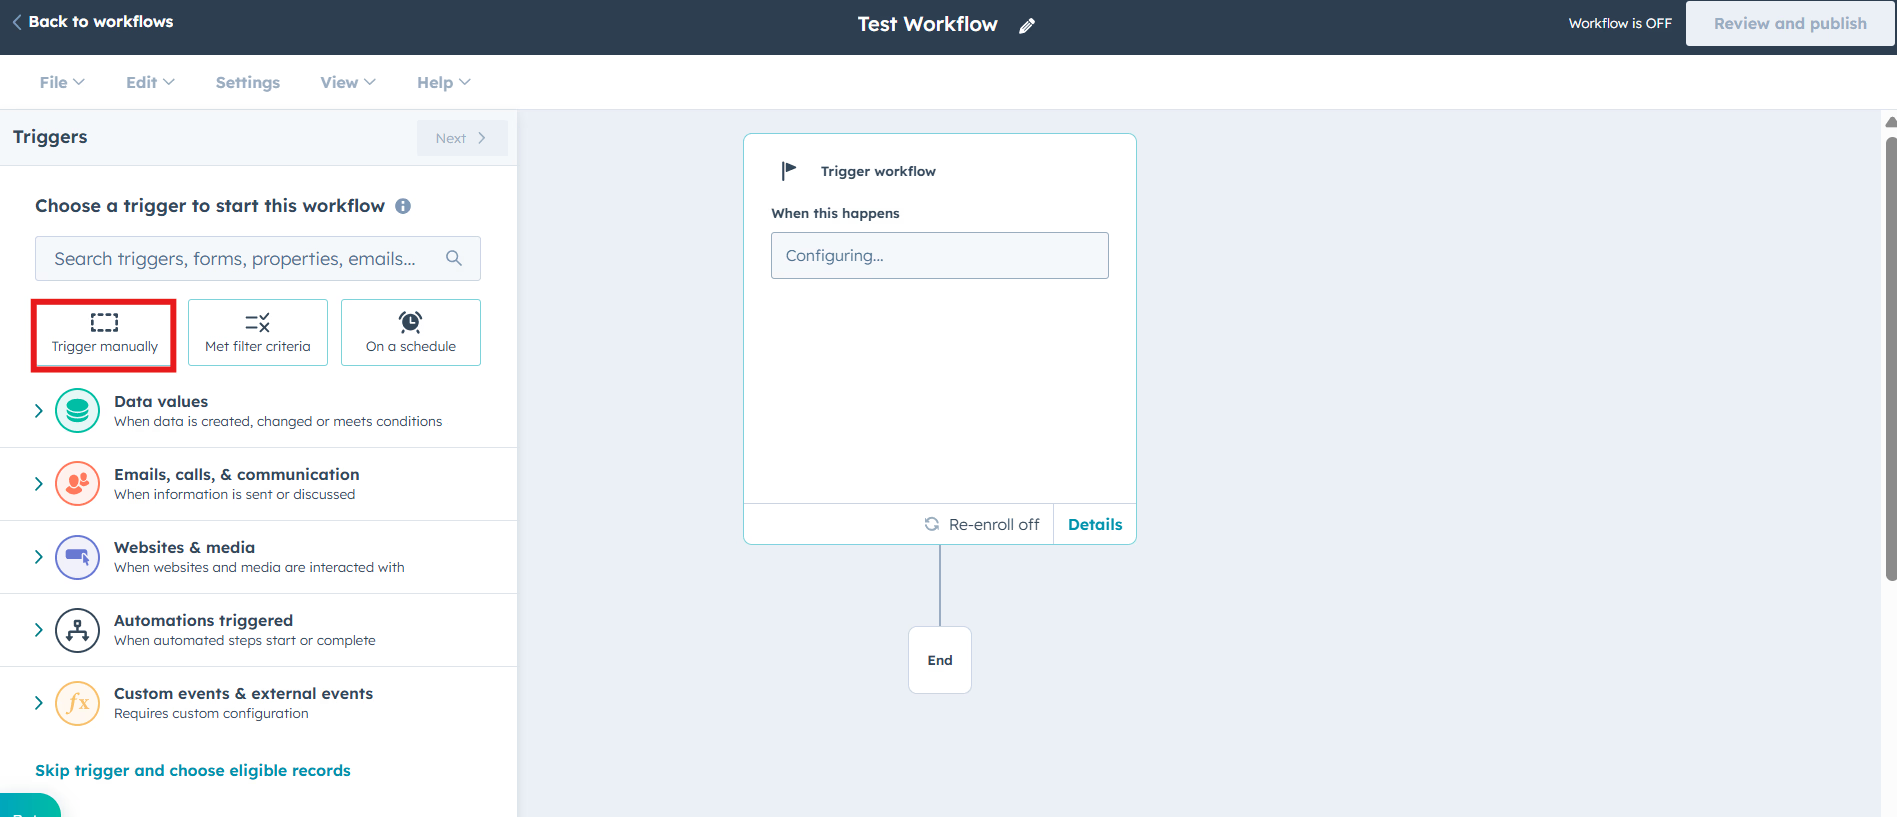
Set up your trigger - we'll select **"Trigger manually**" as an example.
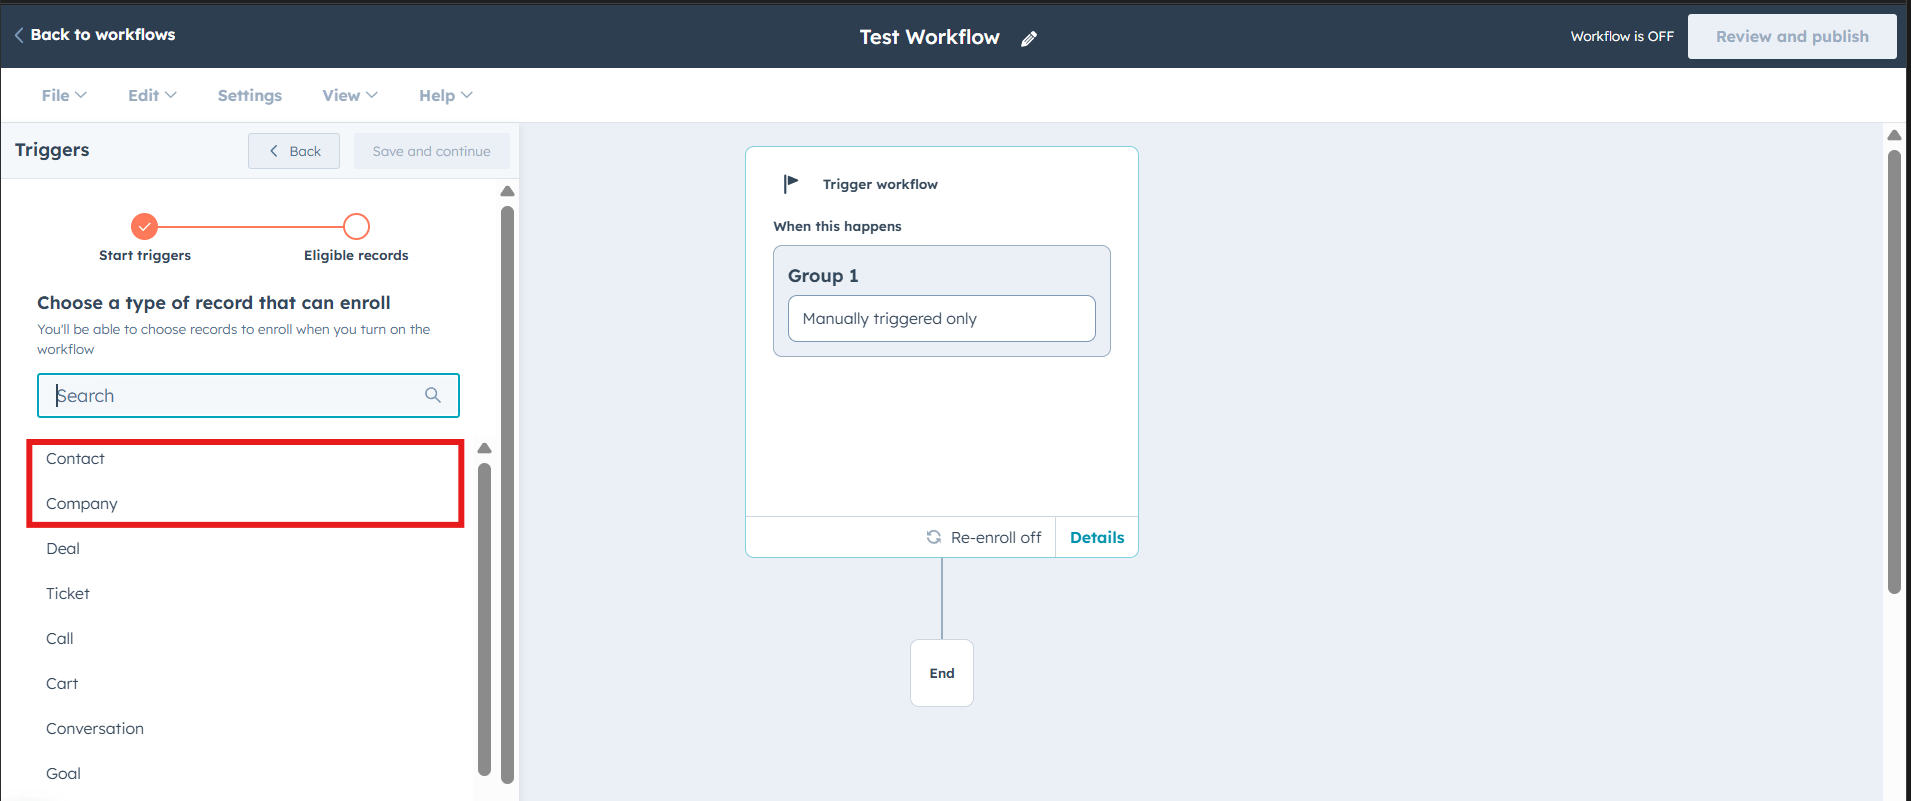
 From the options we you can choose \*\*"Contact" or "Company" \*\*based on your requirements and click on "**Save and continue**" to proceed.
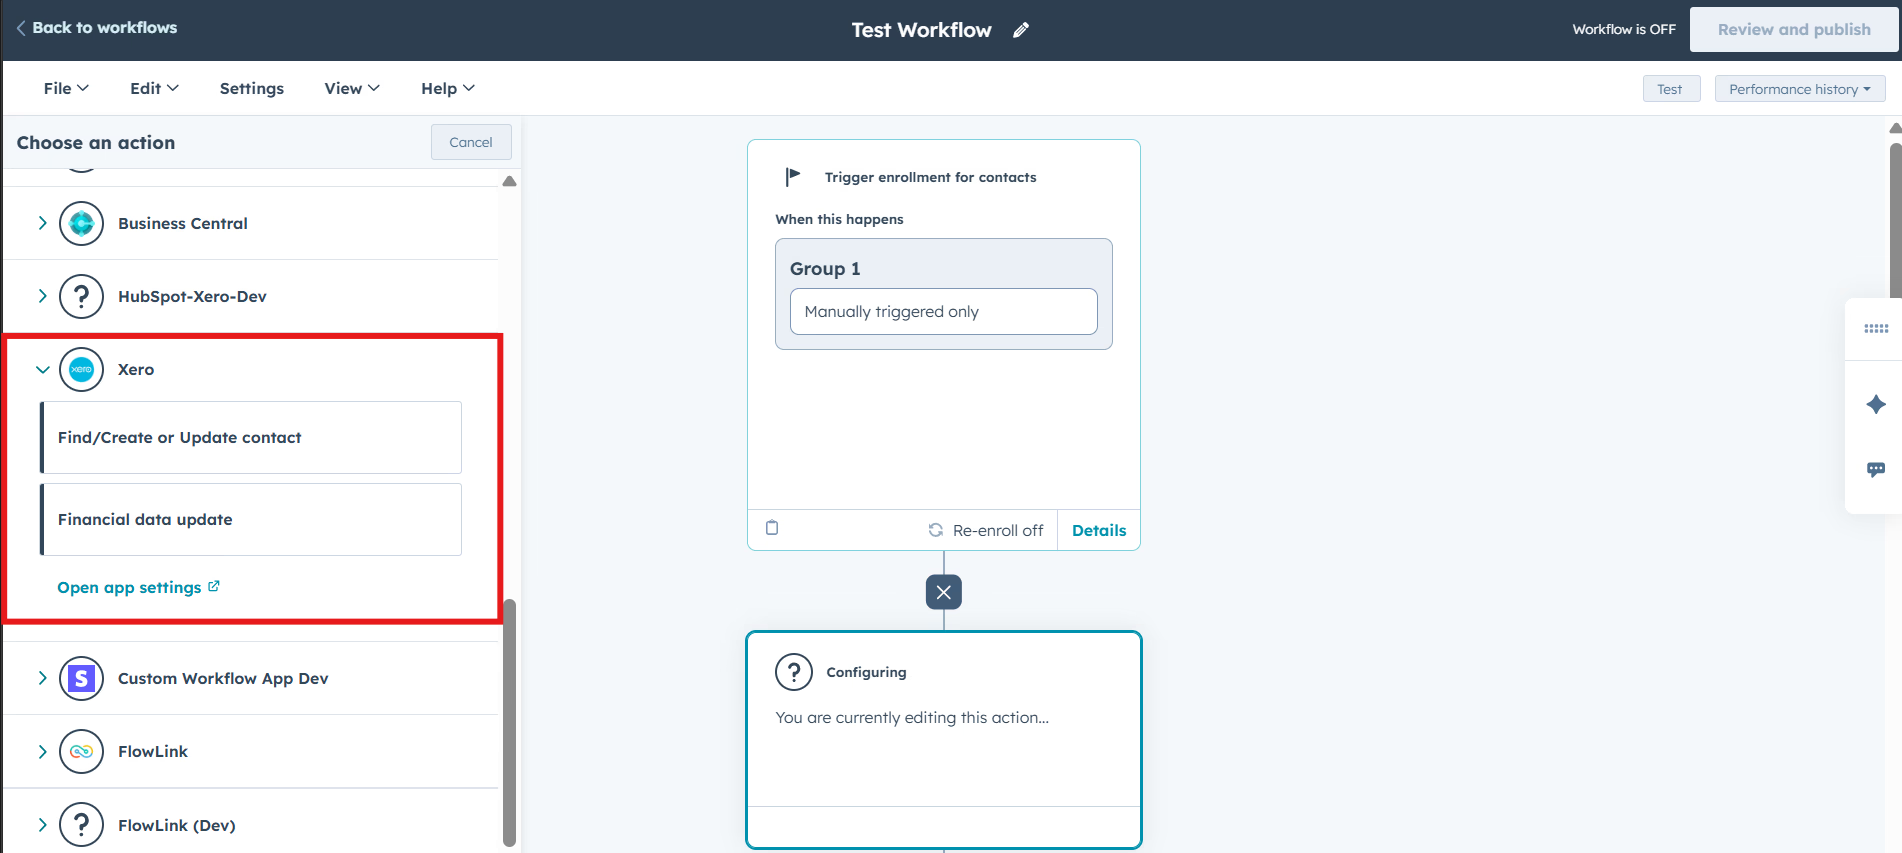
 After setting your trigger, scroll down to the\*\*'Integrated apps'\*\* section and select "**Xero**" by Cloudify solutions.
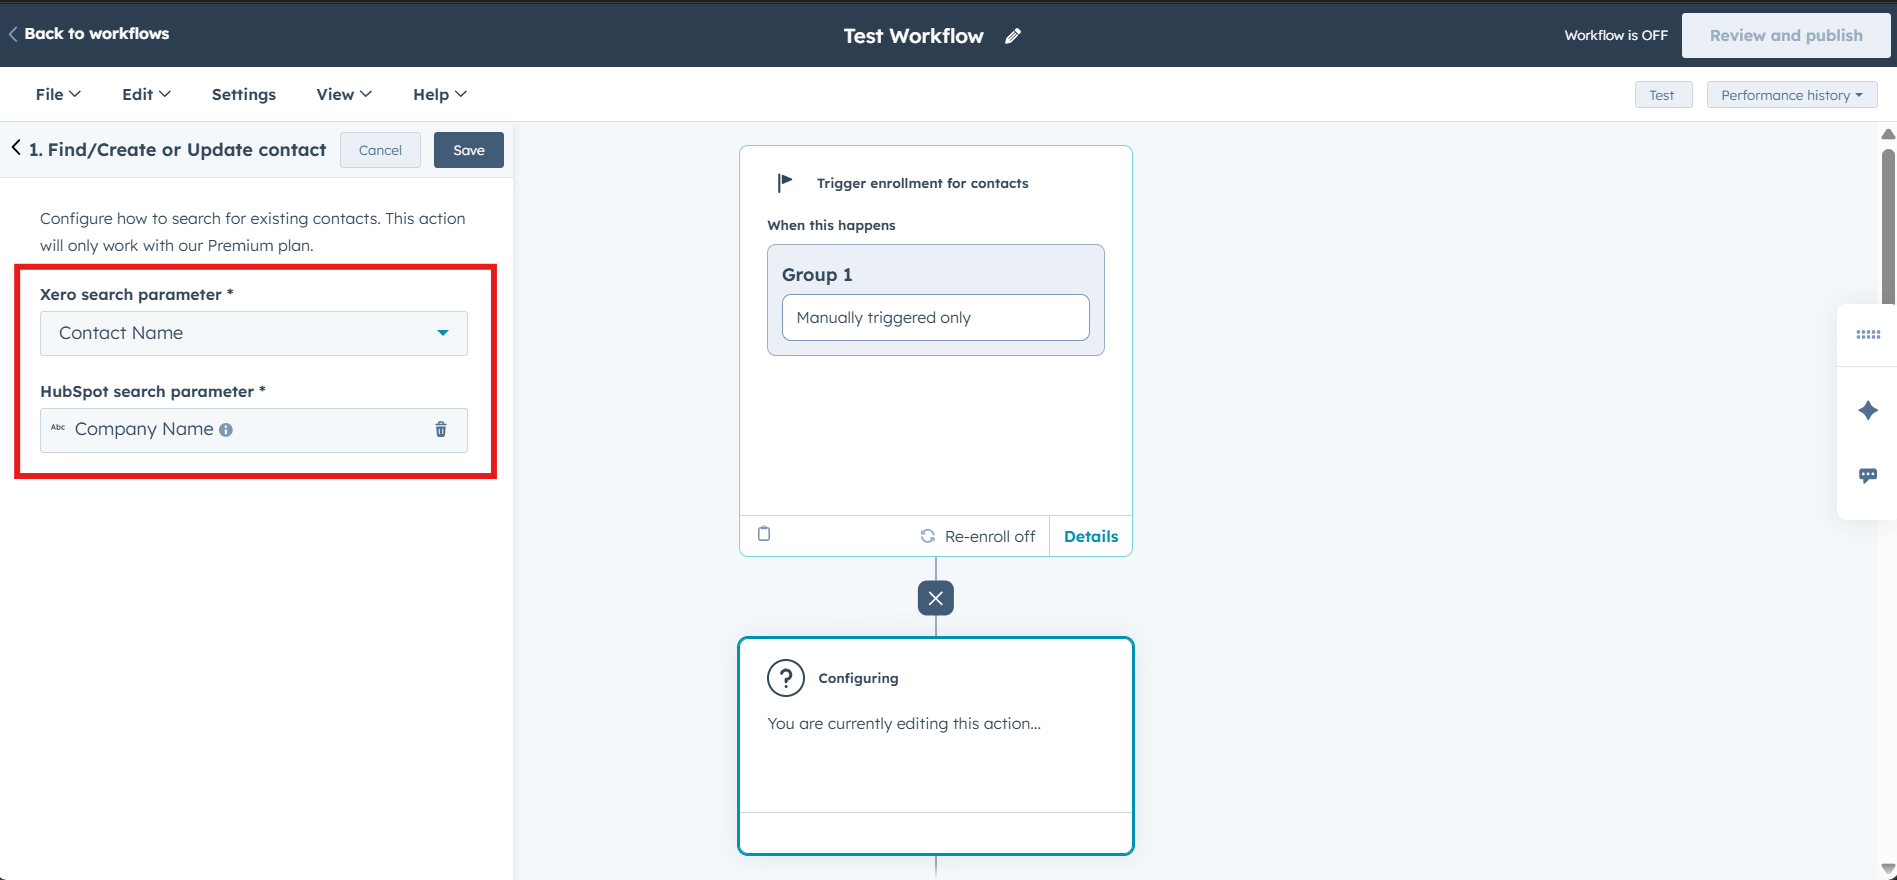
 Next, select 'Configure how to search for existing customers or update customer'. For the Xero search parameter, we'll use **'Contact Name'**, and for the HubSpot search parameter, we'll use **'Company Name'**. Then simply click "**save**"
 Now finally click on "**Review and publish**" to turn on your workflow. You can also **"Test"** your workflow before making live.
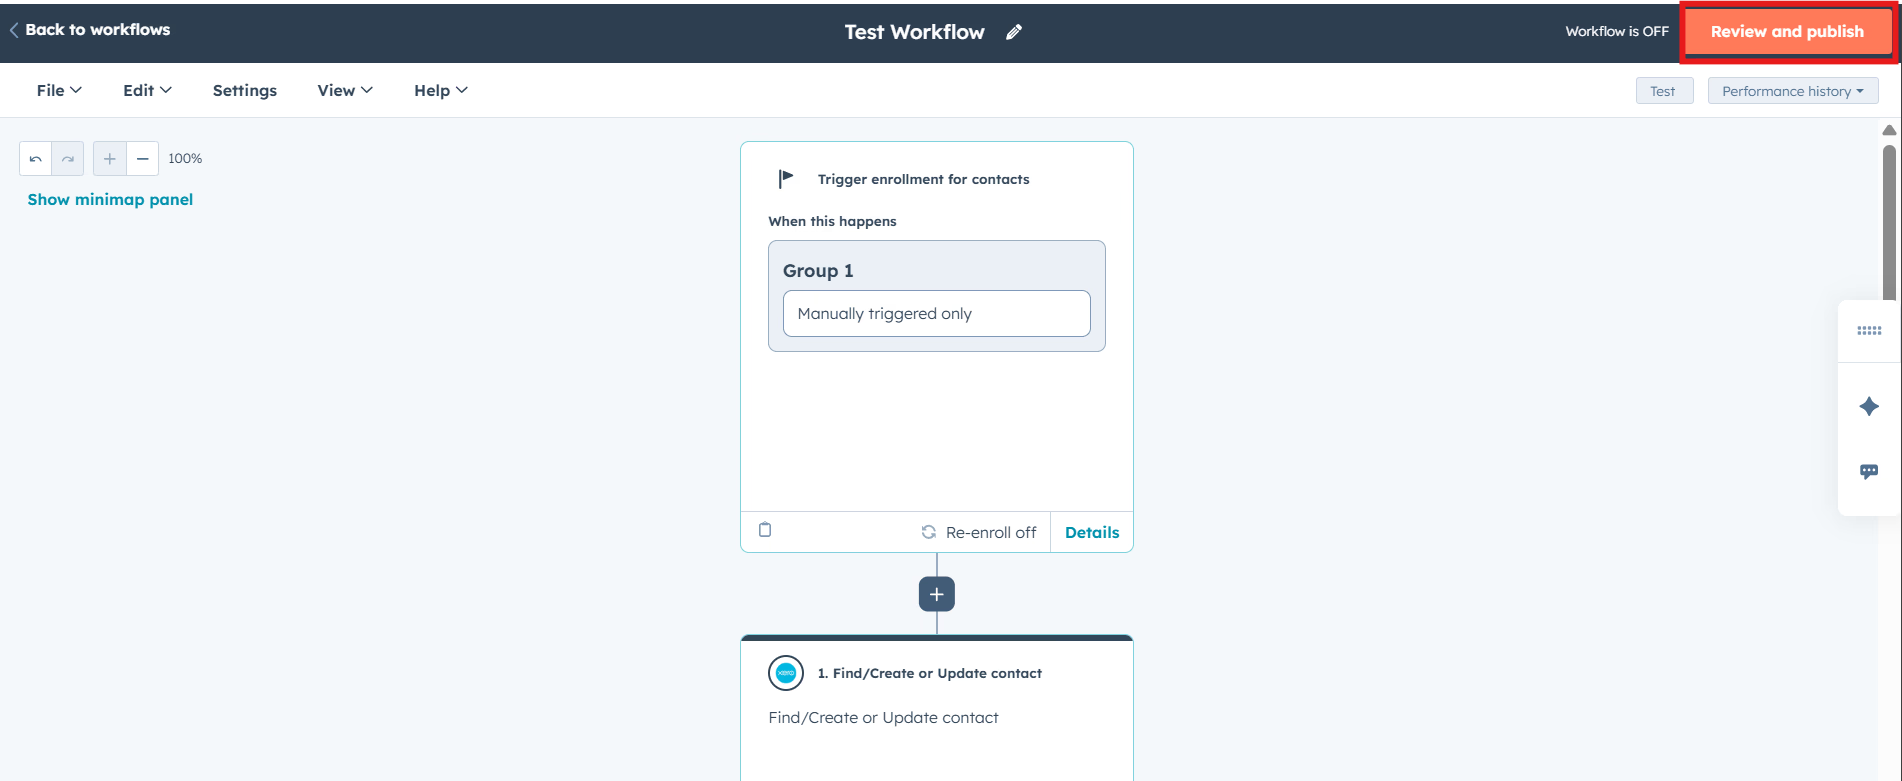 The ‘**Find/Create or Update Customer’** option syncs contact details, while **'Financial Data Update’** brings back booked data to your HubSpot account. Once you configure and save your search parameters, the app will automatically match the right contacts across systems whenever forms are submitted, eliminating the need for manual data entry.
**Got unique integration needs?**\
Our custom team can build tailored integrations, specialized data mappings, and workflow automations to perfectly match your specific business processes.
[Advanced integration settings](https://custom.cloudify.biz/)
The ‘**Find/Create or Update Customer’** option syncs contact details, while **'Financial Data Update’** brings back booked data to your HubSpot account. Once you configure and save your search parameters, the app will automatically match the right contacts across systems whenever forms are submitted, eliminating the need for manual data entry.
**Got unique integration needs?**\
Our custom team can build tailored integrations, specialized data mappings, and workflow automations to perfectly match your specific business processes.
[Advanced integration settings](https://custom.cloudify.biz/)