> ## Documentation Index
> Fetch the complete documentation index at: https://docs.cloudify.biz/llms.txt
> Use this file to discover all available pages before exploring further.
# Deal
> Deal-Based Workflows are where automation shines for your sales process. Let's set up a workflow for when deals close.
First, we'll set our trigger. You can use any trigger based on your needs. For this example, we'll select "**Met filter criteria"**.
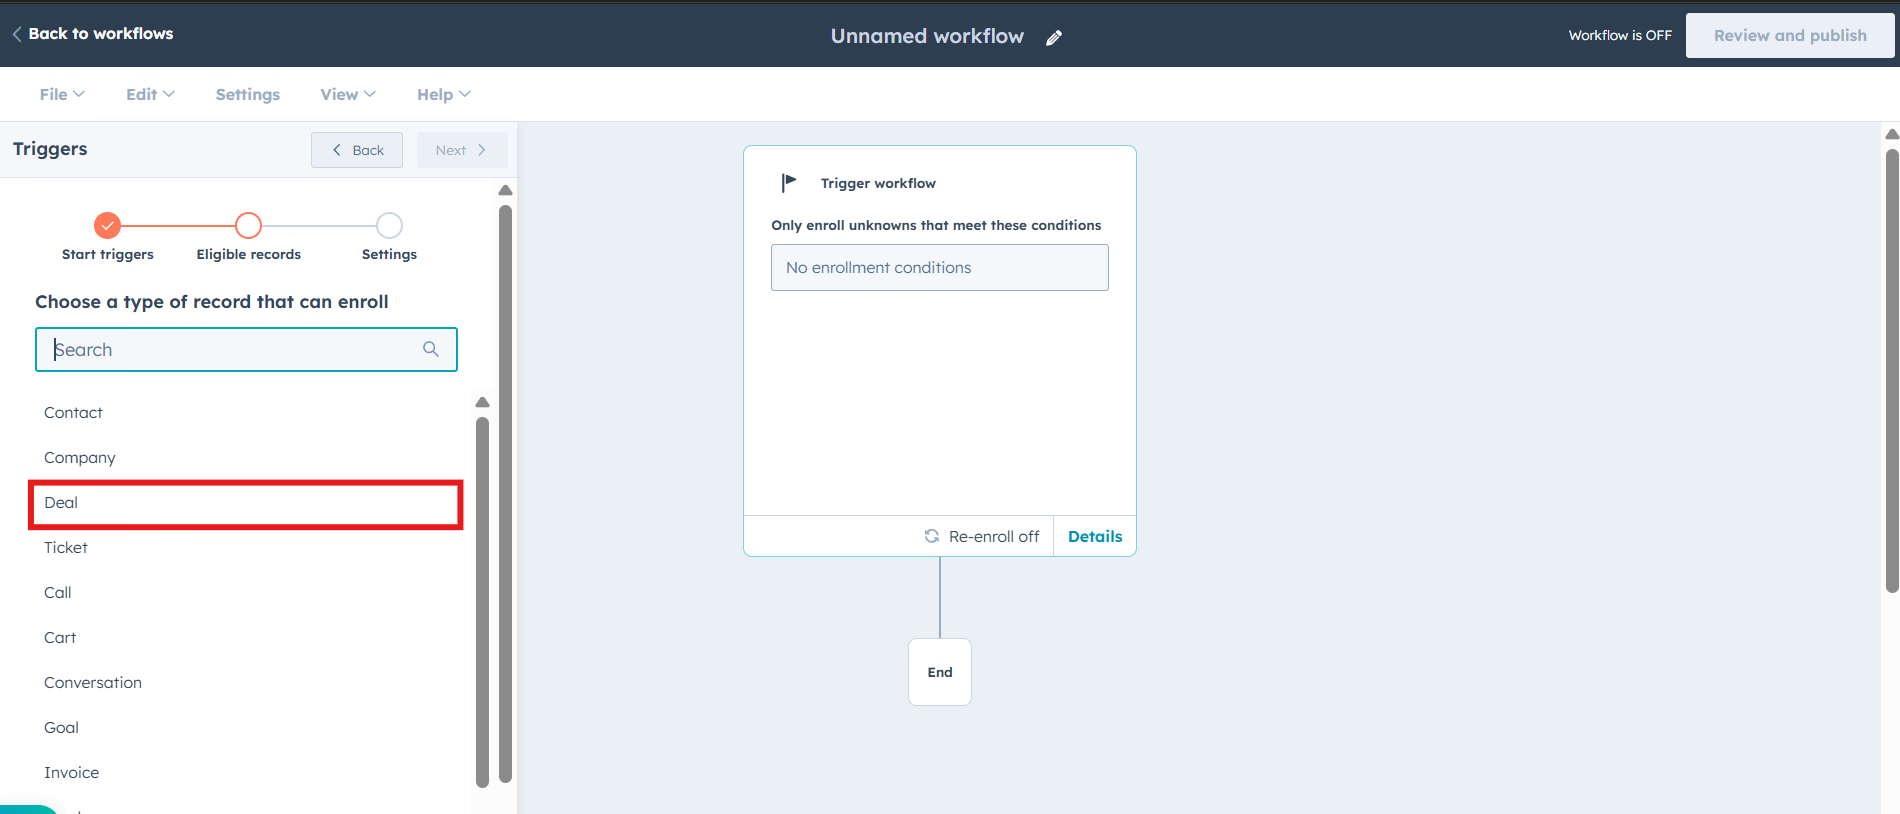
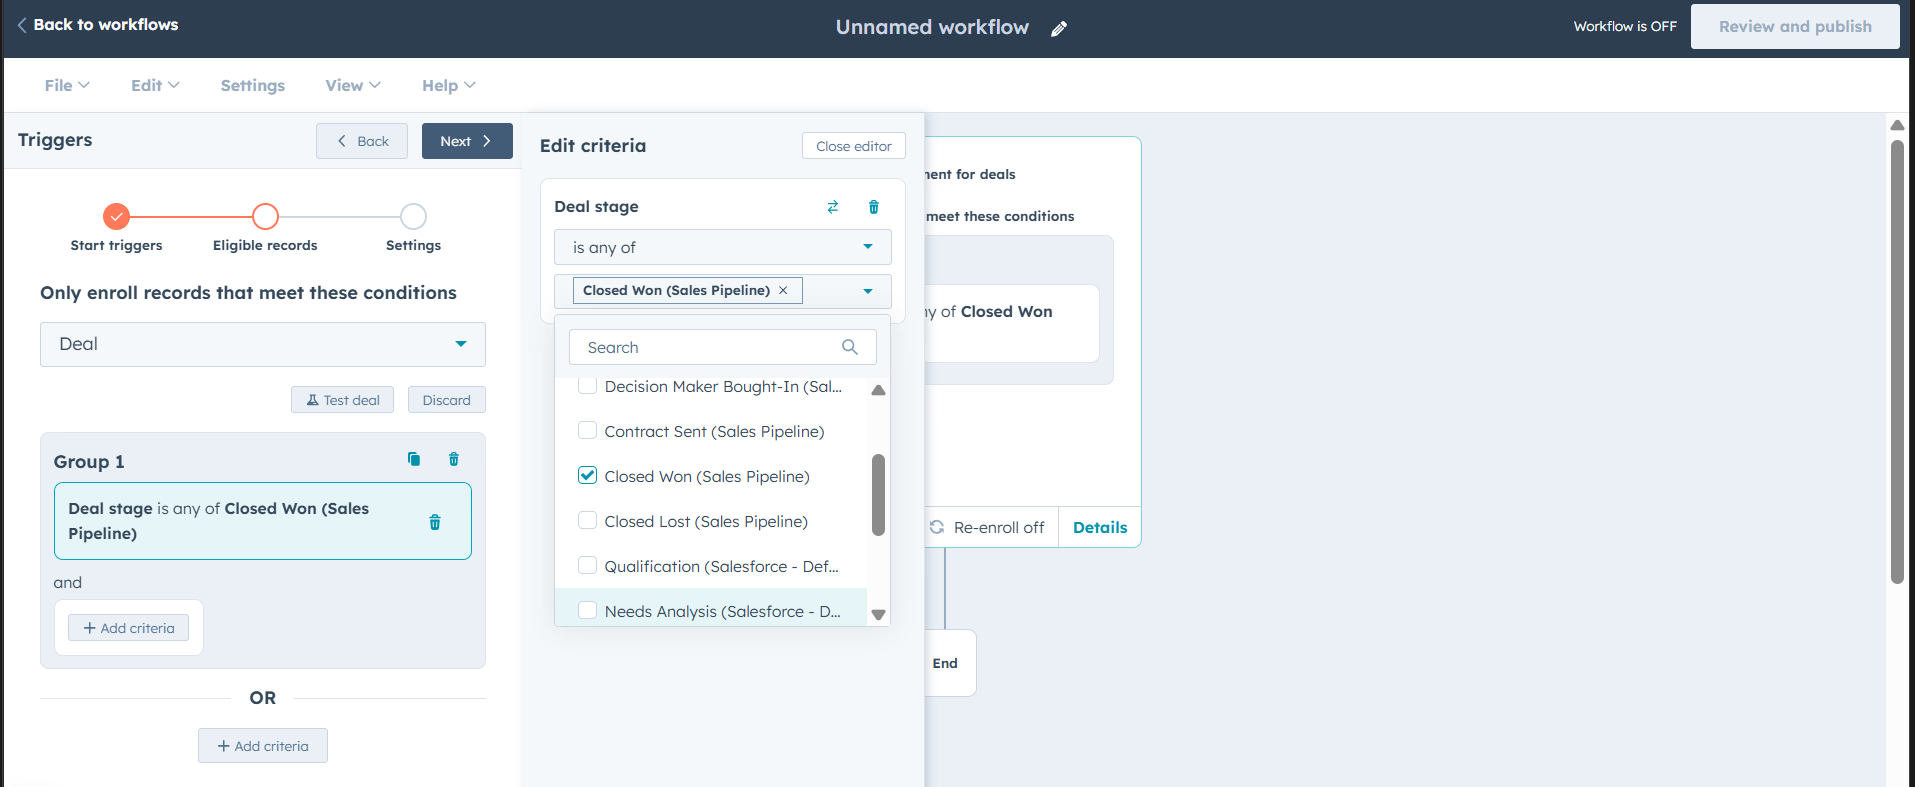
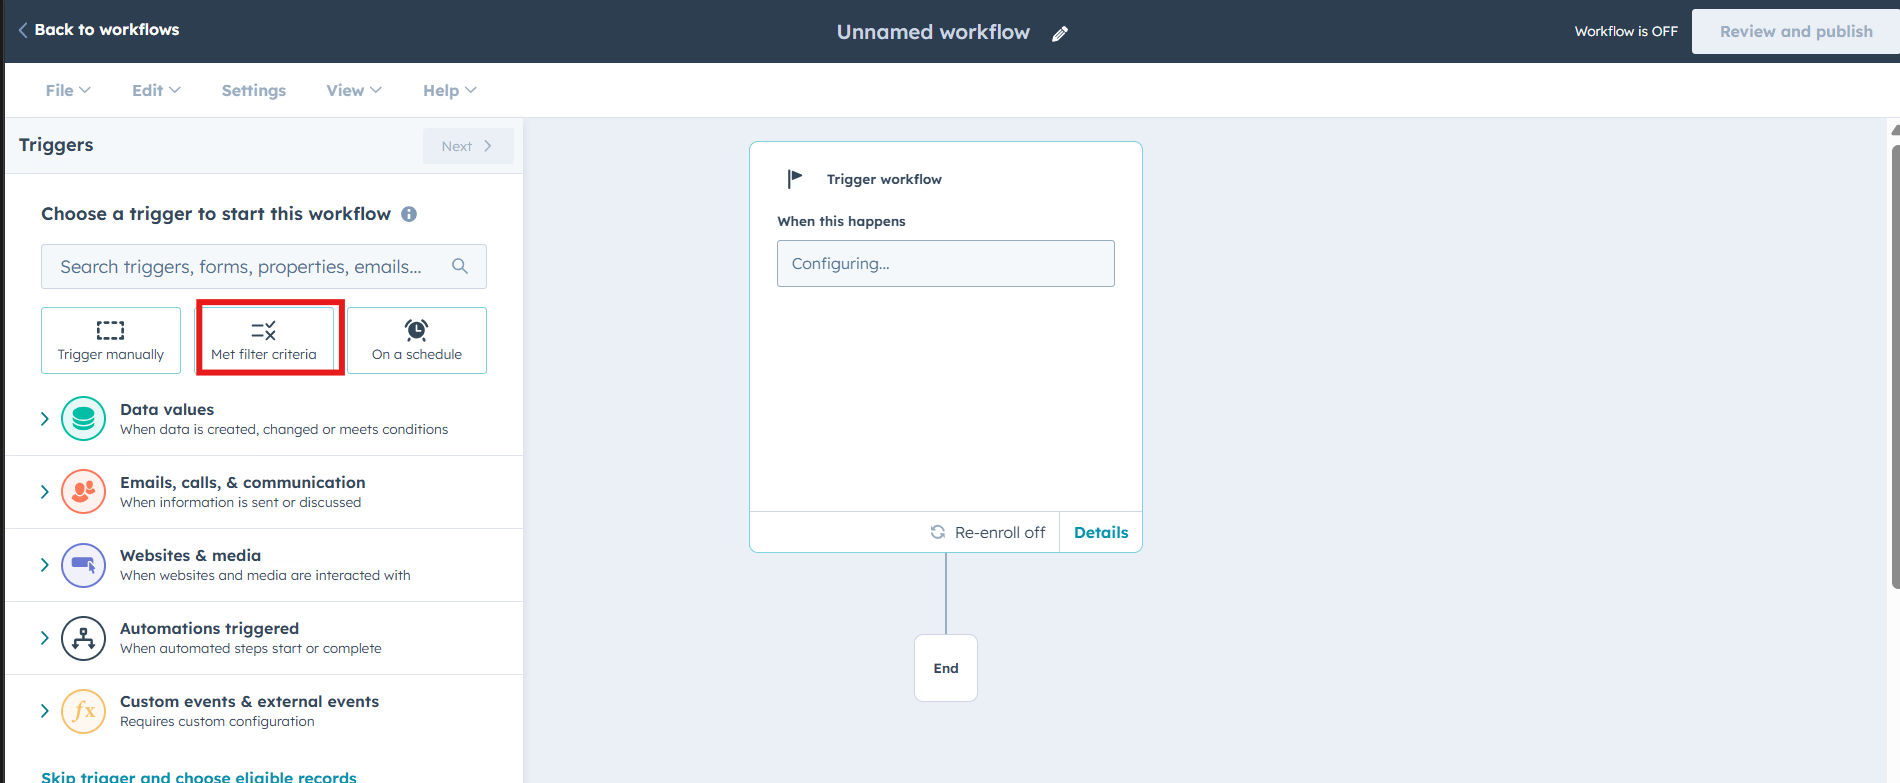 Now choose a type of record that can enroll. Click on **'Deal,**' and then select any trigger based on your needs—this is just for demonstration. In this example, we'll click on '**Deal properties**,' select 'Deal stage,' and set it to **'Closed Won**' in your sales pipeline.
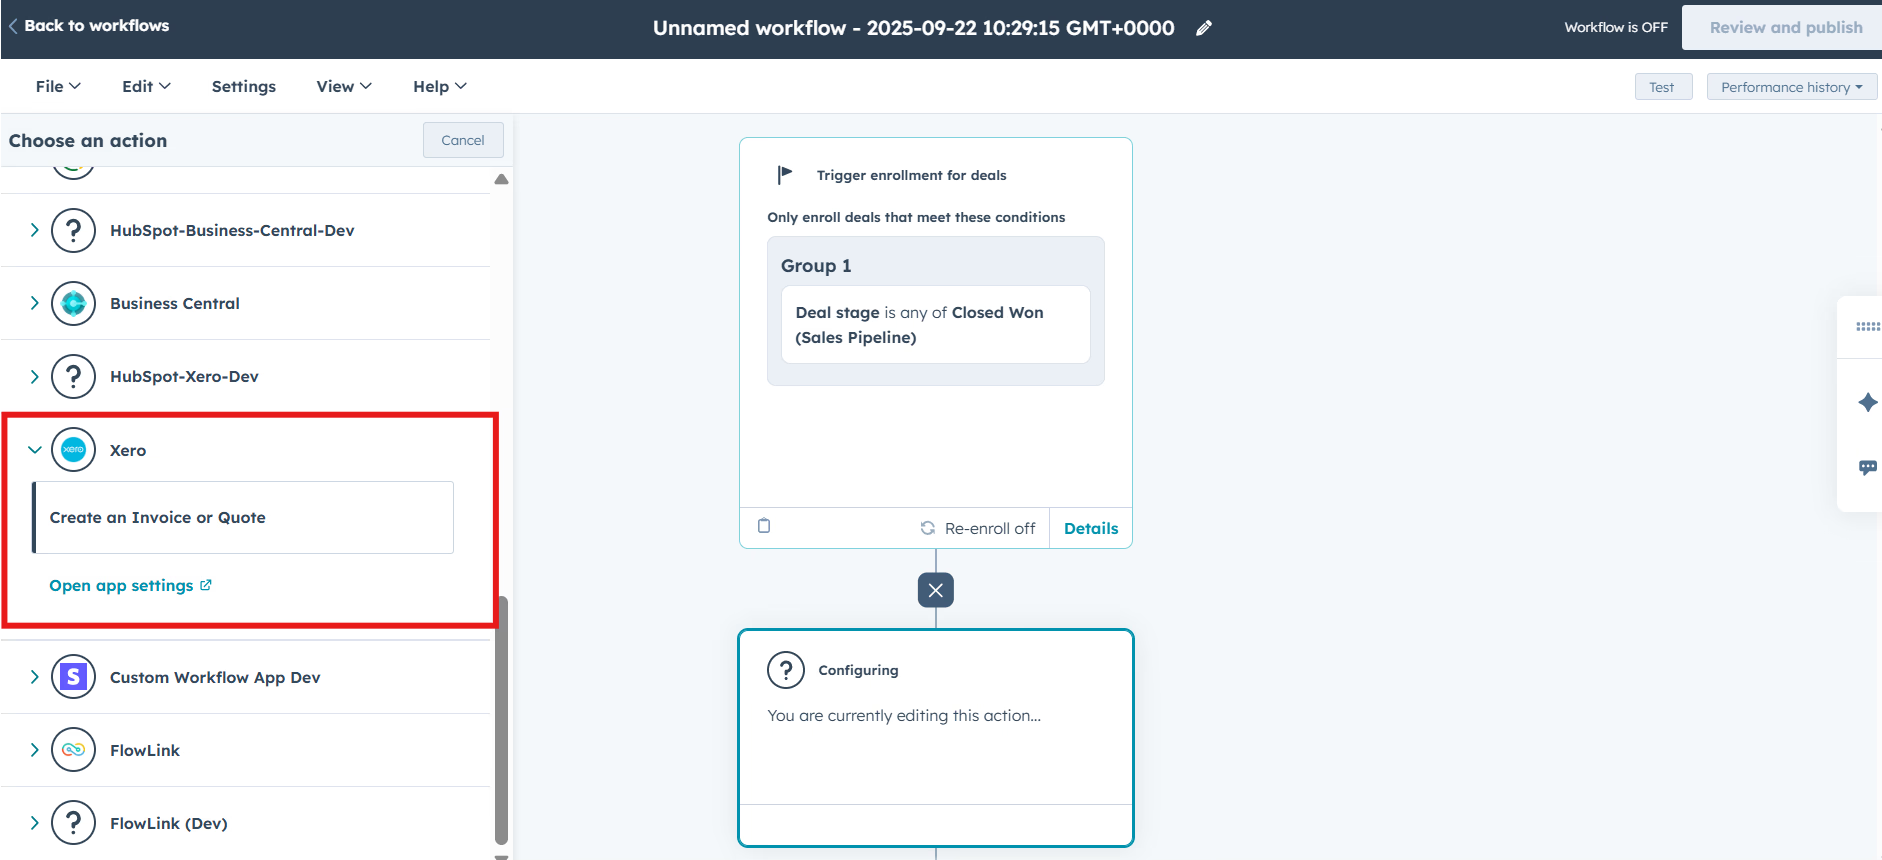
 For the automation, add "**Xero**" by Cloudify from the Integrated apps section
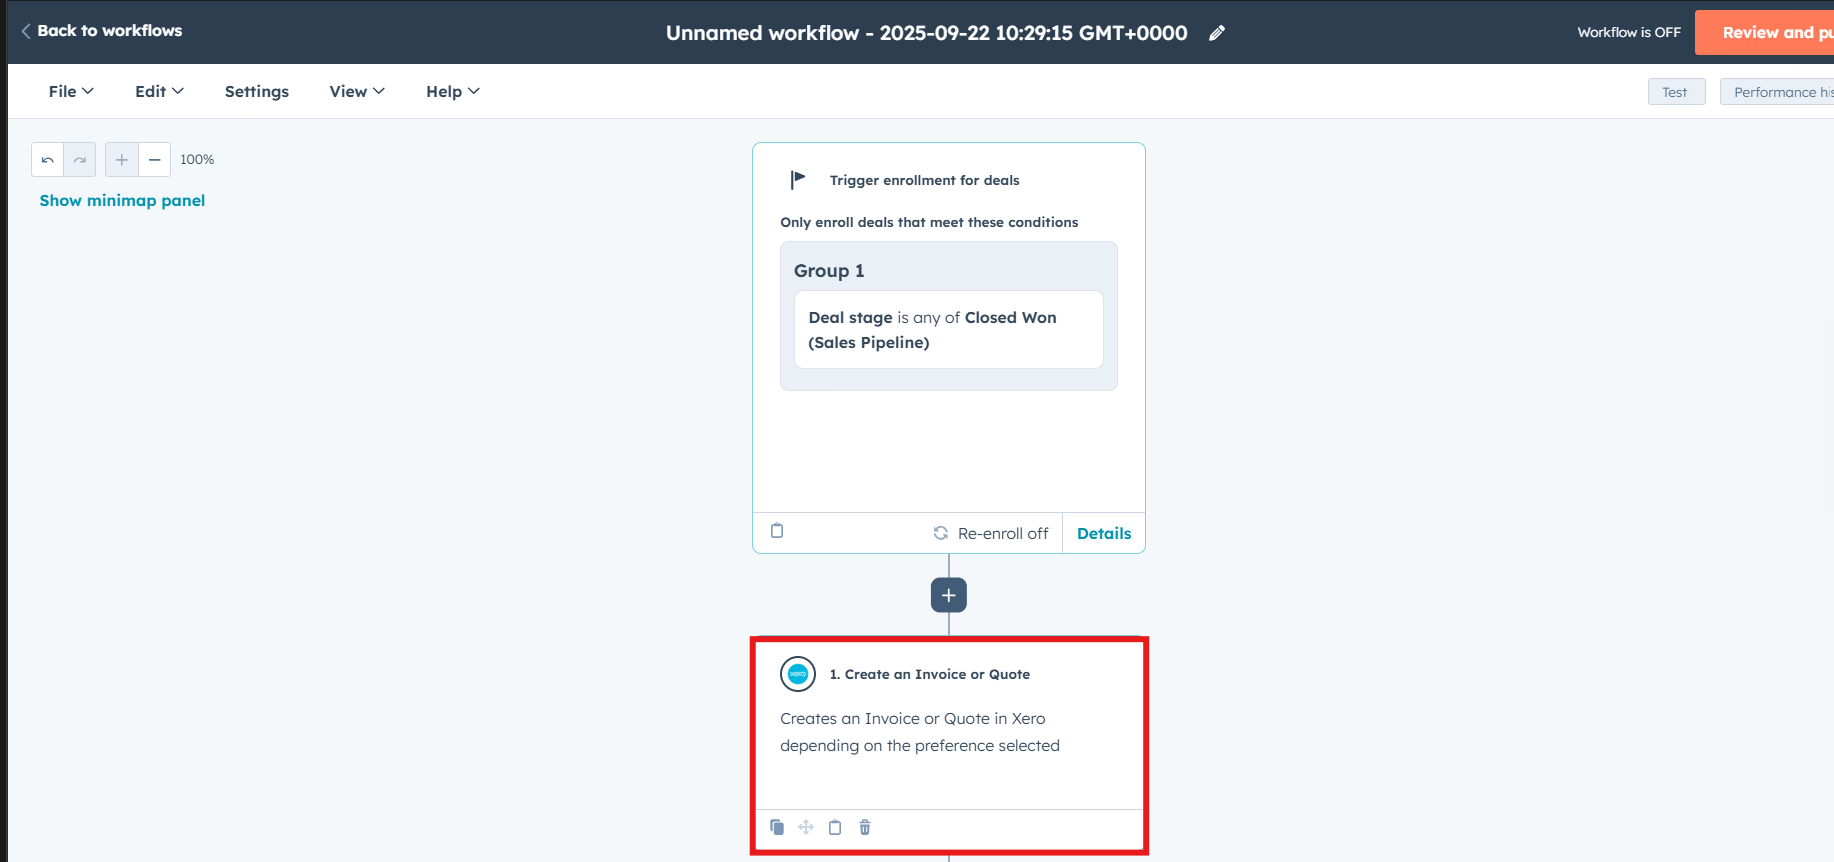
After selecting the Xero app, choose **'Create an Invoice or Quote".**
For the automation, add "**Xero**" by Cloudify from the Integrated apps section
After selecting the Xero app, choose **'Create an Invoice or Quote".**
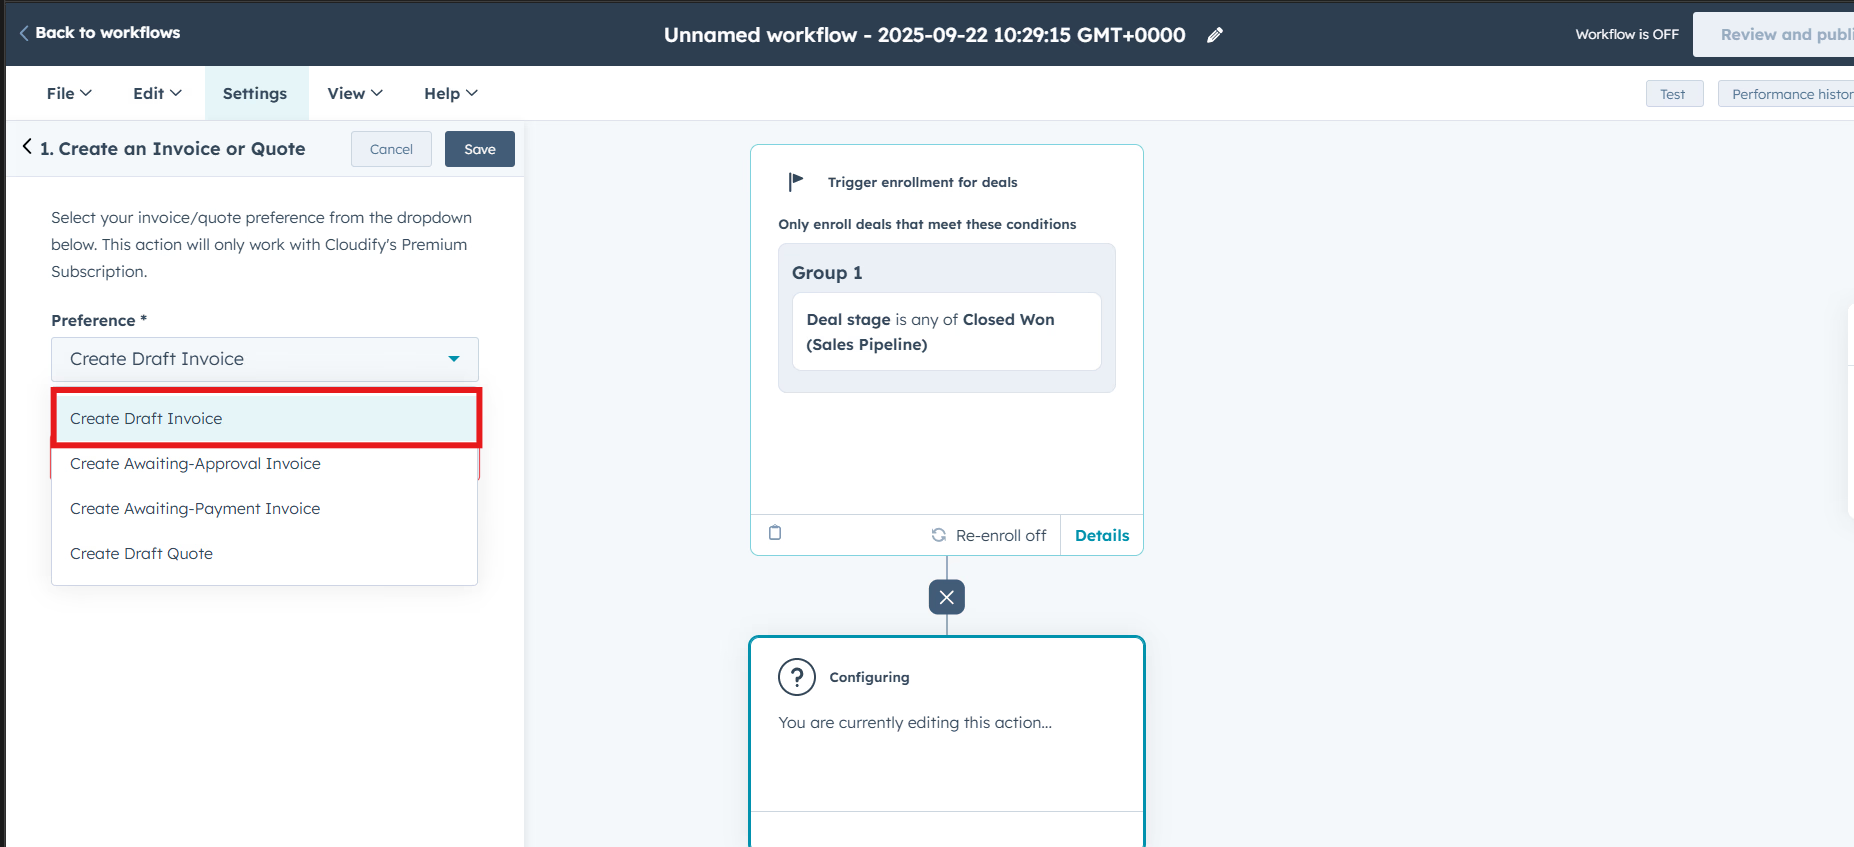
 In this step, select your invoice or quote preference from the dropdown below. We’re selecting ‘**Create draft invoice**,’ but you can pick any option from the dropdown based on your requirements.
 Now select the account you want to apply your lines items to update. For demonstration we will select \*\*"Sales" \*\*and click on **"Save"**
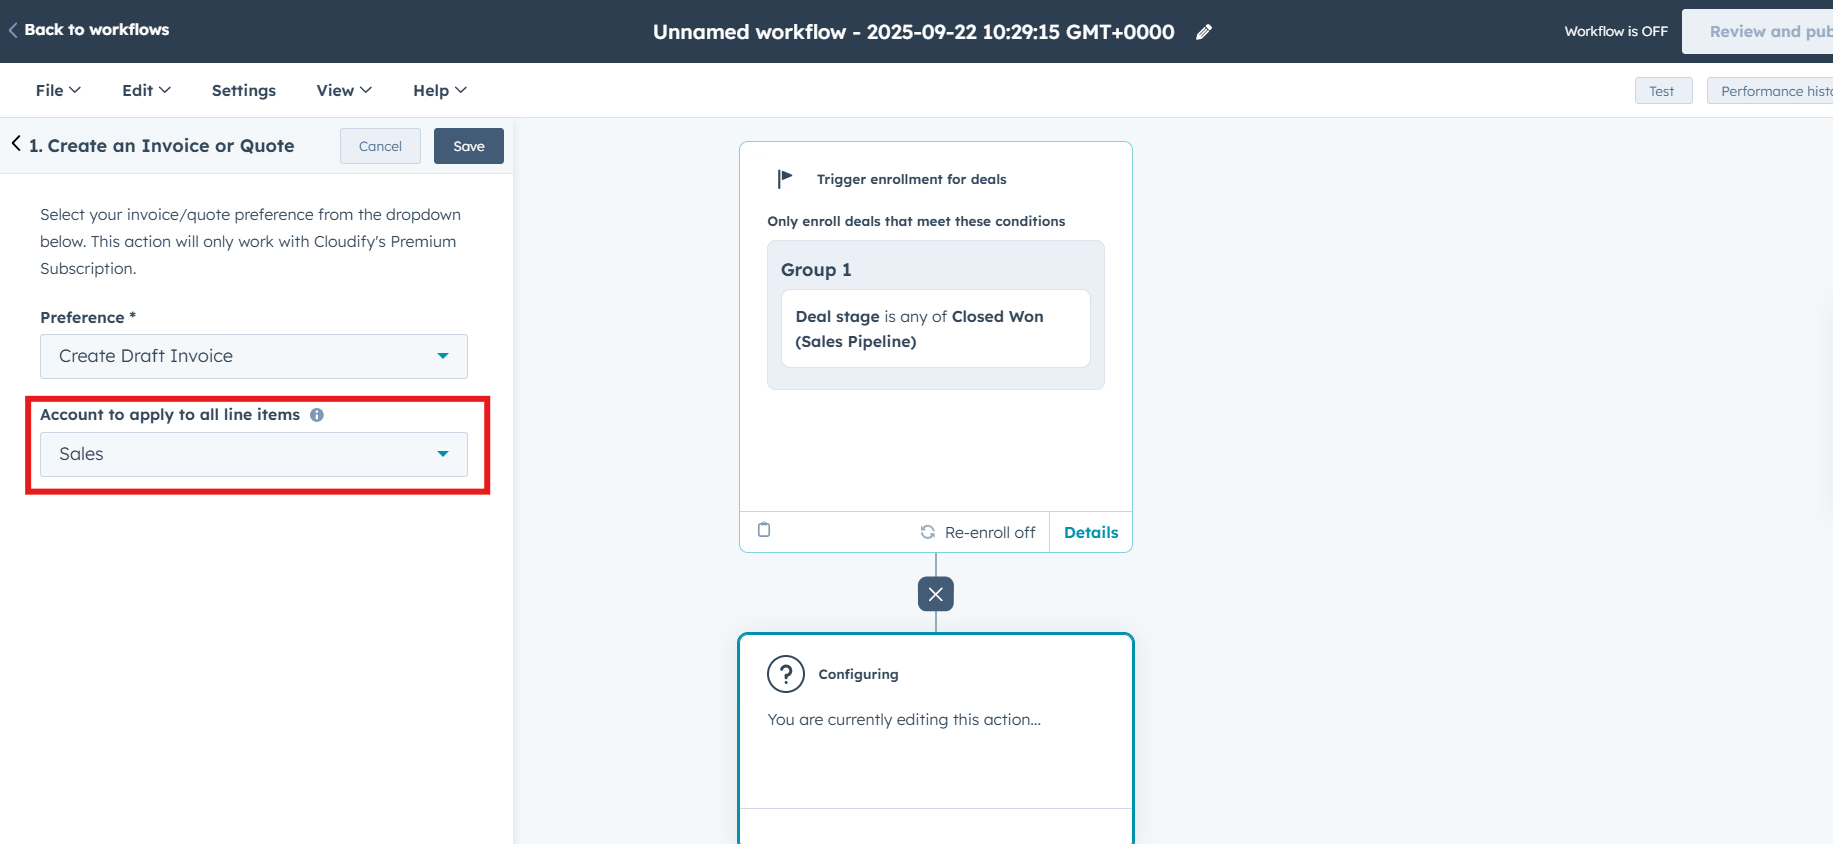 **Note**: If selected, the chosen account will get automatically applied to all line items while creating the Xero invoice.
Now we have finally set up our workflow, and it is ready to run based on the preferences we selected.
Now we have finally set up our workflow, and it is ready to run based on the preferences we selected.
**Note**: If selected, the chosen account will get automatically applied to all line items while creating the Xero invoice.
Now we have finally set up our workflow, and it is ready to run based on the preferences we selected.
Now we have finally set up our workflow, and it is ready to run based on the preferences we selected.
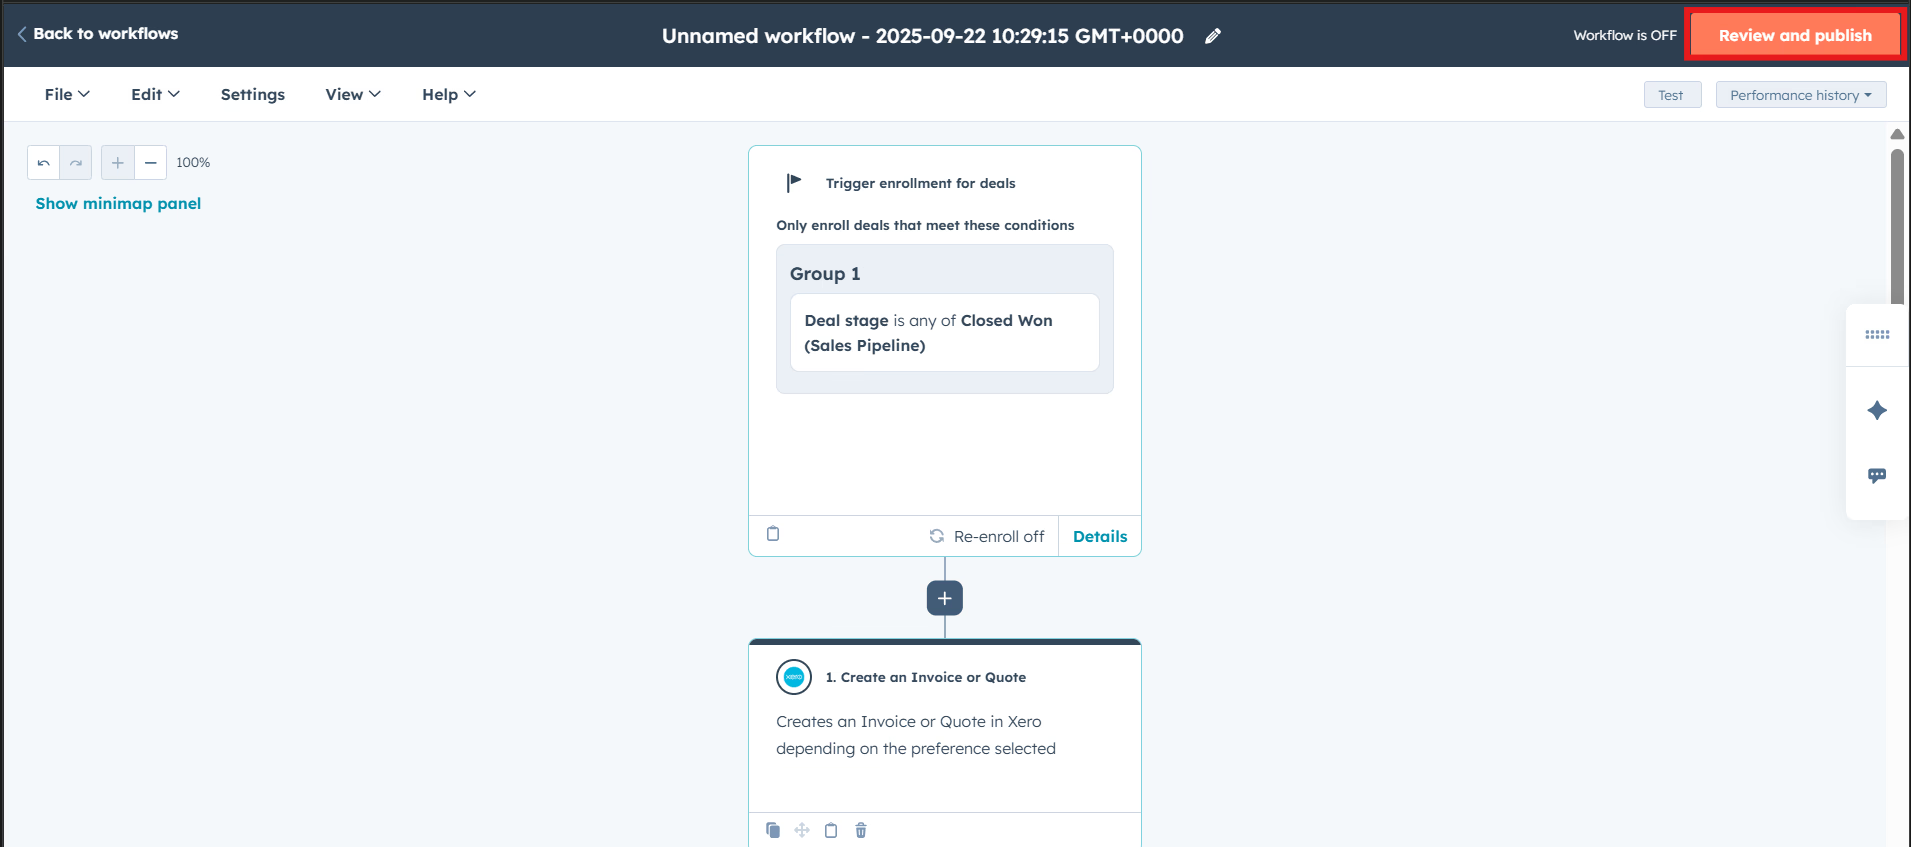
 Click on '**Review and publish,**' or test it first before making it live.
 Workflows actions will only work with Cloudify's Premium Subscription.
**Got unique integration needs?**\
Our custom team can build tailored integrations, specialized data mappings, and workflow automations to perfectly match your specific business processes.
[Advanced integration settings](https://custom.cloudify.biz/)
Workflows actions will only work with Cloudify's Premium Subscription.
**Got unique integration needs?**\
Our custom team can build tailored integrations, specialized data mappings, and workflow automations to perfectly match your specific business processes.
[Advanced integration settings](https://custom.cloudify.biz/)