> ## Documentation Index
> Fetch the complete documentation index at: https://docs.cloudify.biz/llms.txt
> Use this file to discover all available pages before exploring further.
# Invoice
> Invoice-Based Workflows are where automation truly streamlines your finance operations. Let’s set up a workflow for when invoices are paid so your team can stay focused while the system handles the repetitive tasks.
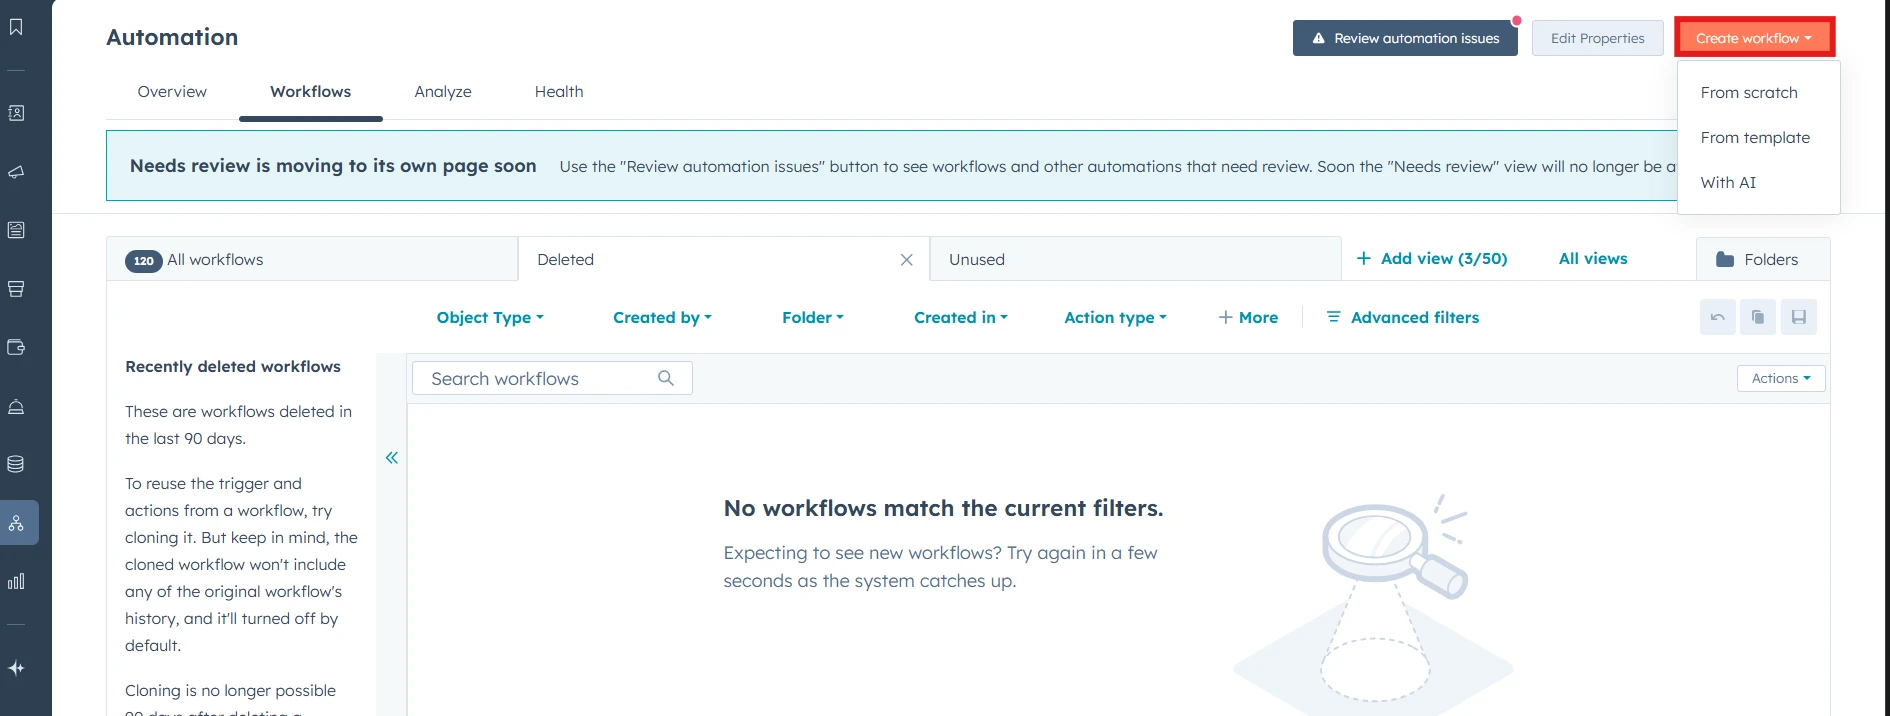
First, navigate to **"Automations"** and select **'Workflows'**.
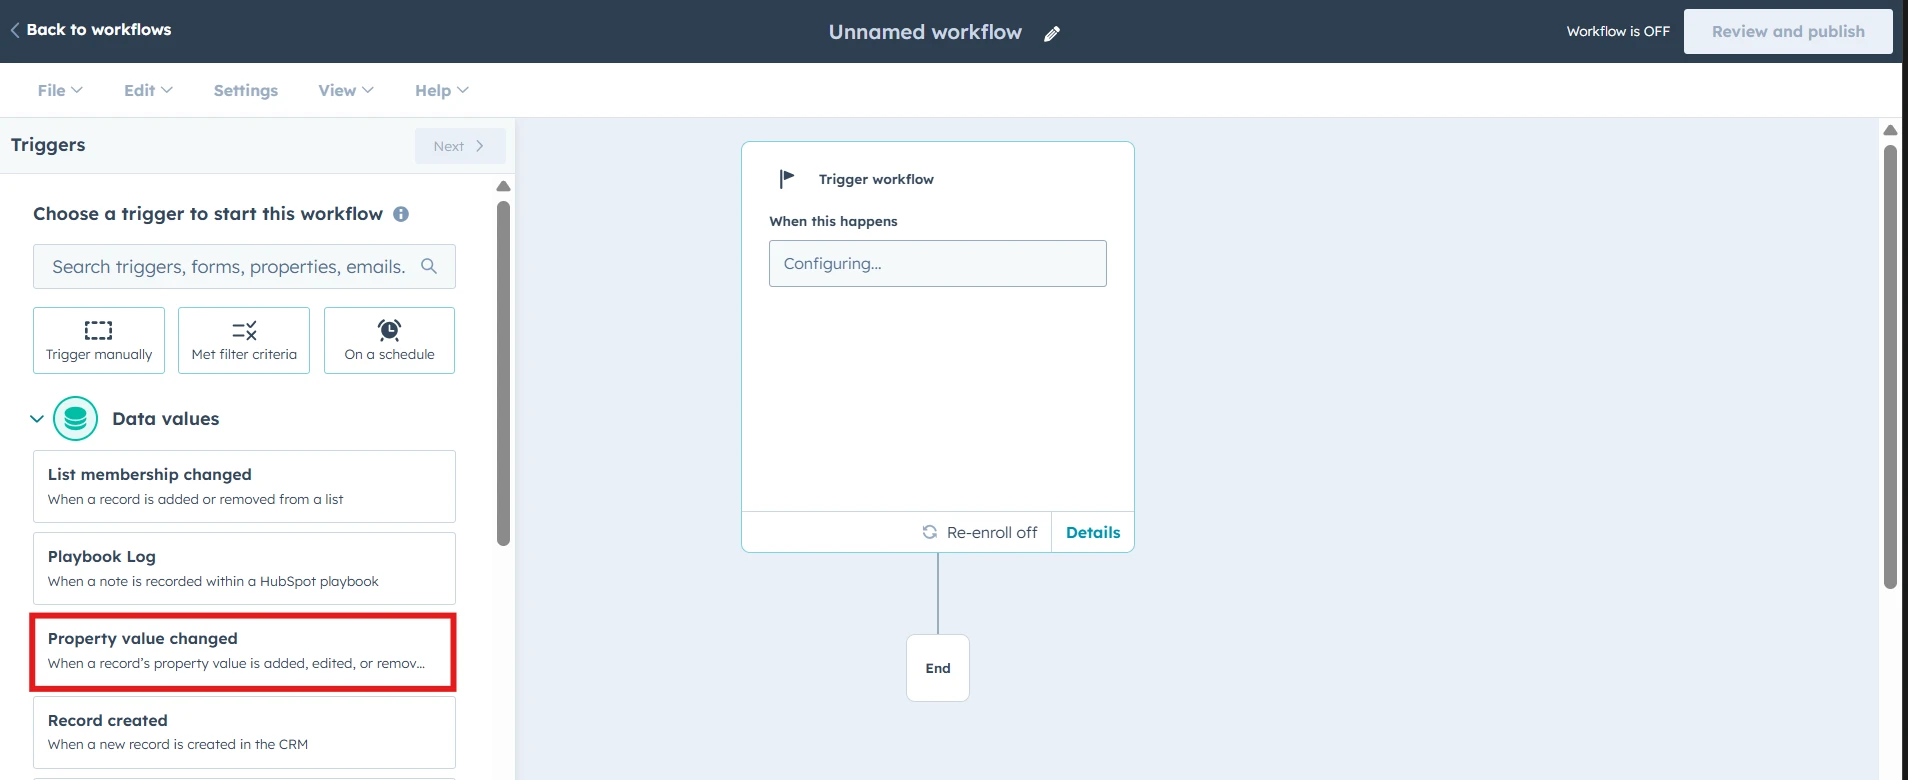
 Now, set up the triggers to enroll a HubSpot invoice into this workflow when it starts running. Invoices can be enrolled either manually or automatically. For example, let’s select **“Data values”** and then choose **“Property value changed.”**
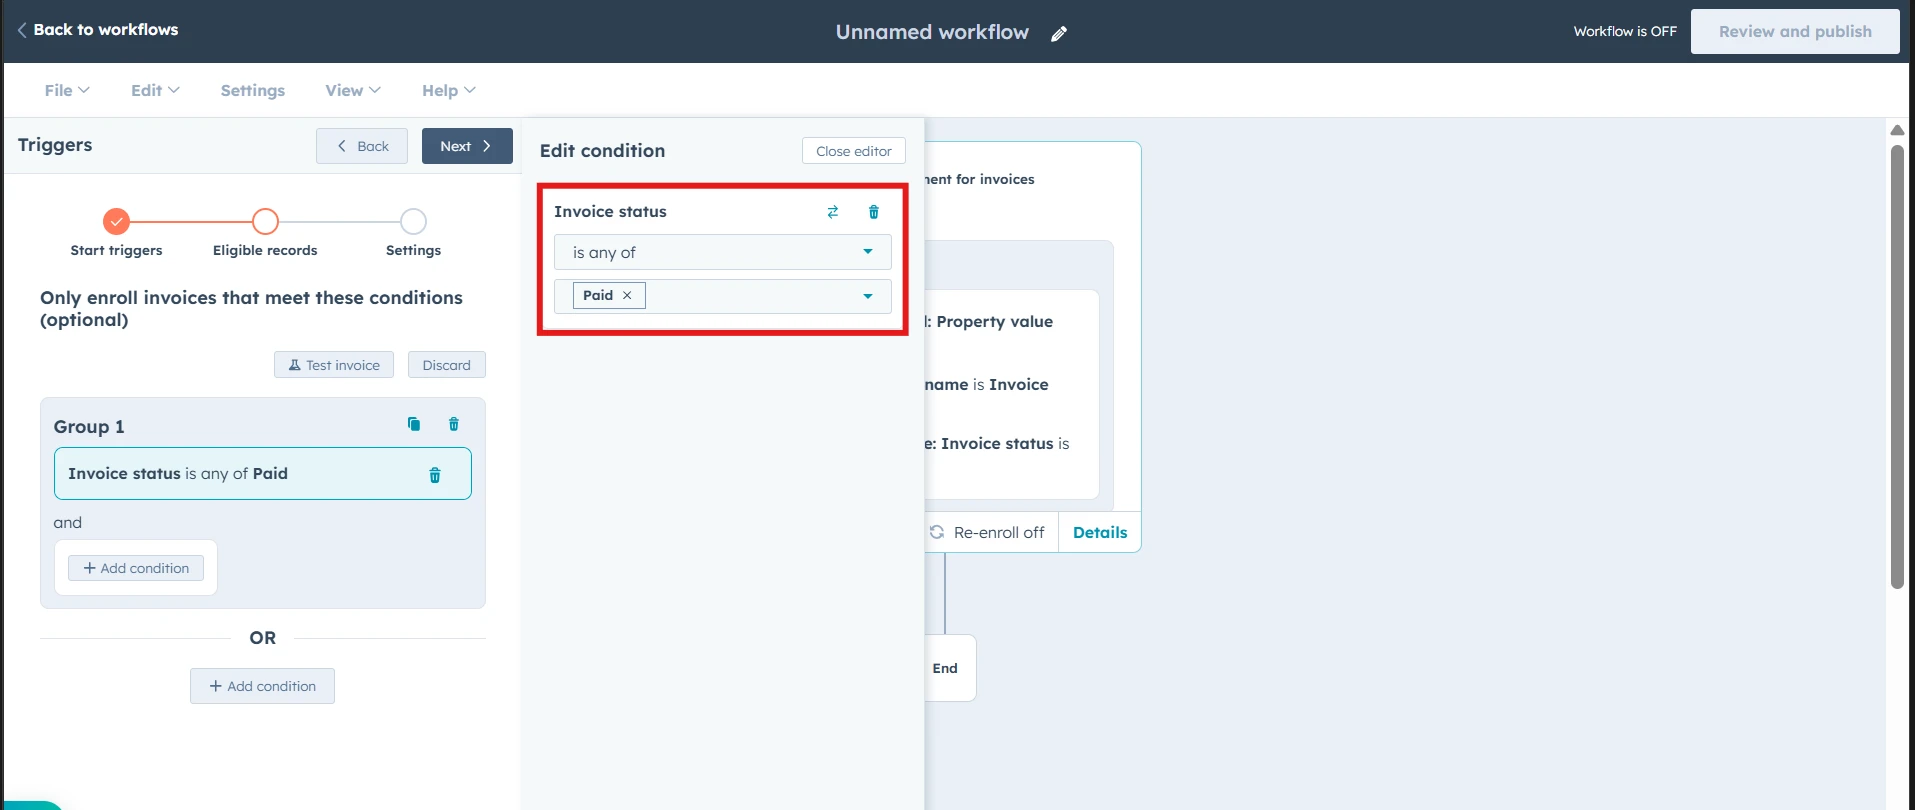
 Next, pick a property to track—here we’ll select choose "**Invoice”** and search for the "**Invoice status"** trigger. From there, you can define the event of your choice. For this demo, we’ll add a condition that enrolls the invoice when its status in HubSpot changes to **“Paid.”**
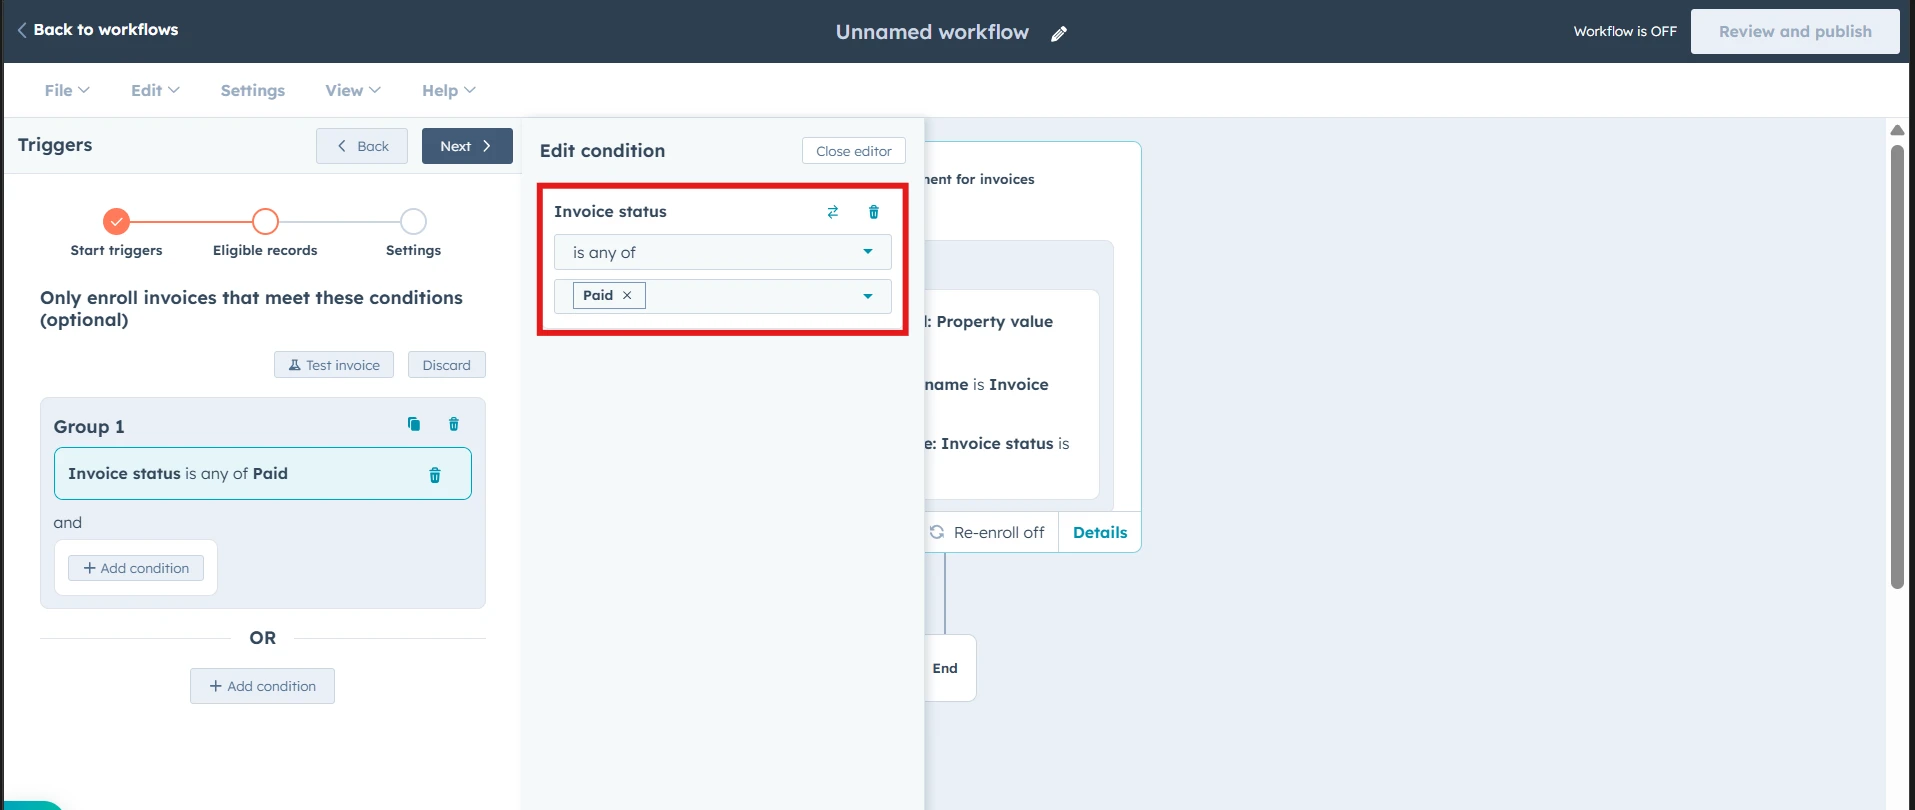
 Once you have set up the triggers, go ahead and save these settings. Finally, add your workflow action.
 Go to integrated apps, select your preferred accounting tool connected via Cloudify and choose the action to '**Create One-time or Recurring Invoice**'. You can customize your workflow the way you want and add this action multiple times as well. “**Review your workflow”** and Turn it ON.
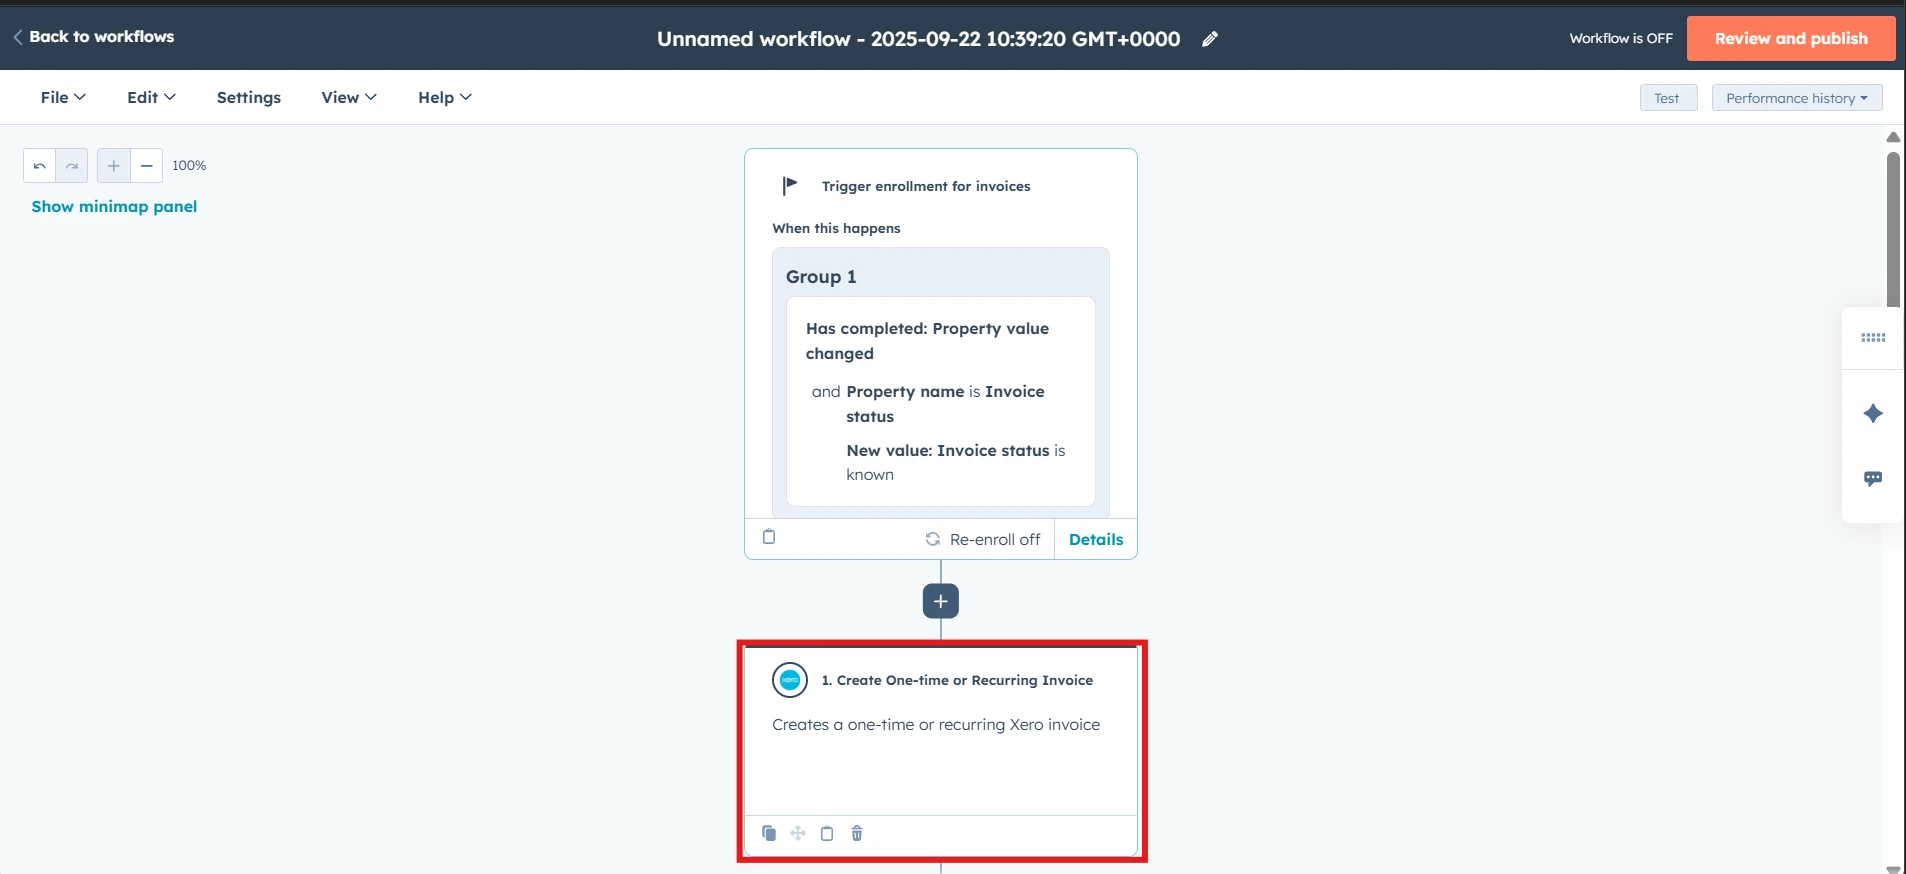 To test this workflow, go to the \*\*'Commerce' \*\*section and then **'Invoices'**. Here, you can update an existing invoice and change the status to “Paid”. This will ensure that the selected invoice gets enrolled in the workflow and creates a corresponding invoice in your accounting system. You can view the invoice created in your accounting system by directly checking the notes in the associated company.
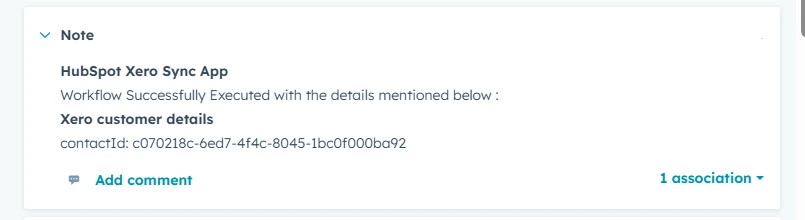 This is just one of the many ways you can connect your HubSpot Workflows and HubSpot Invoices to create a one-time or recurring invoice in your accounting system.
**Got unique integration needs?**\
Our custom team can build tailored integrations, specialized data mappings, and workflow automations to perfectly match your specific business processes.
[Advanced integration settings](https://custom.cloudify.biz/)
This is just one of the many ways you can connect your HubSpot Workflows and HubSpot Invoices to create a one-time or recurring invoice in your accounting system.
**Got unique integration needs?**\
Our custom team can build tailored integrations, specialized data mappings, and workflow automations to perfectly match your specific business processes.
[Advanced integration settings](https://custom.cloudify.biz/)