> ## Documentation Index
> Fetch the complete documentation index at: https://docs.cloudify.biz/llms.txt
> Use this file to discover all available pages before exploring further.
# Invoice/Quote Rules
> Specify how invoices or quotes are generated in Xero by linking them to your HubSpot sales flow.
Select a Pipeline from the drop-down menu. This step allows you to link the creation of invoices or quotes to a specific sales pipeline in HubSpot. It ensures that the invoices or quotes are generated at the right time in the sales process, improving efficiency and reducing the risk of errors associated with manual entry.
Feel free to click [**Get Guided Installation**](https://meetings.hubspot.com/cloudify/app-assistance) if you require assistance from Cloudify experts regarding the installation steps
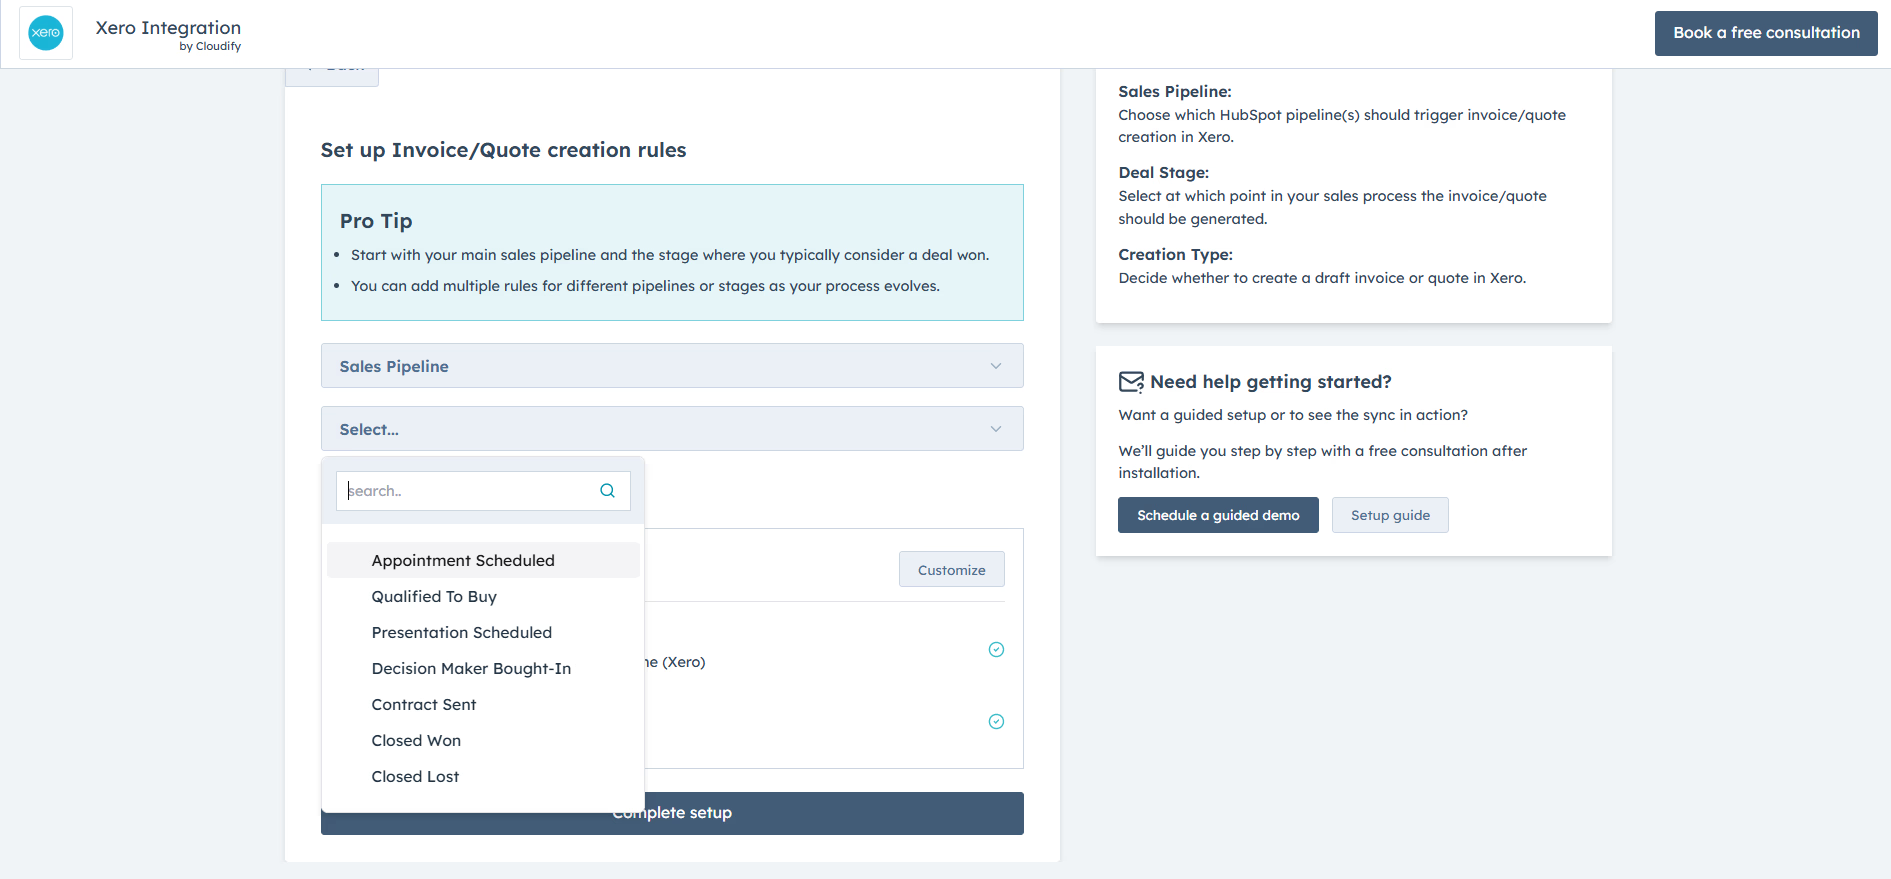
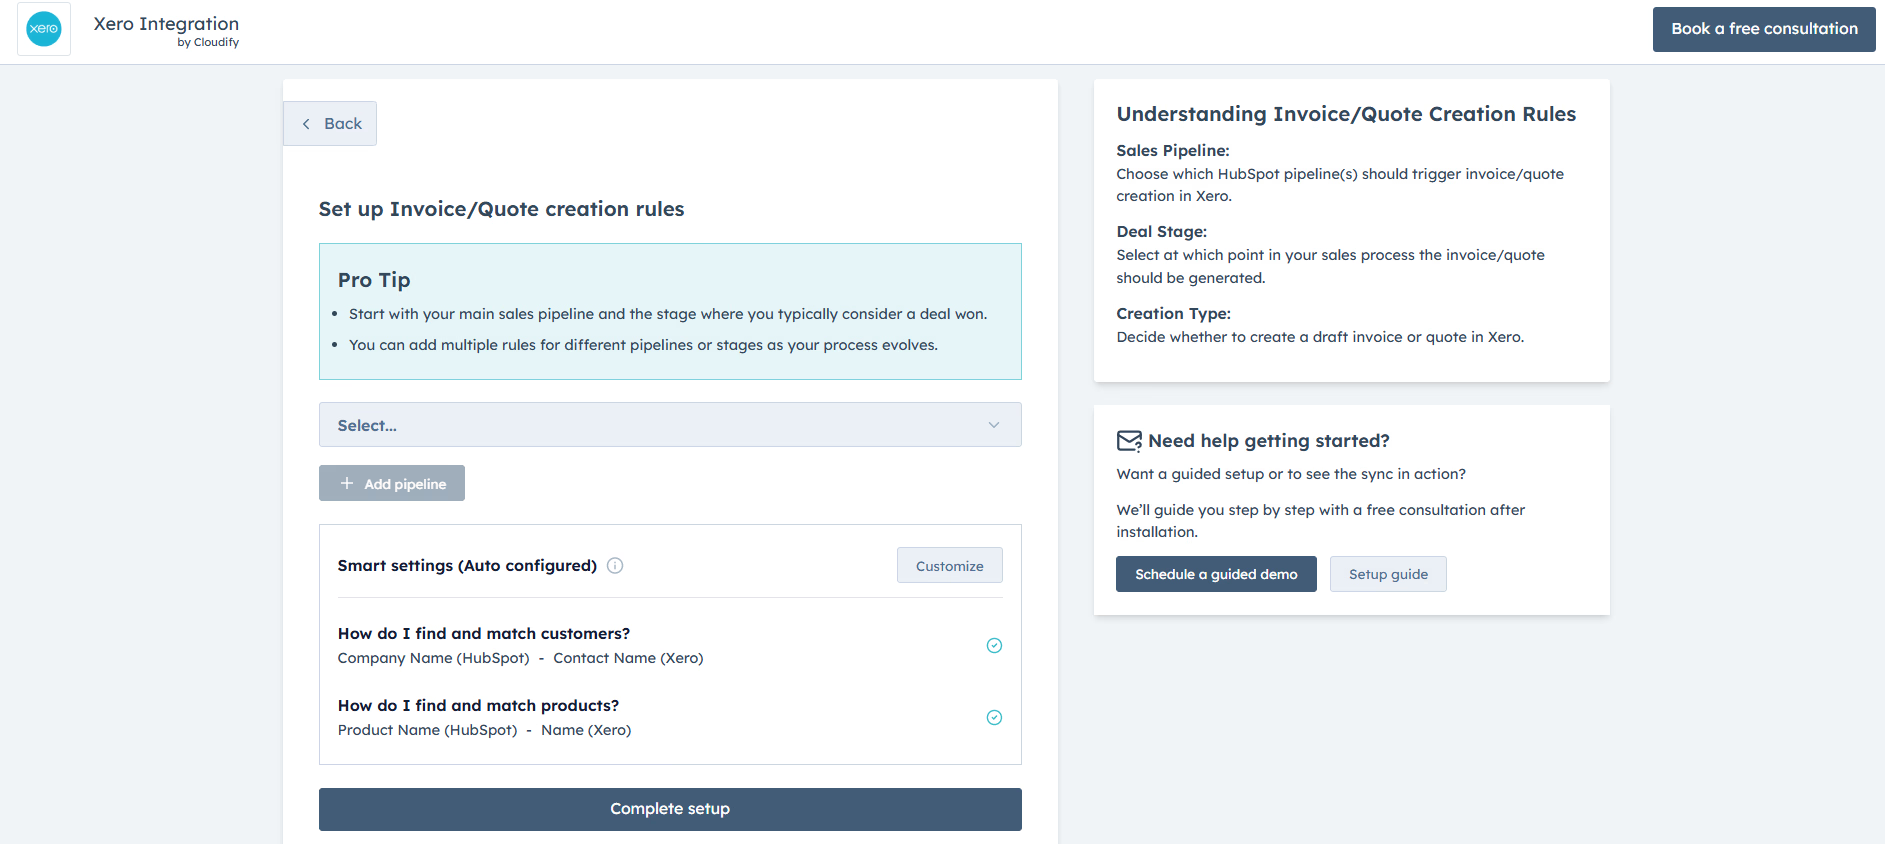 Select the Deal Stage from the drop-down menu. Here, you select the particular stage within the sales pipeline that will trigger the creation of an invoice or quotes in Xero. This ensures the invoicing process aligns perfectly with your established sales flow.
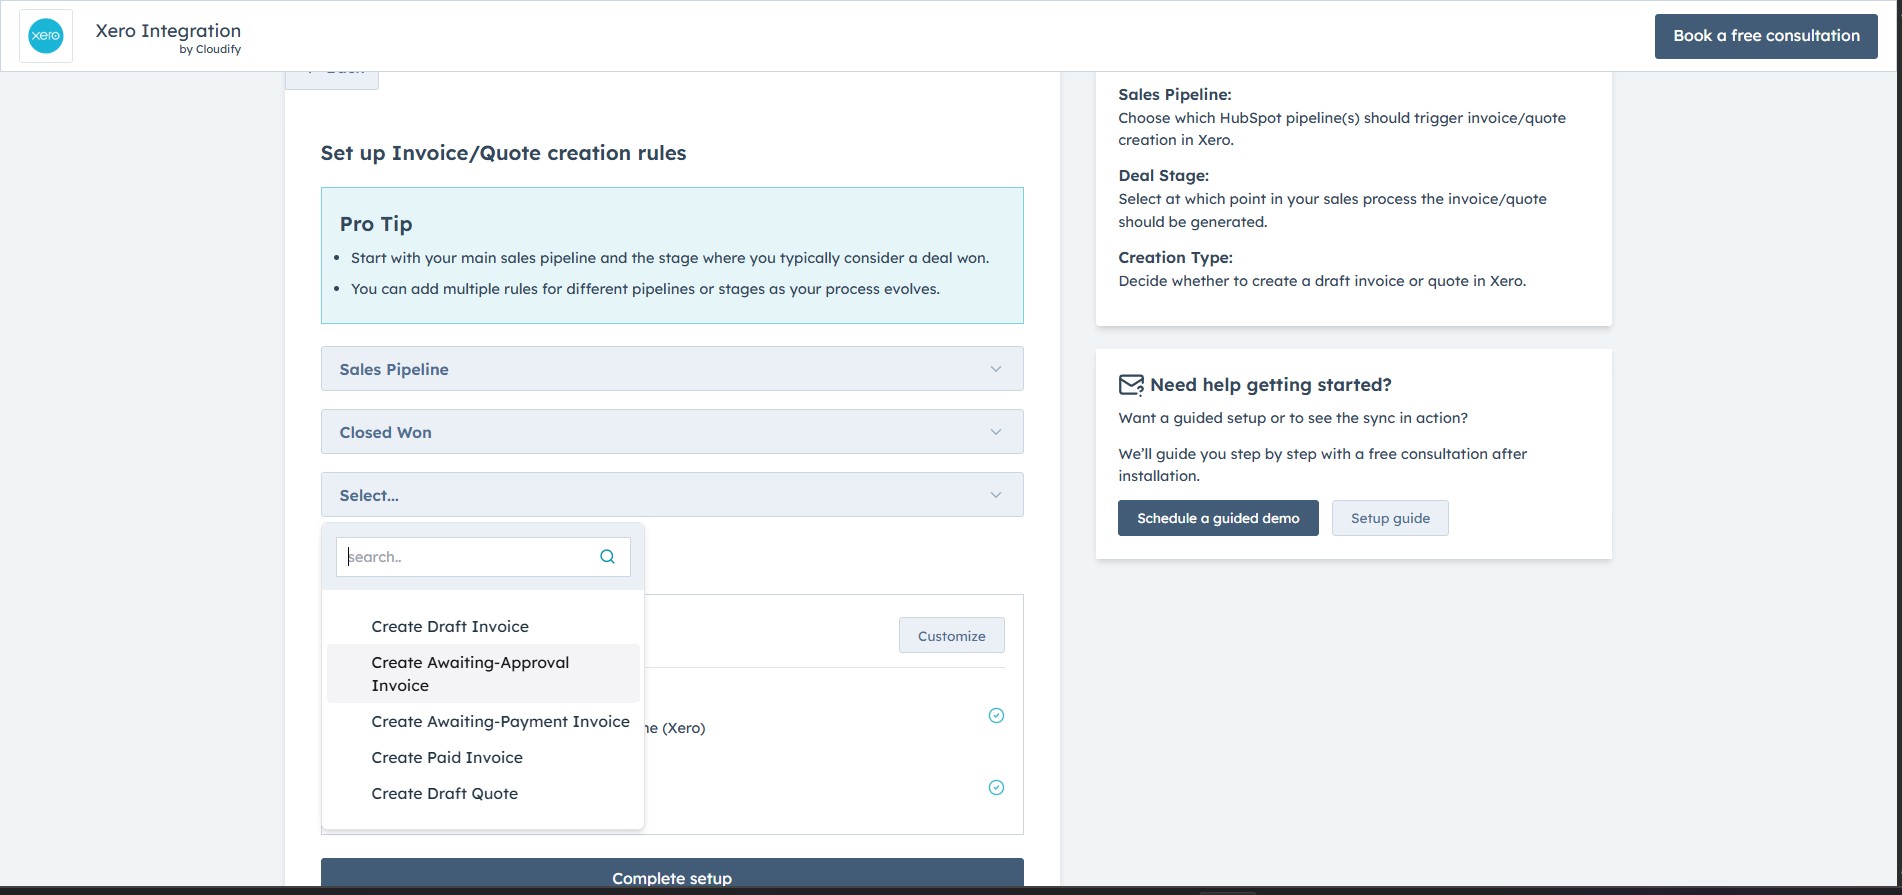
 Choose the Invoice/Quote from the next drop-down menu. This action involves creating a draft invoice/quote as per your requirement.
After selecting the required options, click on **"Add Pipeline".**
Choose the Invoice/Quote from the next drop-down menu. This action involves creating a draft invoice/quote as per your requirement.
After selecting the required options, click on **"Add Pipeline".**
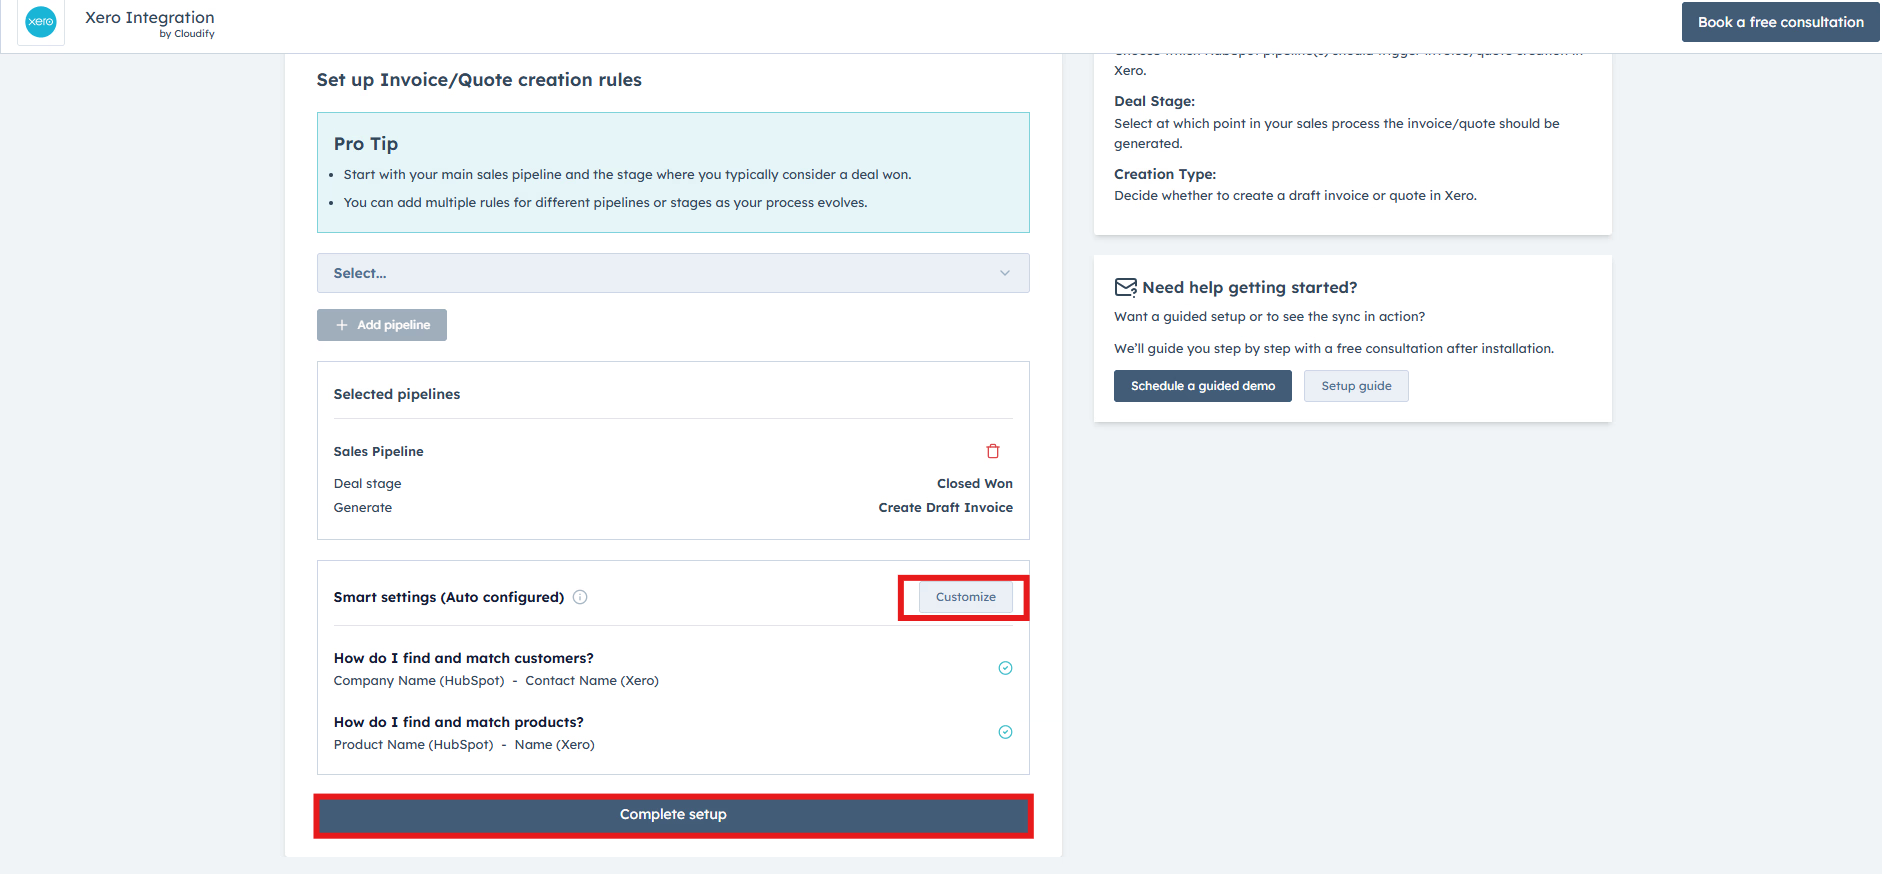
 Once you’ve added the pipeline, you can click on “**Customize**” to set up your **Customer Matching** and **Product Matching** preferences, or click on “**Complete Setup**” to directly view the dashboard and start syncing.
 **Got unique integration needs?**\
Our custom team can build tailored integrations, specialized data mappings, and workflow automations to perfectly match your specific business processes.
[Advanced integration settings](https://custom.cloudify.biz/)
**Got unique integration needs?**\
Our custom team can build tailored integrations, specialized data mappings, and workflow automations to perfectly match your specific business processes.
[Advanced integration settings](https://custom.cloudify.biz/)