> ## Documentation Index
> Fetch the complete documentation index at: https://docs.cloudify.biz/llms.txt
> Use this file to discover all available pages before exploring further.

# Customer Synchronization Rules

## How to Turn On Customer Sync Rules

<Steps>
  <Step>
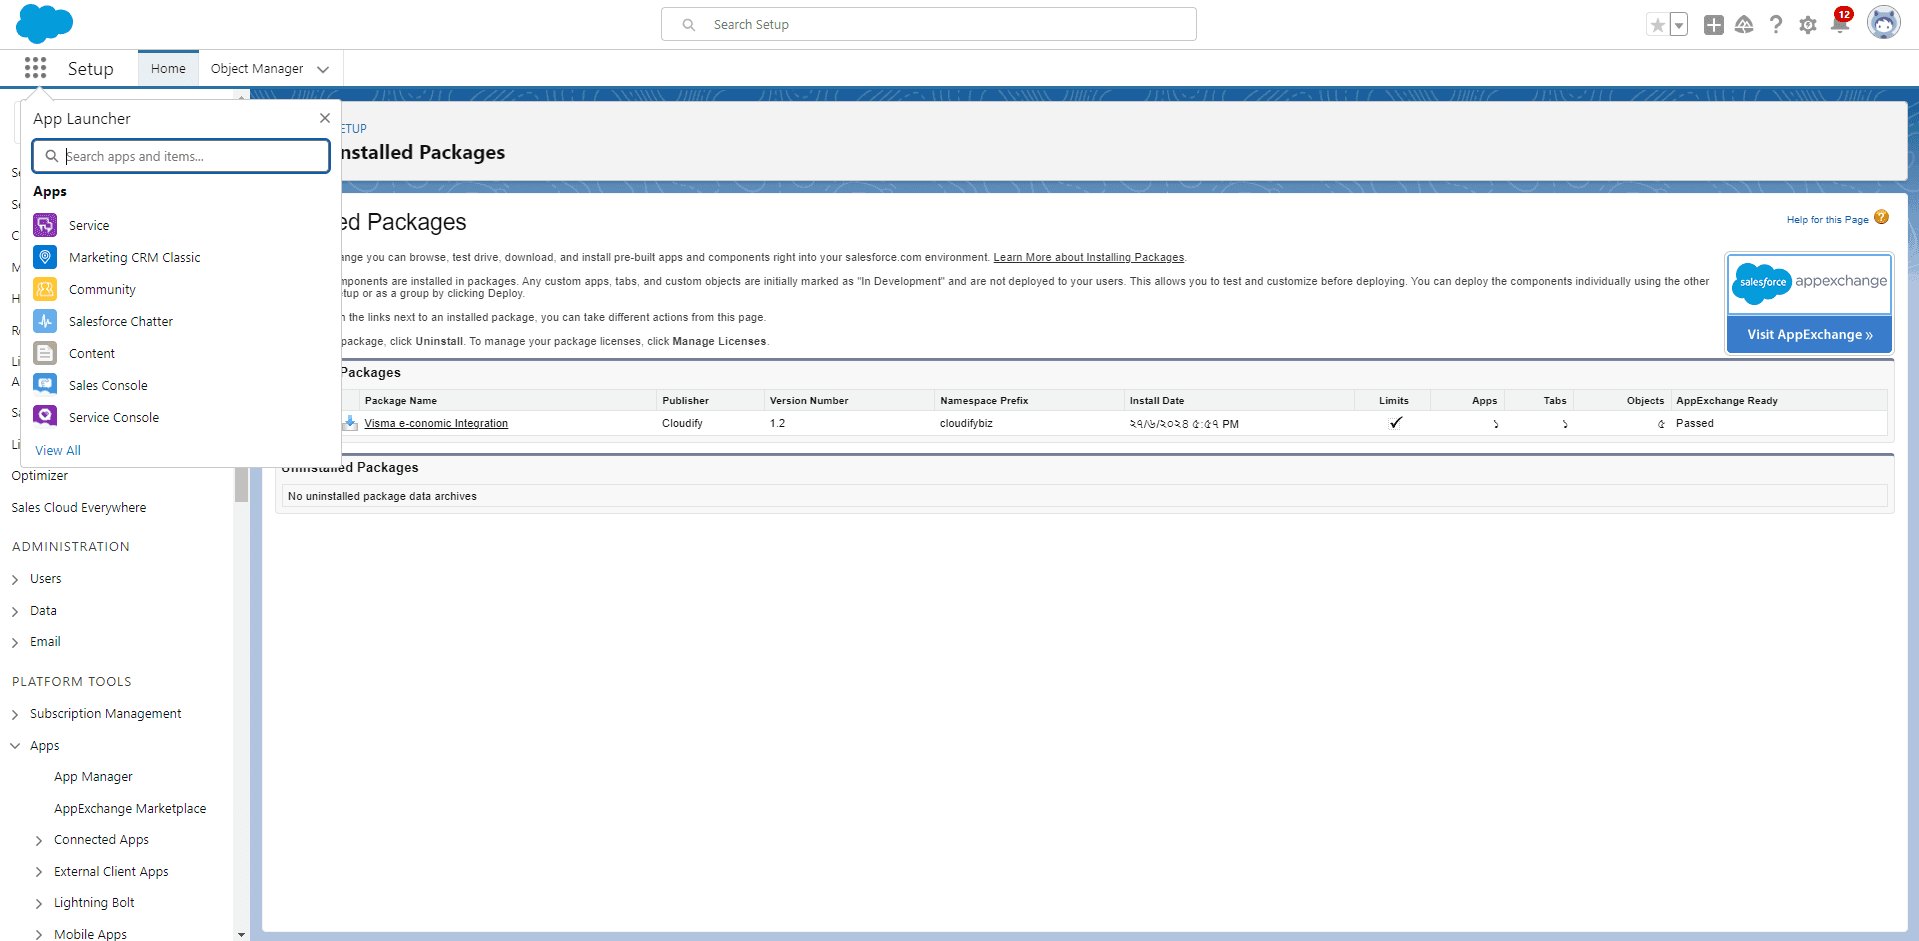
    Click **App Launcher** on the screen's left side.
    <Frame>
      ![Customer Synchronization Rules](https://framerusercontent.com/images/QUQQwATkb4C2iSZGkbxWYkMKQ58.png)
    </Frame>
  </Step>

  <Step>
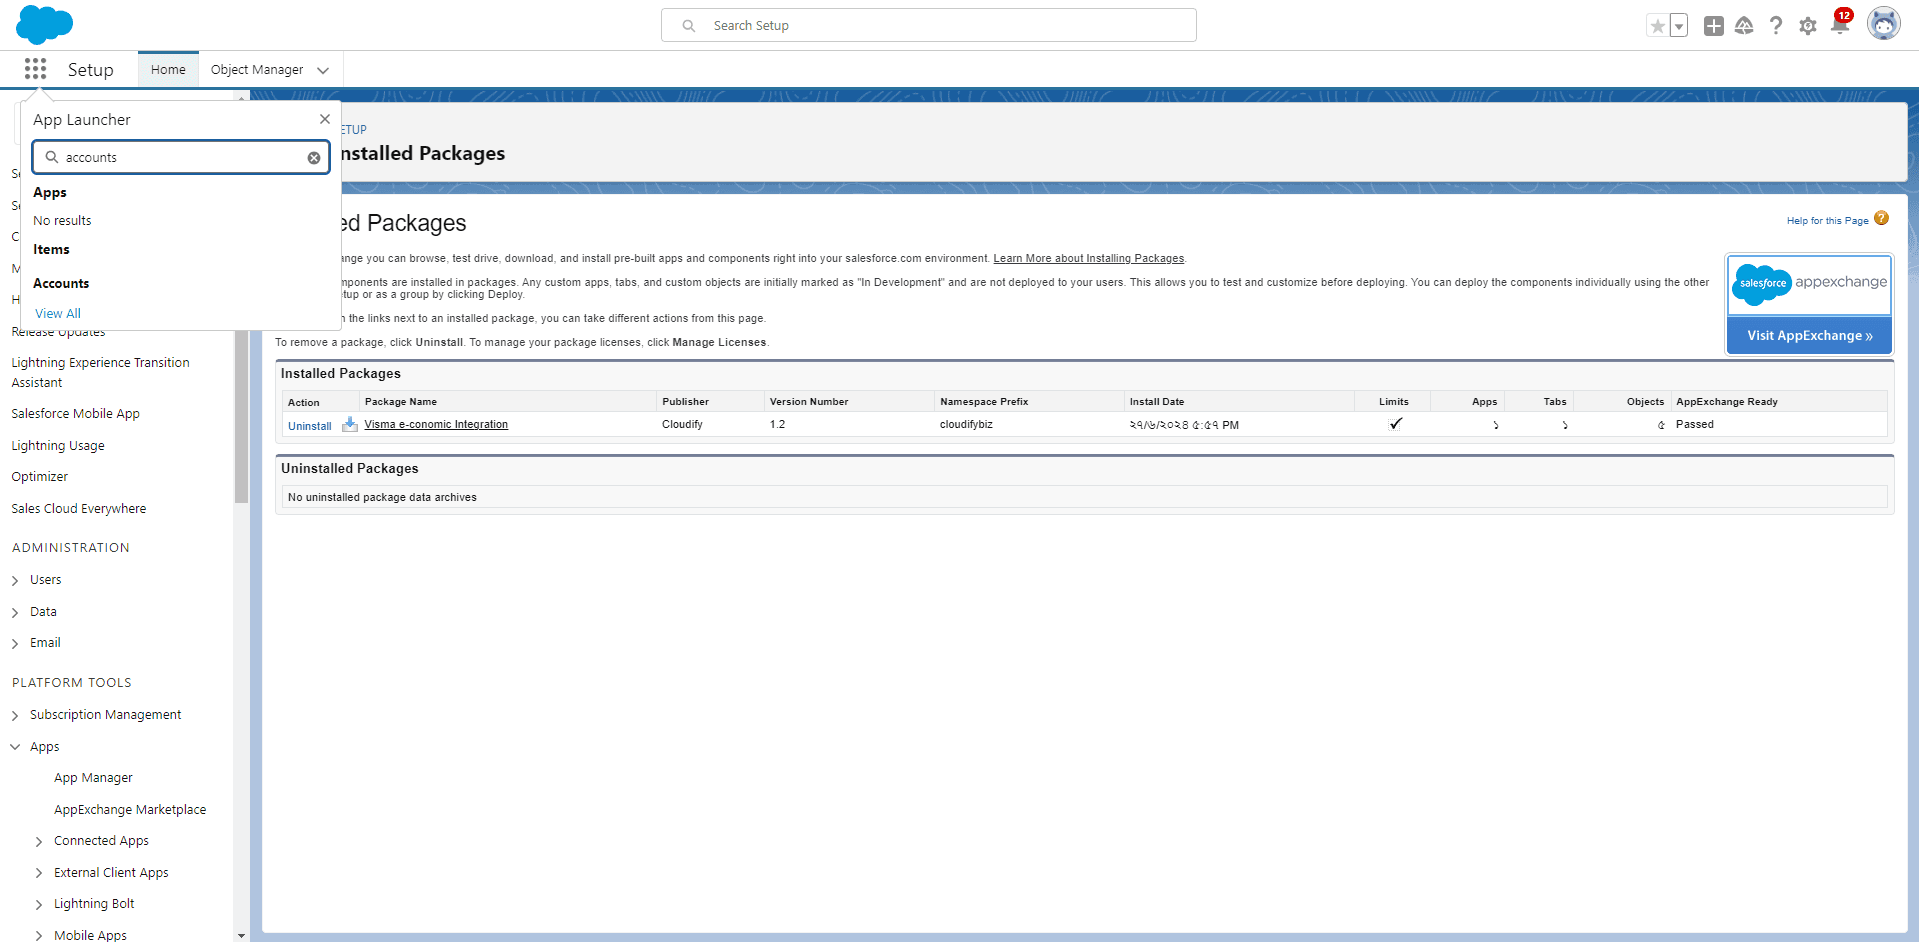
    Search **"Accounts"** in the App Launcher.
    <Frame>
      ![Customer Synchronization Rules](https://framerusercontent.com/images/NSz8hPKnHbs31CiFLcoJB41VyA.png)
    </Frame>
  </Step>

  <Step>
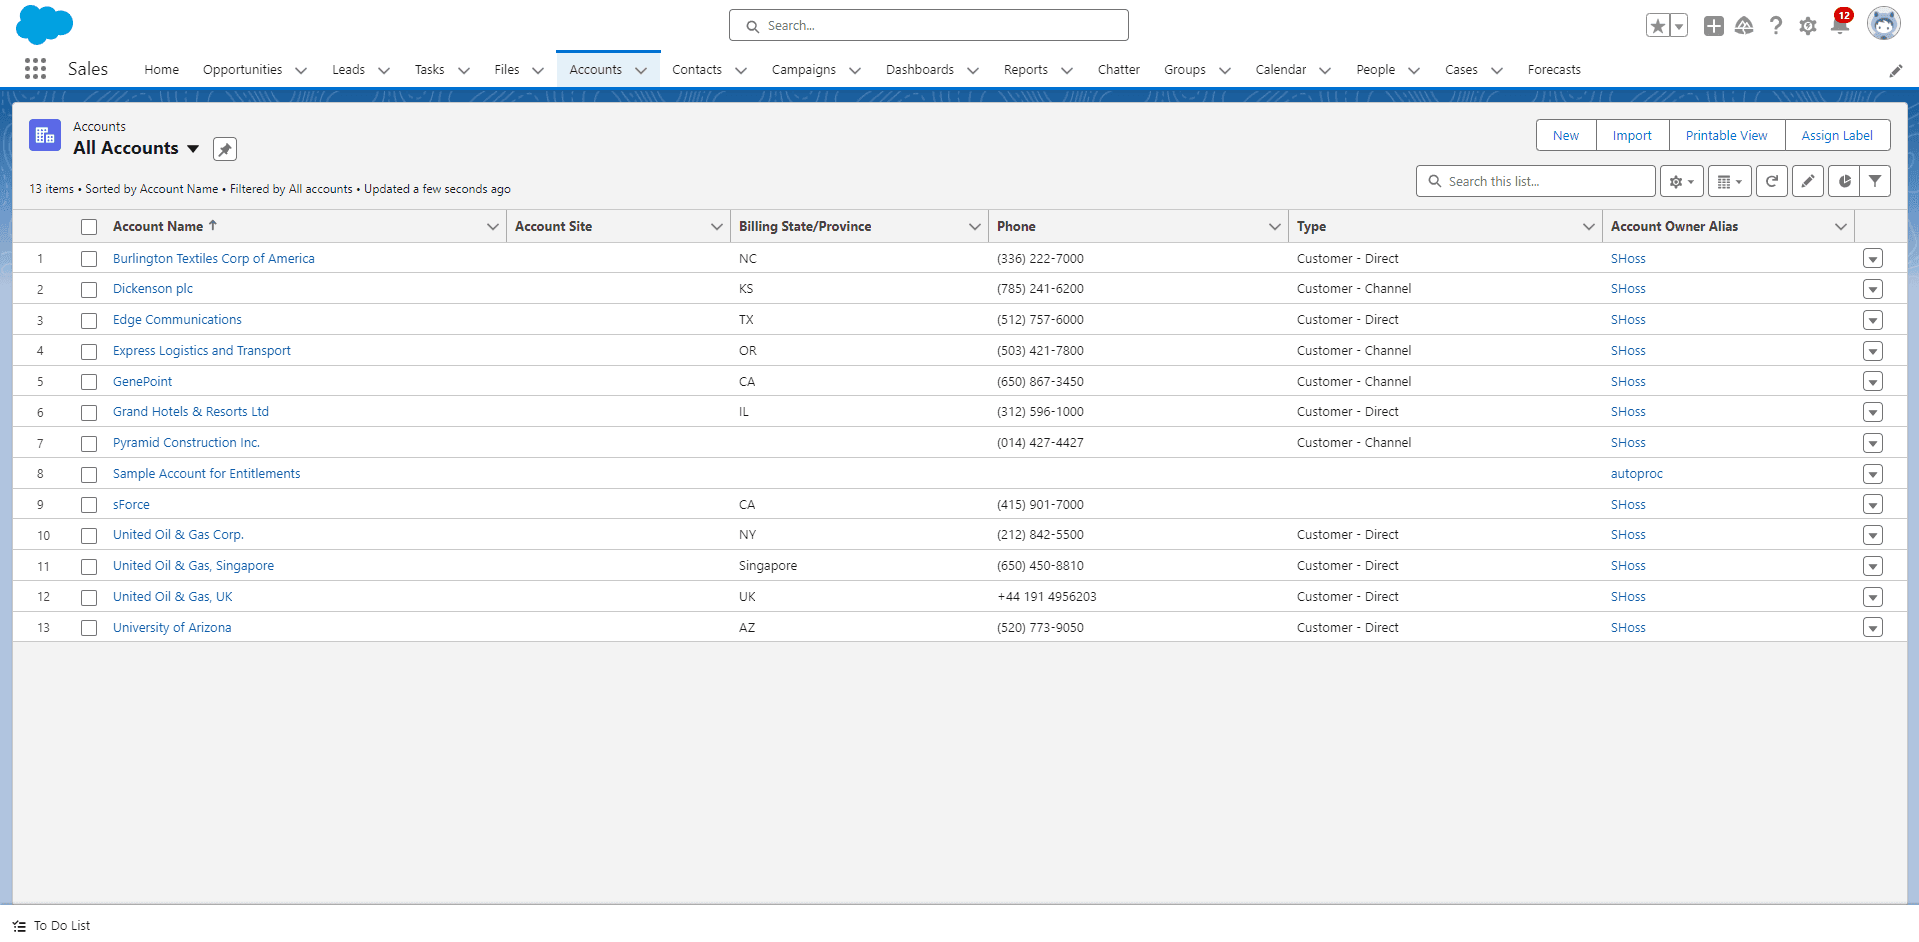
    Click the account name as per your requirement.
    <Frame>
      ![Customer Synchronization Rules](https://framerusercontent.com/images/NNuVMgoHFvBwPzt6ifGLGYDpDw.png)
    </Frame>
  </Step>

  <Step>
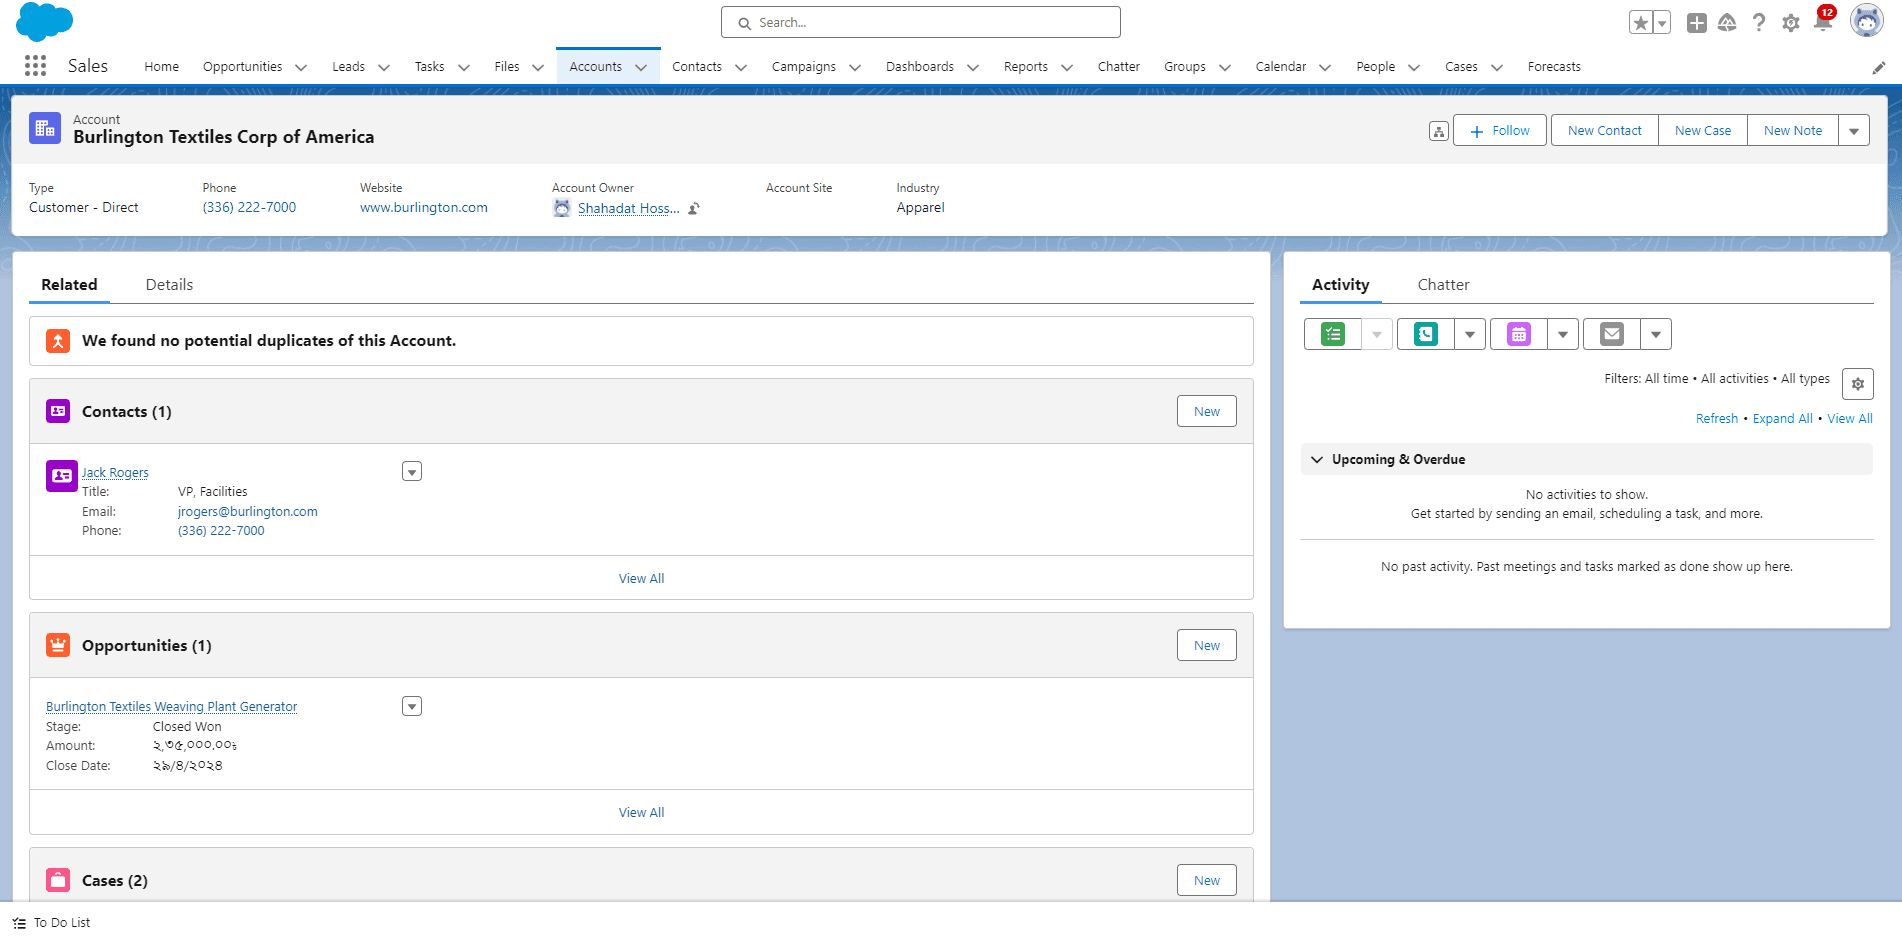
    You will be redirected to the account name page.
    <Frame>
      ![Customer Synchronization Rules](https://framerusercontent.com/images/EKdwTho0uyiTLEUAUd9VkZWR6sc.png)
    </Frame>
  </Step>

  <Step>
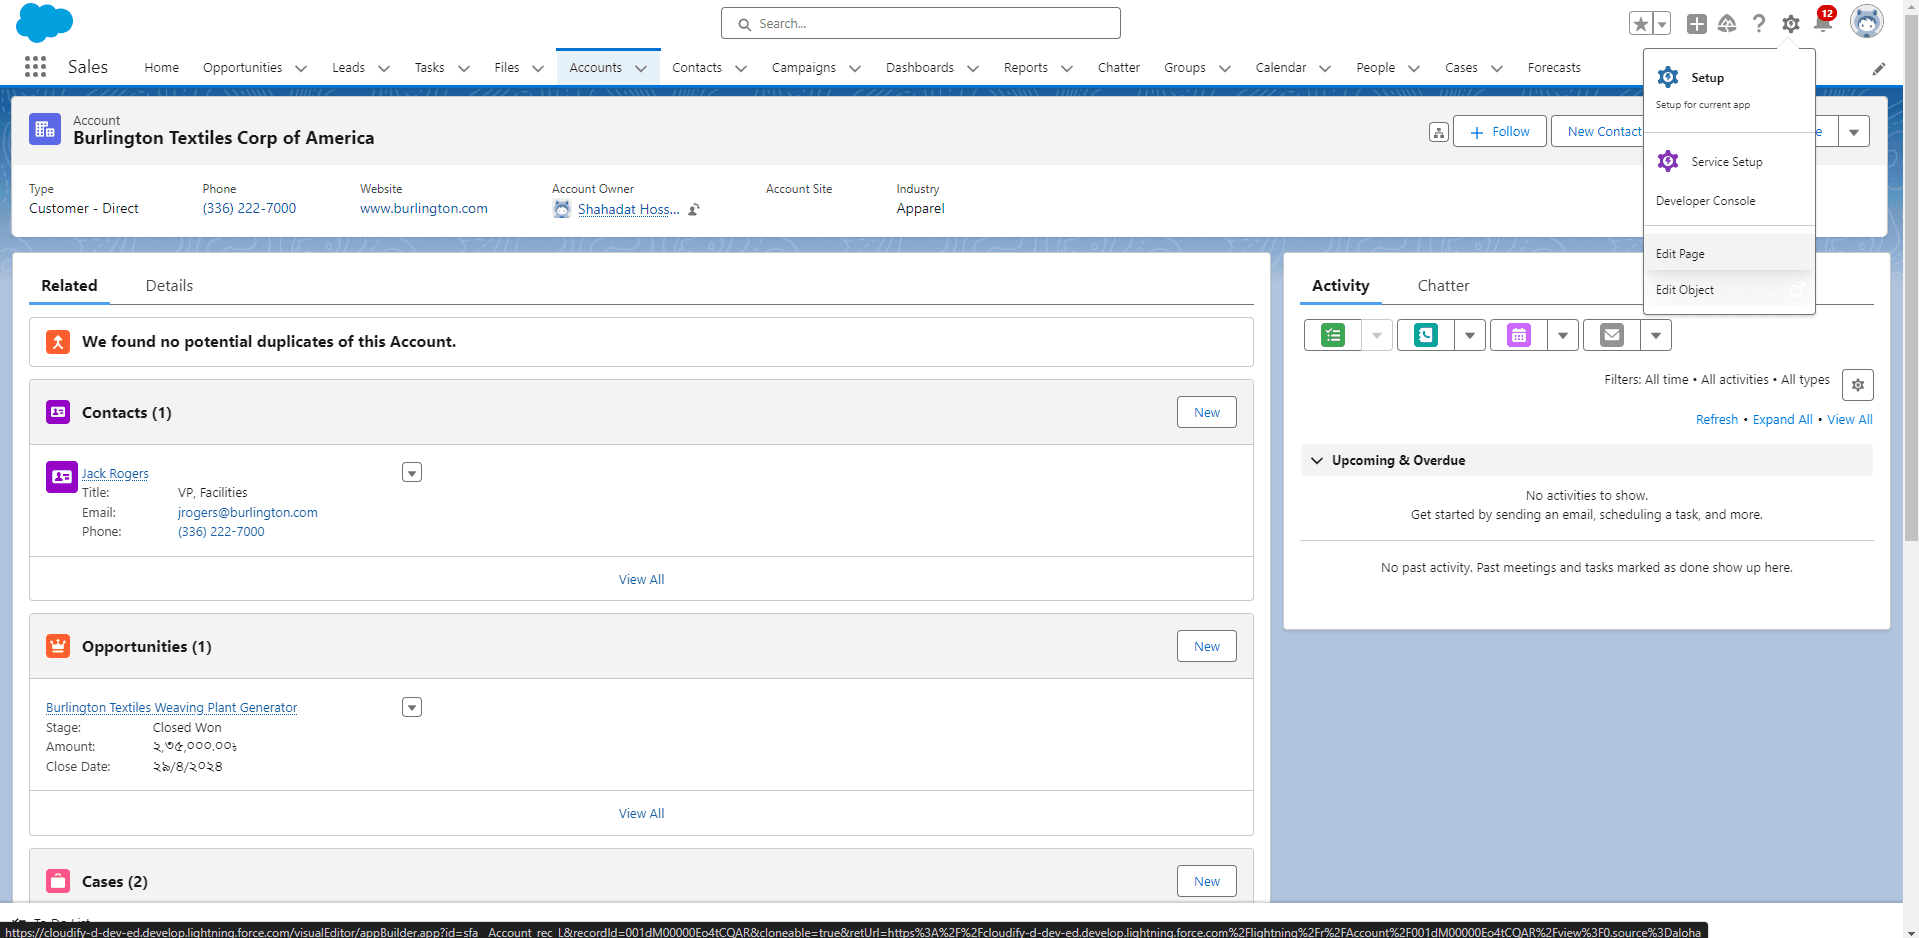
    Click **"Settings"** and then click **"Edit Page"**. The page will open in editing format.
    <Frame>
      ![Customer Synchronization Rules](https://framerusercontent.com/images/qZ1EOkRvurSUw3GhLbLsTWQP6vs.png)
    </Frame>
  </Step>

  <Step>
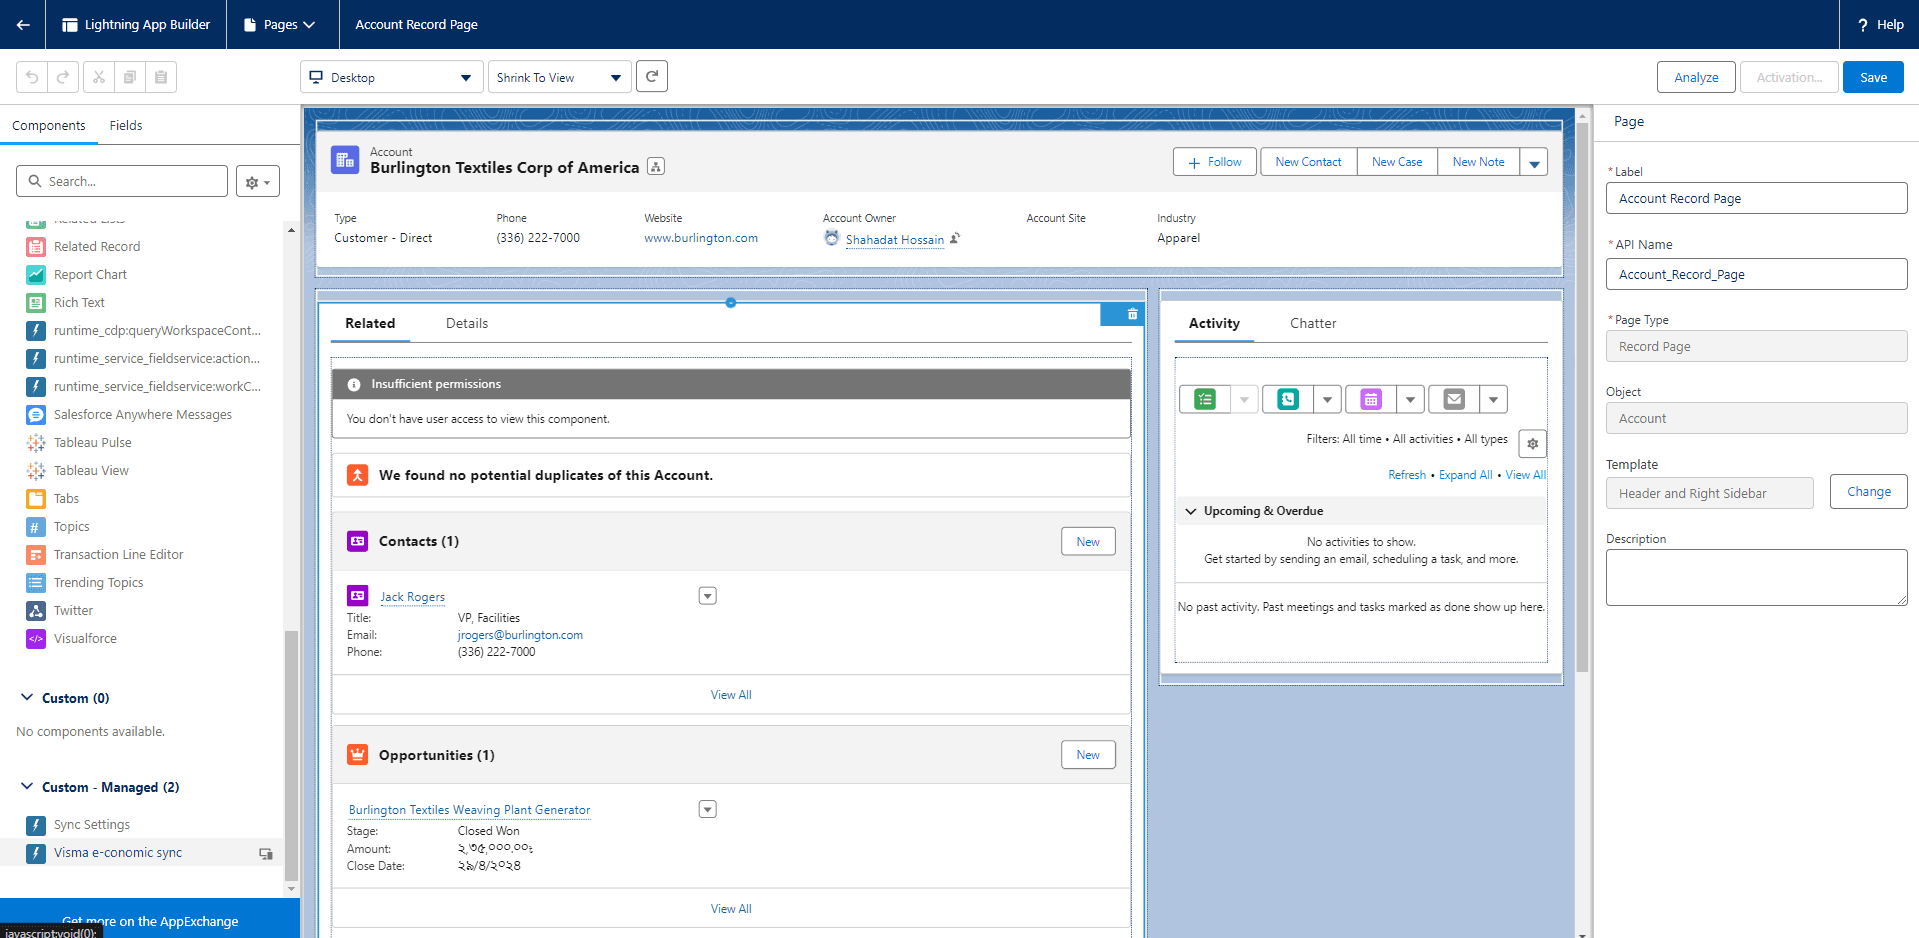
    On the left side of the screen, under **"Custom - Managed"**, you will find **Visma e-conomic**.
    <Frame>
      ![Customer Synchronization Rules](https://framerusercontent.com/images/WusUmQoqDQjdtD0L3ze9oAudA.png)
    </Frame>
  </Step>

  <Step>
    Click on it to proceed to the next step.
  </Step>

  <Step>
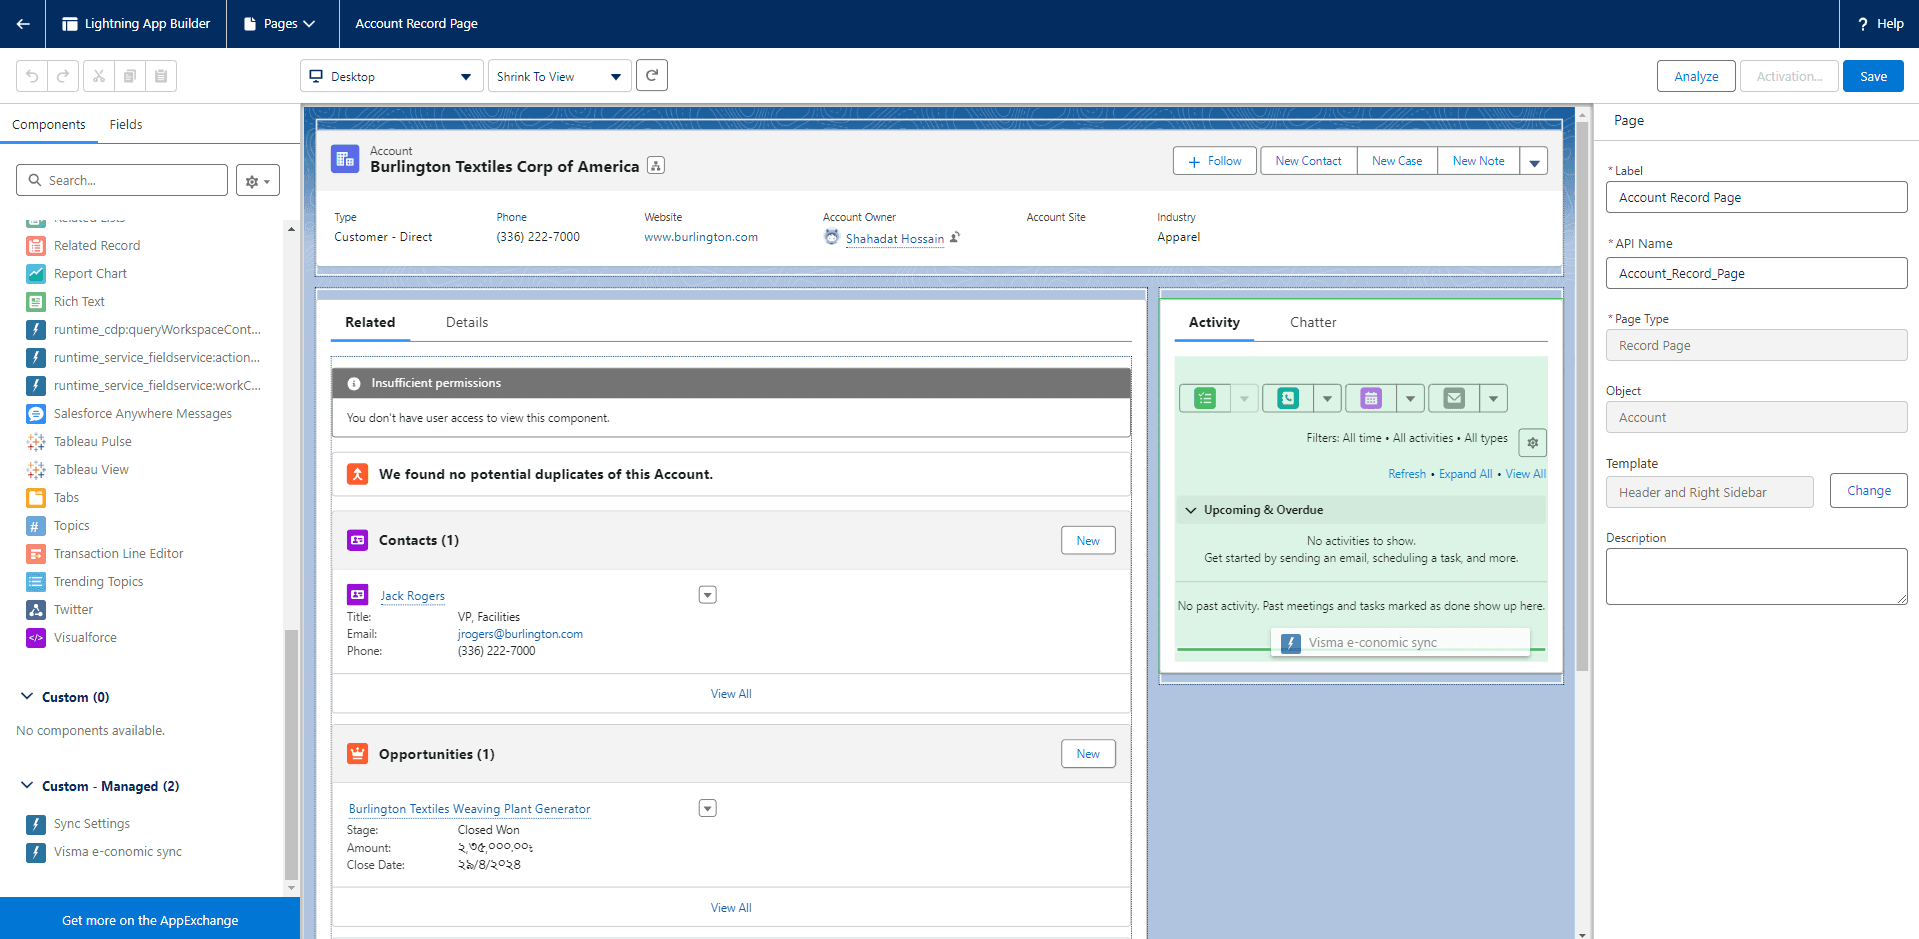
    Drag **Visma e-conomic** and drop it on the right side of the **"Activity"** page.
    <Frame>
      ![Customer Synchronization Rules](https://framerusercontent.com/images/woXL1AQZBDSEaQGqC8Son3234.png)
    </Frame>
  </Step>

  <Step>
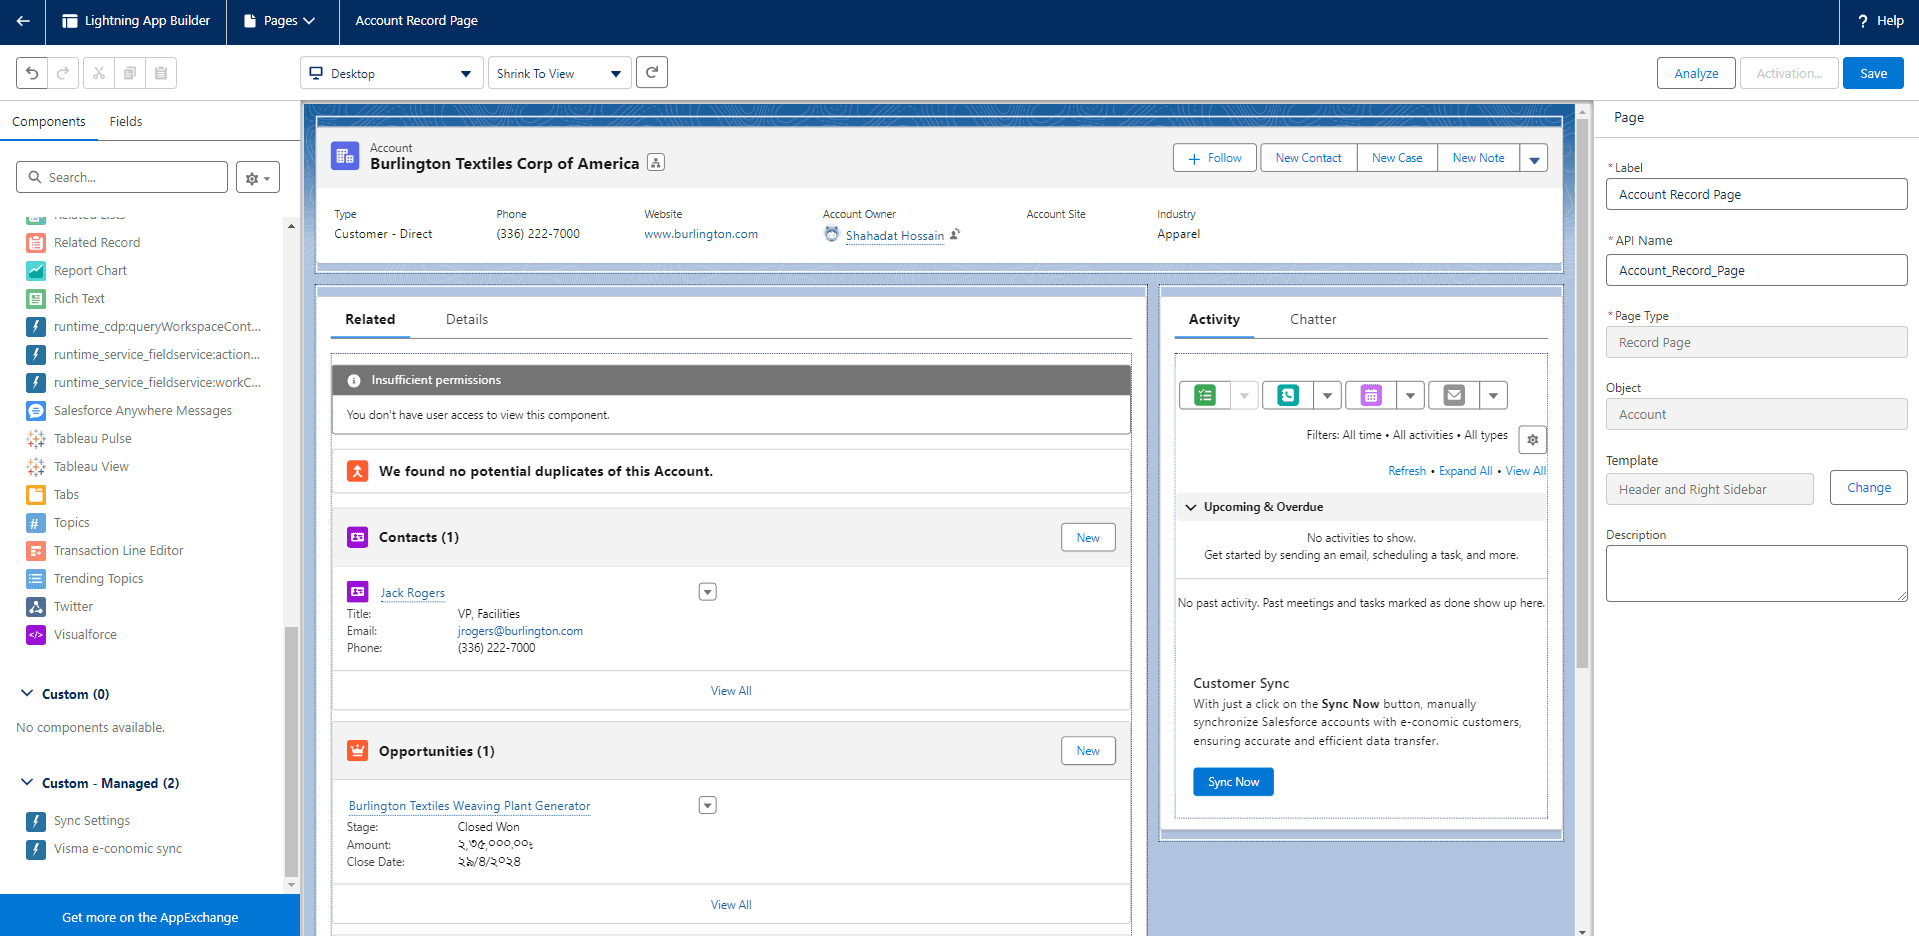
    The **"Customer Sync"** dialogue box will appear automatically.
    <Frame>
      ![Customer Synchronization Rules](https://framerusercontent.com/images/ARaGNN8cR1dUF3yiSzXn4LIjN4.png)
    </Frame>
  </Step>

  <Step>
    Click **"Save"**.
  </Step>

  <Step>
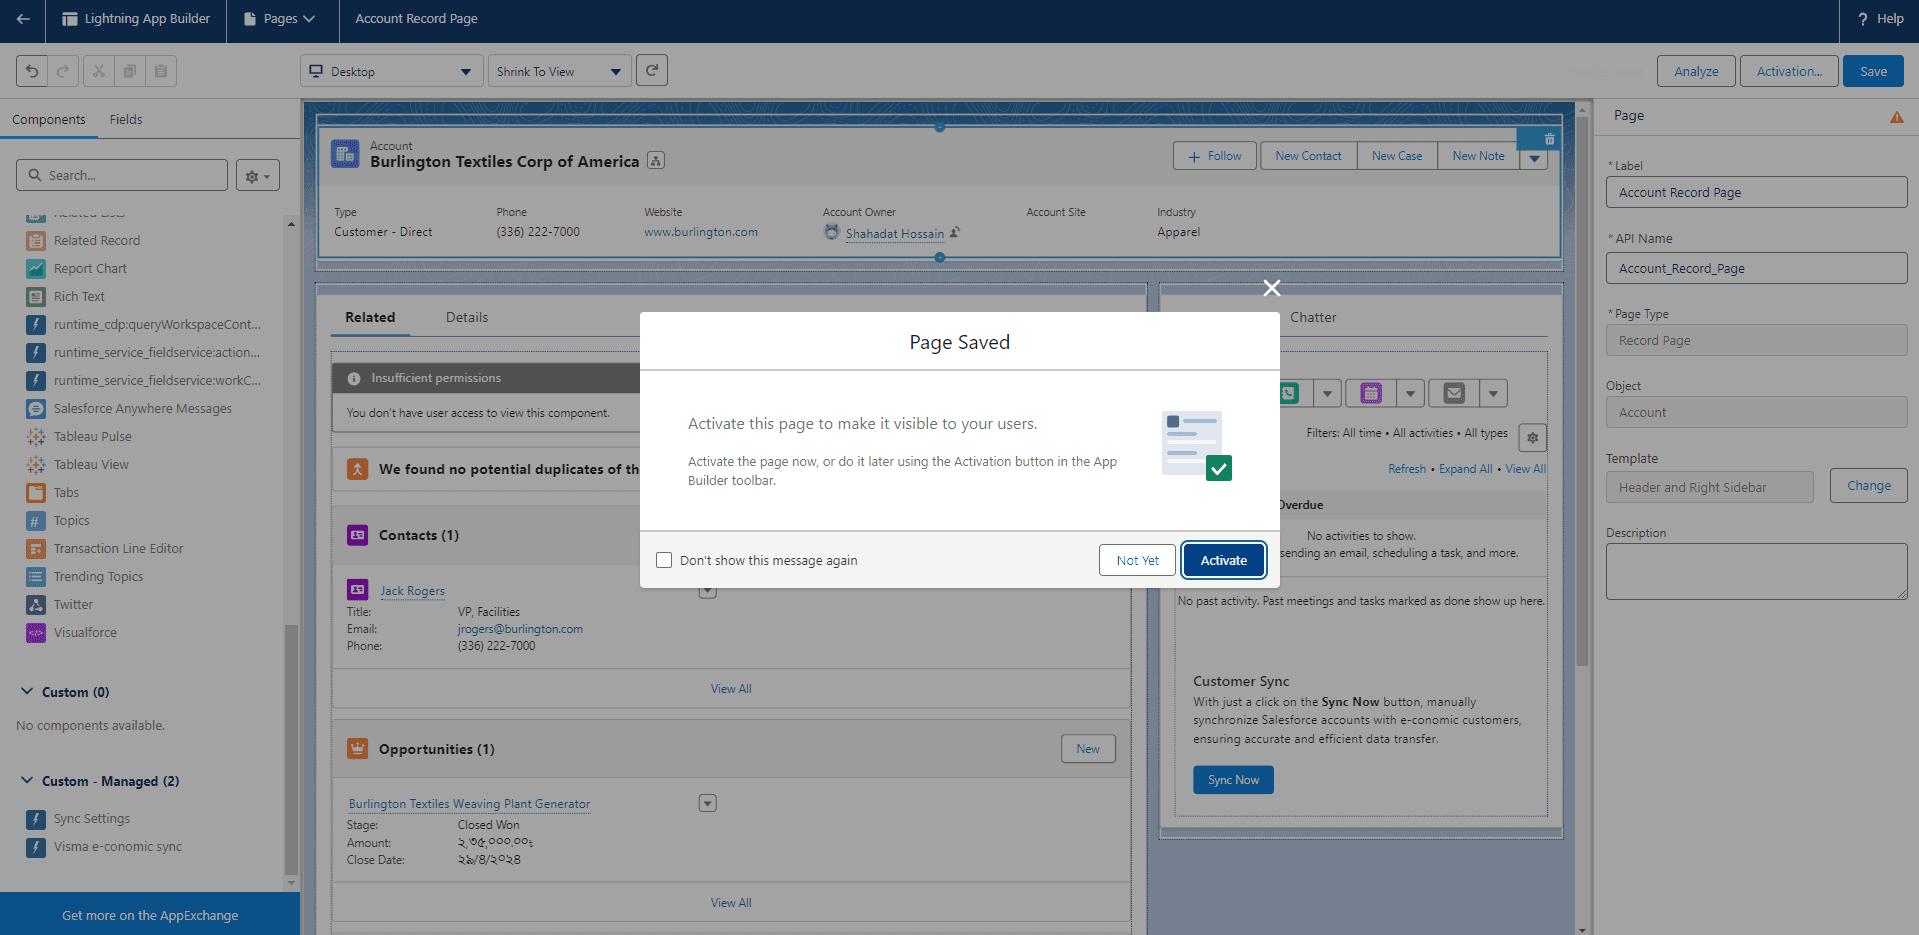
    A new confirmation screen will appear. Click **"Activate"**.
    <Frame>
      ![Customer Synchronization Rules](https://framerusercontent.com/images/jPDiA0oEhpQL4oaIiR7O3zfJwnM.png)
    </Frame>
  </Step>

  <Step>
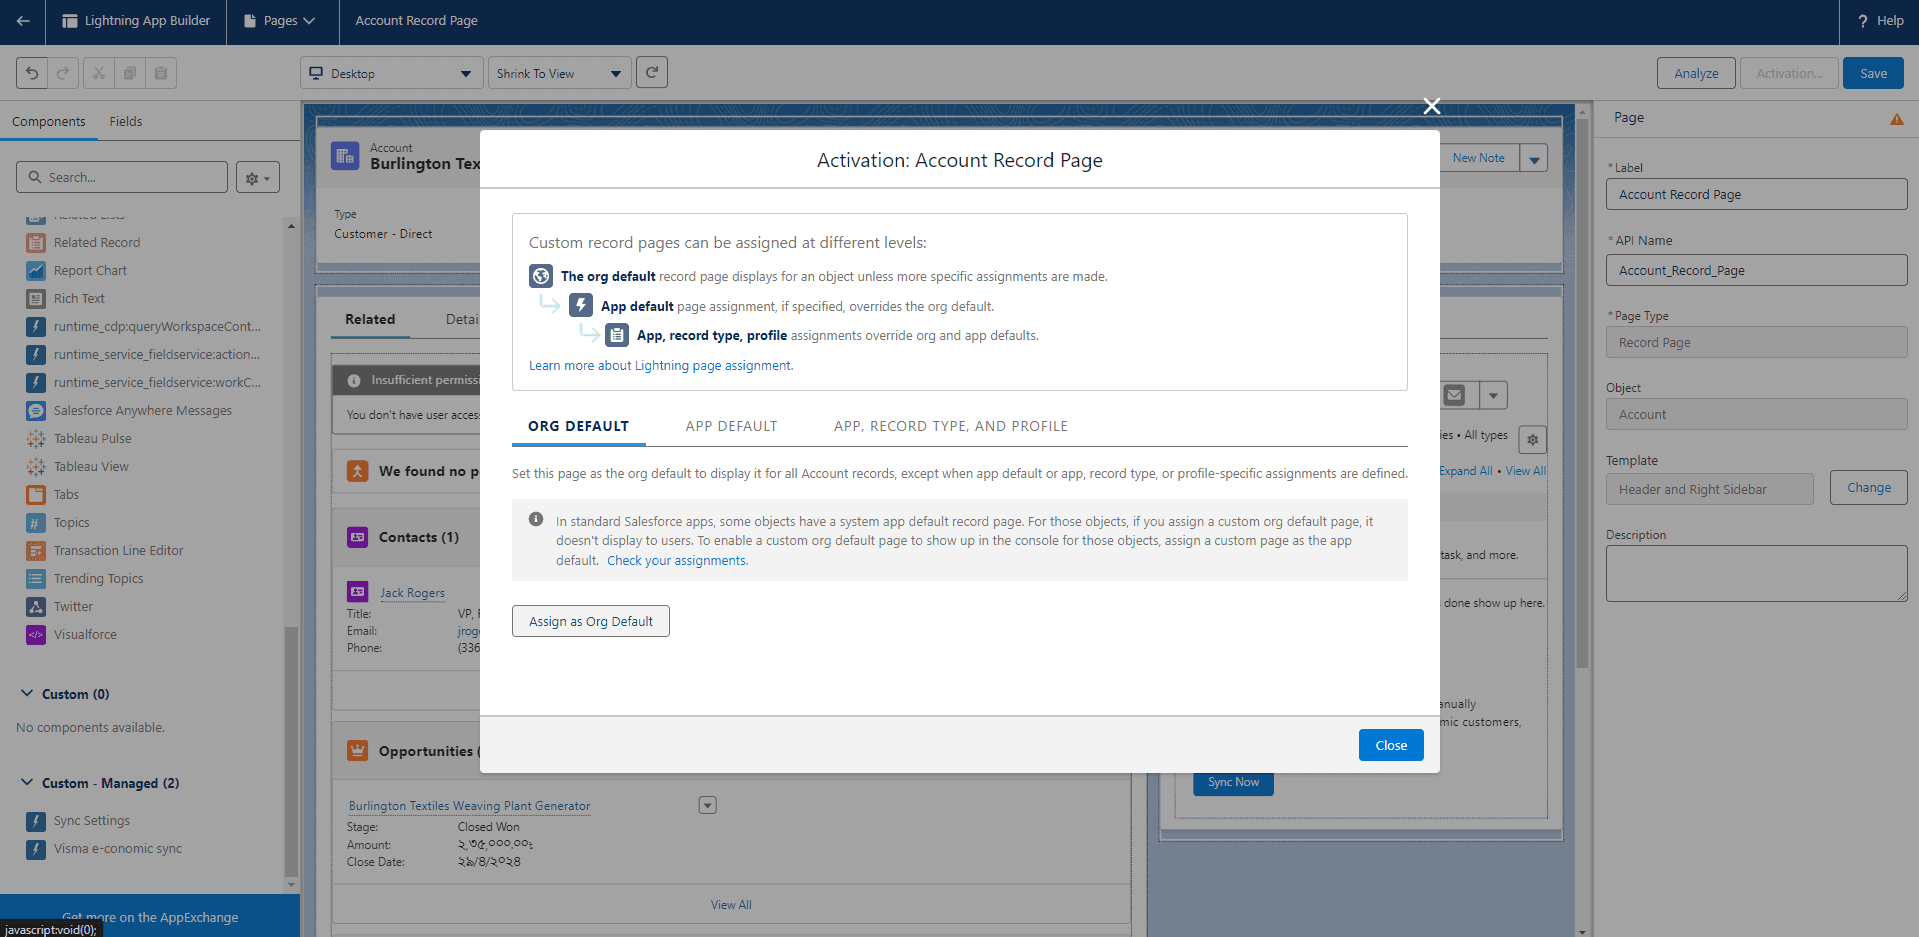
    A new dialogue box will appear. Scroll down and click **"Assign as Org Default"**.
    <Frame>
      ![Customer Synchronization Rules](https://framerusercontent.com/images/ADj3xfciuRnwDxQZU9Osz5sBZM.png)
    </Frame>
  </Step>

  <Step>
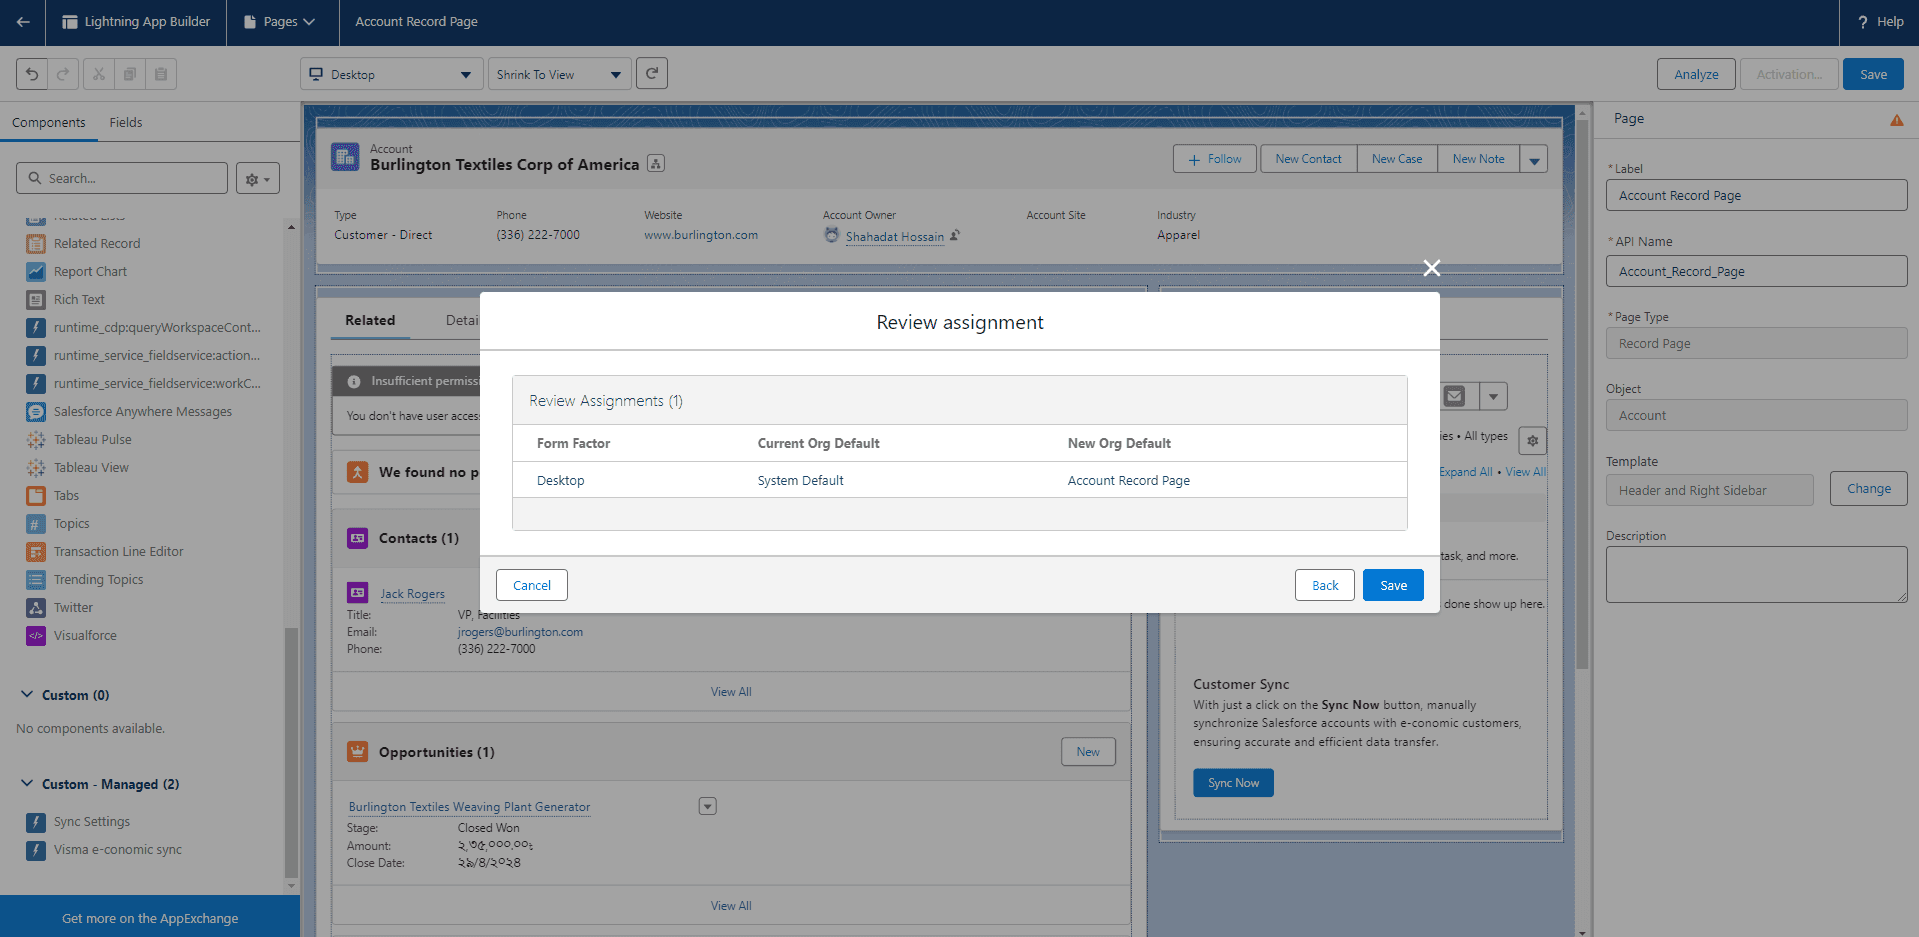
    You will see three options for form factors. Select the one that fits your needs:

    * **Desktop** — makes the default page available only on desktop computers.
    * **Phone** — makes the default page available only on mobile phones.
    * **Desktop and phone** — makes the default page accessible on both desktop and mobile.

    <Frame>
      ![Customer Synchronization Rules](https://framerusercontent.com/images/ISSxUhlHNbYN48CoiMEbVoviyKI.png)
    </Frame>
  </Step>

  <Step>
    Click **"Desktop"**, then click **"Save"**.
    <Frame>
      ![Customer Synchronization Rules](https://framerusercontent.com/images/XN472a5f2Gvma0erQ8M0AEjZKw.png)
    </Frame>
  </Step>

  <Step>
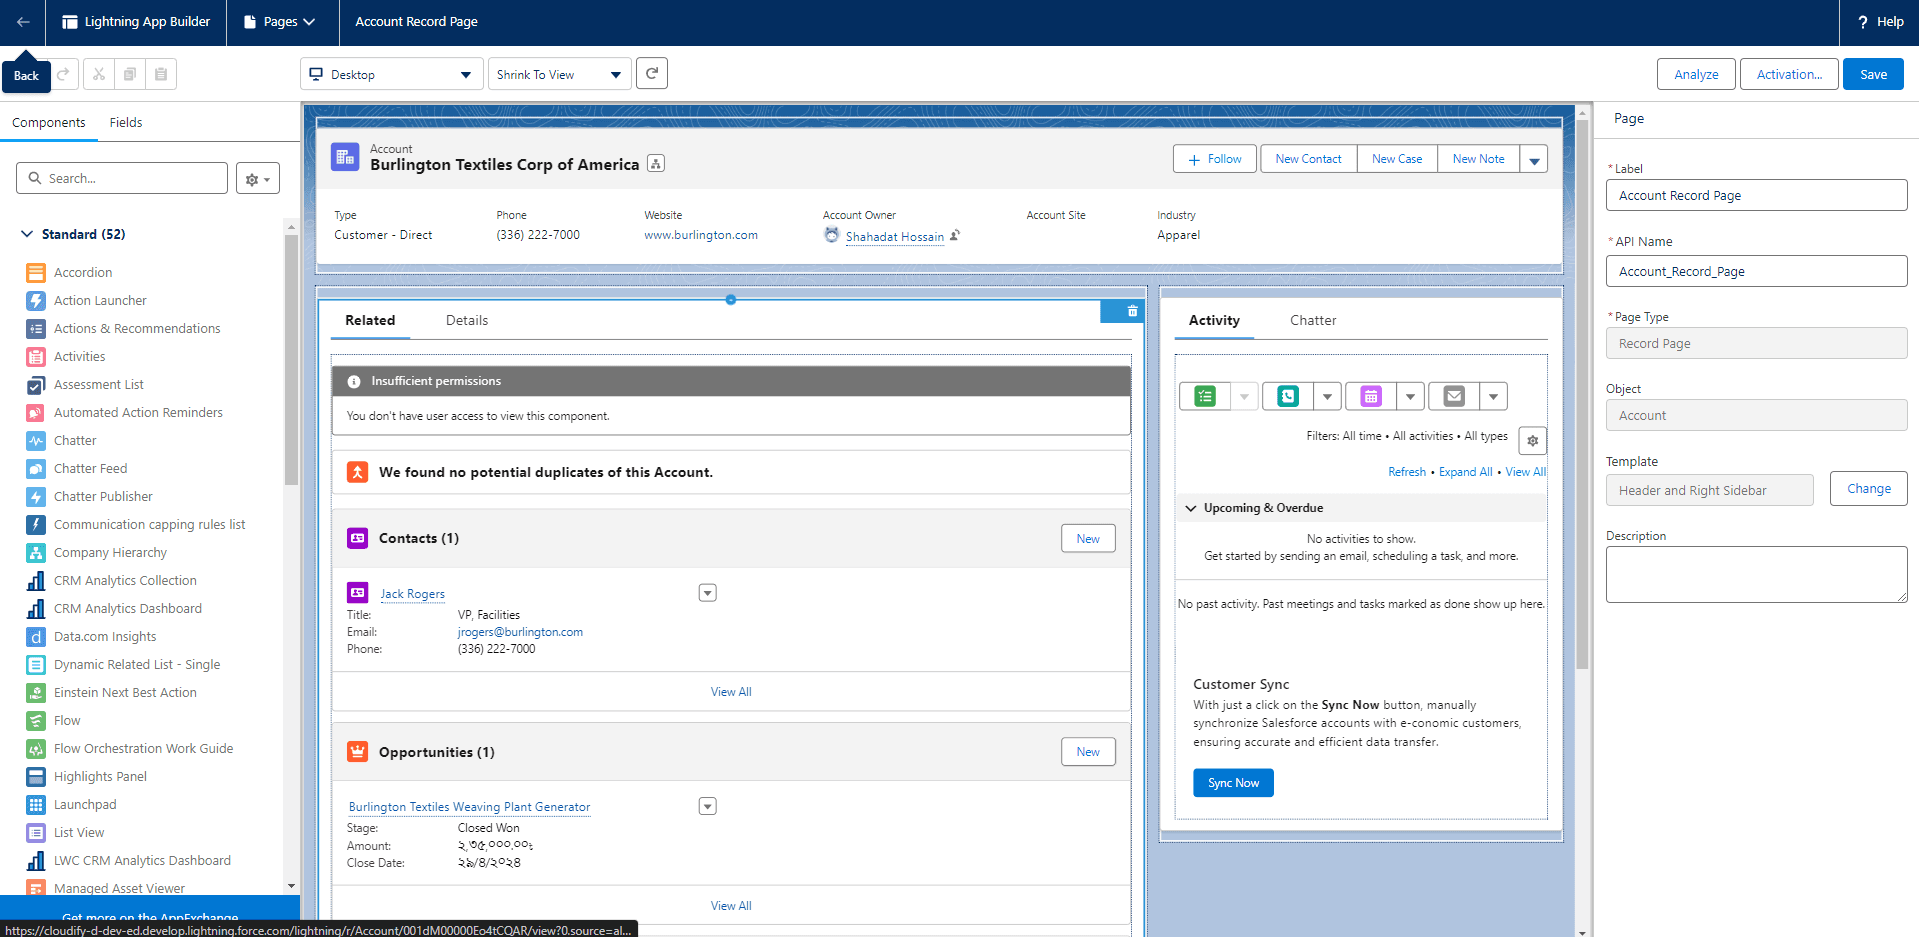
    Click the **back arrow** on the left side of the screen.
    <Frame>
      ![Customer Synchronization Rules](https://framerusercontent.com/images/AEd7Sq0dQ59DaugYtgke7ehrc.png)
    </Frame>
  </Step>

  <Step>
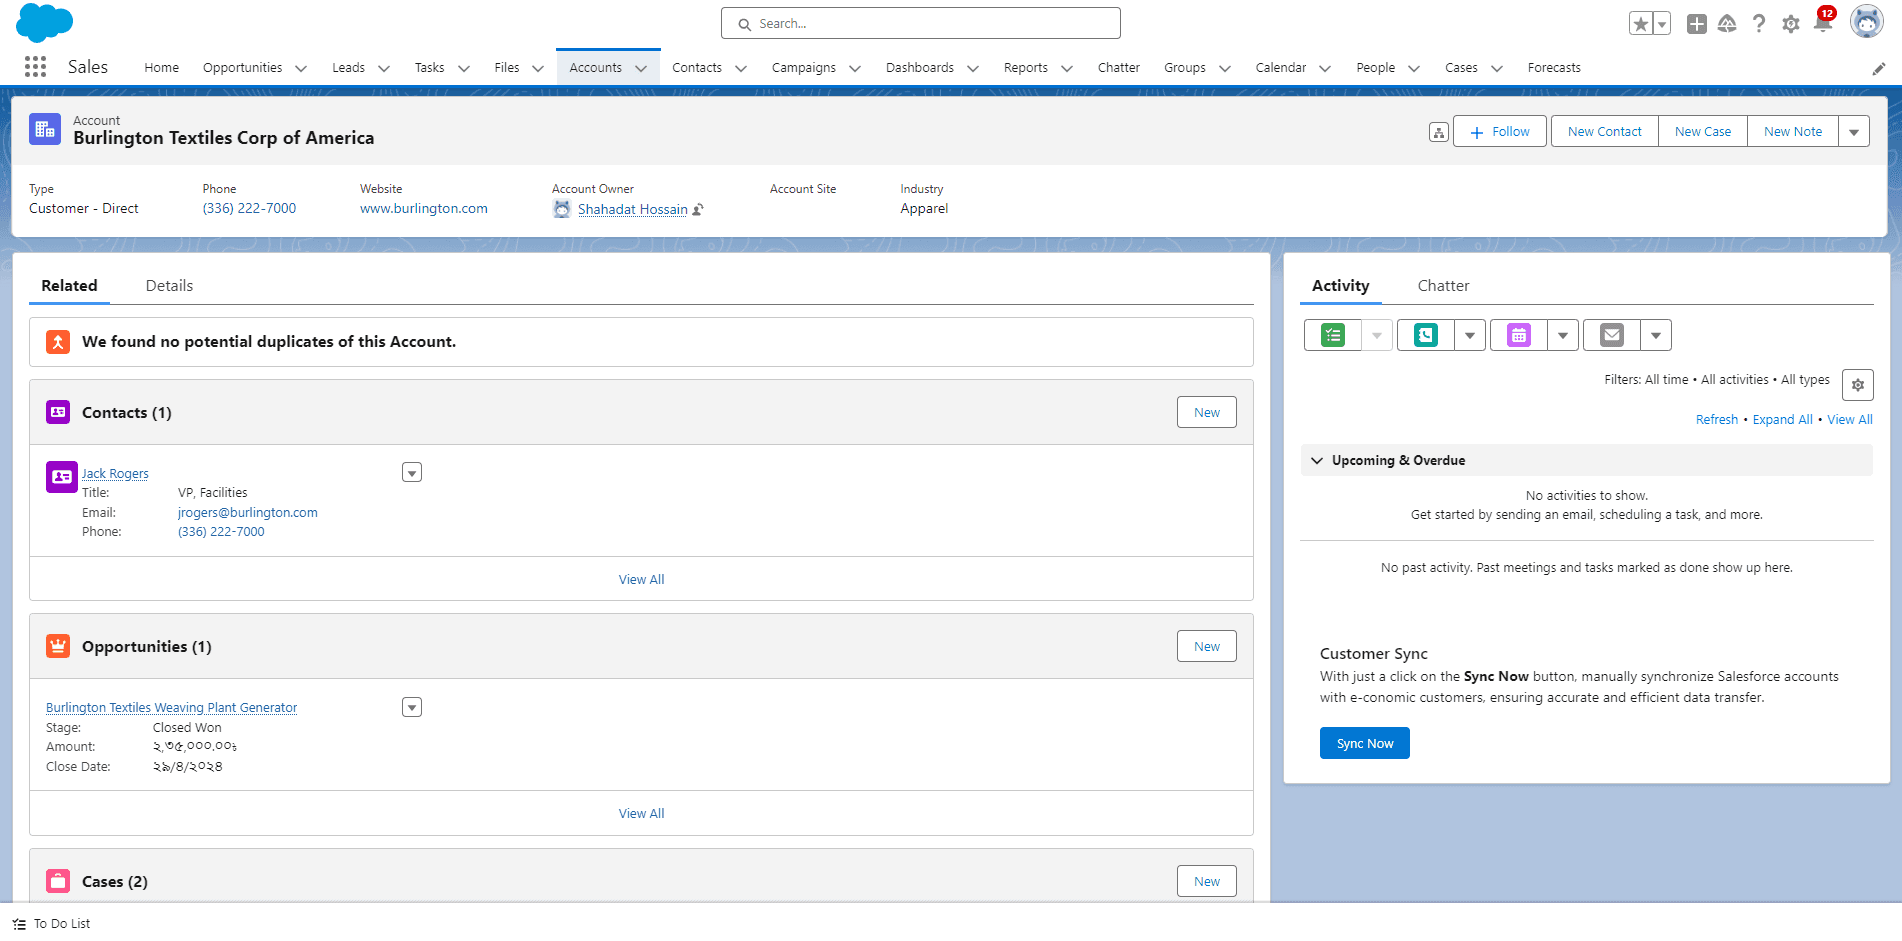
    Go to **Accounts**. You will find the **"Sync Now"** button under **"Customer Sync"** on the left side of the screen.
    <Frame>
      ![Customer Synchronization Rules](https://framerusercontent.com/images/G9ybB5KhZ059oVjlf5xVAMHPM8A.png)
    </Frame>
  </Step>
</Steps>

<Tip>
  **Got unique integration needs?**\
  Our custom team can build tailored integrations, specialized data mappings, and workflow automations to perfectly match your specific business processes.

  [Advanced integration settings](https://custom.cloudify.biz/)
</Tip>
