> ## Documentation Index
> Fetch the complete documentation index at: https://docs.cloudify.biz/llms.txt
> Use this file to discover all available pages before exploring further.
# Connect your account
> Install the Cloudify Shopify–Xero integration and connect your accounts in under 5 minutes.
## Step 1 — Welcome
After installing **Xero Integration by Cloudify** from the Shopify App Store, you'll see the welcome screen:
* **Instant invoices** — Automatic Xero invoice creation for every Shopify order.
* **Accurate sync** — Customer and tax data stays consistent across platforms.
* **Save time** — Save up to 5 minutes of manual entry per order.
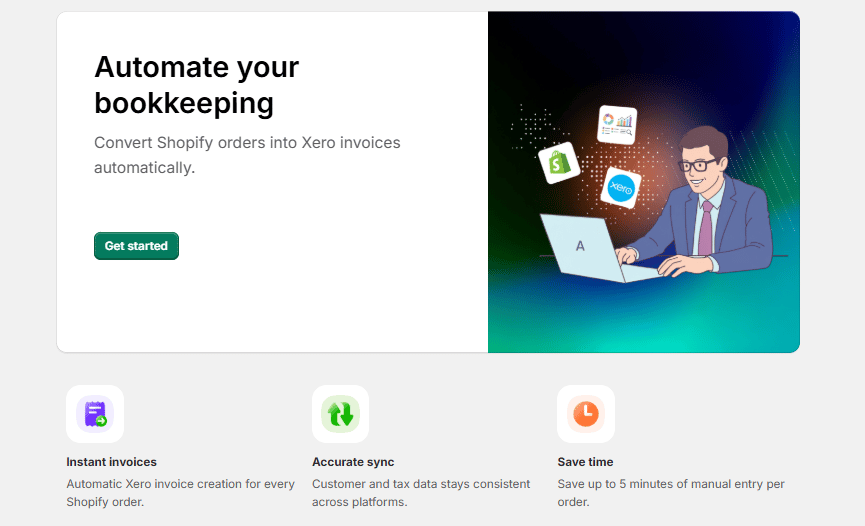 Click **"Get started"** to begin.
***
## Step 2 — Connect to Xero
Connect your Xero account to authorize the integration with Shopify.
Click **"Connect to Xero"** and sign in with your Xero credentials. Once authorized, the integration will have access to create invoices, contacts, and items in your Xero org.
Click **"Get started"** to begin.
***
## Step 2 — Connect to Xero
Connect your Xero account to authorize the integration with Shopify.
Click **"Connect to Xero"** and sign in with your Xero credentials. Once authorized, the integration will have access to create invoices, contacts, and items in your Xero org.
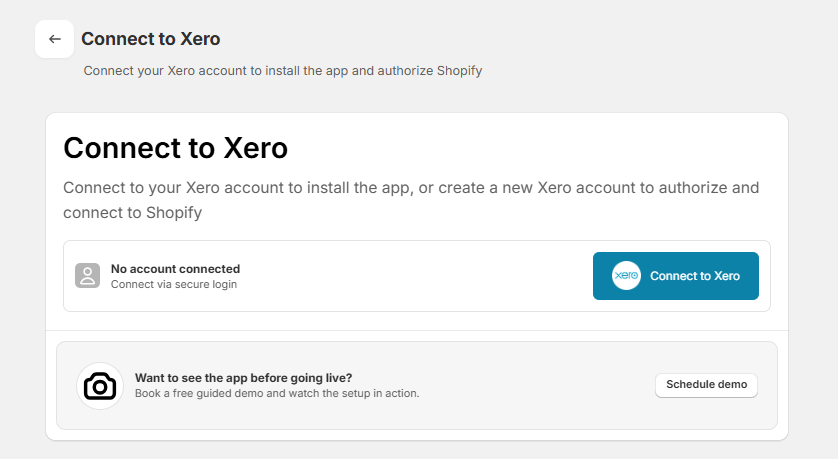 **Want to see the app before going live?** You can book a free guided demo before connecting — click **"Schedule demo"** on this screen.
***
## Step 3 — Select Synchronization Mode
Choose how your Shopify sales and orders should sync to Xero. This is the most important decision in the setup.
**Want to see the app before going live?** You can book a free guided demo before connecting — click **"Schedule demo"** on this screen.
***
## Step 3 — Select Synchronization Mode
Choose how your Shopify sales and orders should sync to Xero. This is the most important decision in the setup.
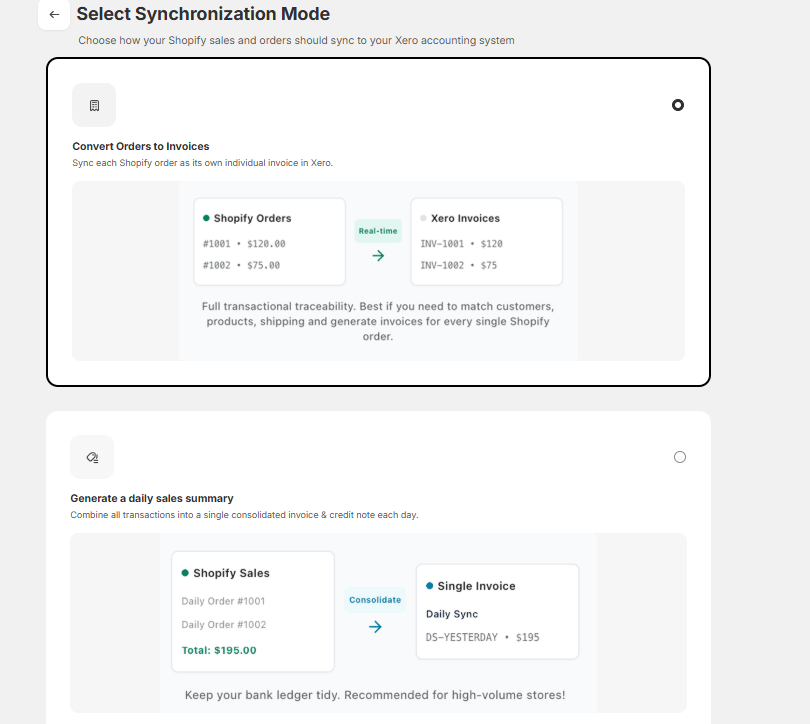 Sync each Shopify order as its own individual invoice in Xero.
Full transactional traceability. Best if you need to match customers, products, shipping, and generate invoices for every single Shopify order.
Combine all transactions into a single consolidated invoice and credit note each day.
Keep your bank ledger tidy. Recommended for high-volume stores.
What happens next depends on which mode you choose:
* **Convert Orders to Invoices** → Click **"Continue with Invoices"**. Cloudify auto-configures your settings and takes you to the **"You're All Set!"** screen (see Step 4 below).
* **Generate a Daily Sales Summary** → Click **"Continue to Settings"**. You'll be taken directly to the Sales Summary configuration page to set up transfer frequency, tax mapping, accounts, and payment methods. See the [Sales Summary Mode](/shopify-xero-sales-summary-mode) guide for full details.
***
## Step 4 — You're All Set!
This screen appears when you choose **Convert Orders to Invoices**. If you chose Daily Sales Summary, you'll configure settings on a separate page instead.
Cloudify auto-configures sensible defaults so you can start syncing immediately.
Sync each Shopify order as its own individual invoice in Xero.
Full transactional traceability. Best if you need to match customers, products, shipping, and generate invoices for every single Shopify order.
Combine all transactions into a single consolidated invoice and credit note each day.
Keep your bank ledger tidy. Recommended for high-volume stores.
What happens next depends on which mode you choose:
* **Convert Orders to Invoices** → Click **"Continue with Invoices"**. Cloudify auto-configures your settings and takes you to the **"You're All Set!"** screen (see Step 4 below).
* **Generate a Daily Sales Summary** → Click **"Continue to Settings"**. You'll be taken directly to the Sales Summary configuration page to set up transfer frequency, tax mapping, accounts, and payment methods. See the [Sales Summary Mode](/shopify-xero-sales-summary-mode) guide for full details.
***
## Step 4 — You're All Set!
This screen appears when you choose **Convert Orders to Invoices**. If you chose Daily Sales Summary, you'll configure settings on a separate page instead.
Cloudify auto-configures sensible defaults so you can start syncing immediately.
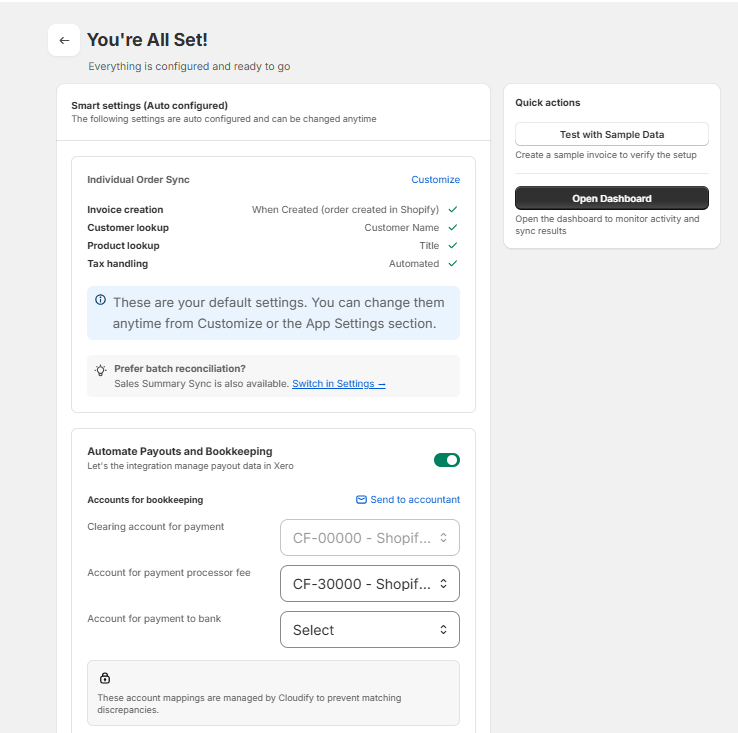 ### Smart Settings (Auto Configured)
These settings are applied automatically and can be changed anytime from the app settings:
| Setting | Default Value |
| -------------------- | --------------------------------------- |
| **Invoice creation** | When Created (order created in Shopify) |
| **Customer lookup** | Customer Name |
| **Product lookup** | Title |
| **Tax handling** | Automated |
These are your default settings. You can change them anytime from **Customize** or the **App Settings** section.
**Prefer batch reconciliation?** Sales Summary Sync is also available. Click **"Switch in Settings"** to change modes.
### Quick Actions
Use these to verify your setup before going live:
| Action | What It Does |
| ------------------------- | --------------------------------------------------------------------------------------- |
| **Test with Sample Data** | Creates a sample invoice in Xero so you can verify the setup without using real orders. |
| **Open Dashboard** | Opens the dashboard to monitor activity and sync results. |
### Automate Payouts and Bookkeeping
Toggle this on to let the integration manage payout data in Xero automatically.
### Smart Settings (Auto Configured)
These settings are applied automatically and can be changed anytime from the app settings:
| Setting | Default Value |
| -------------------- | --------------------------------------- |
| **Invoice creation** | When Created (order created in Shopify) |
| **Customer lookup** | Customer Name |
| **Product lookup** | Title |
| **Tax handling** | Automated |
These are your default settings. You can change them anytime from **Customize** or the **App Settings** section.
**Prefer batch reconciliation?** Sales Summary Sync is also available. Click **"Switch in Settings"** to change modes.
### Quick Actions
Use these to verify your setup before going live:
| Action | What It Does |
| ------------------------- | --------------------------------------------------------------------------------------- |
| **Test with Sample Data** | Creates a sample invoice in Xero so you can verify the setup without using real orders. |
| **Open Dashboard** | Opens the dashboard to monitor activity and sync results. |
### Automate Payouts and Bookkeeping
Toggle this on to let the integration manage payout data in Xero automatically.
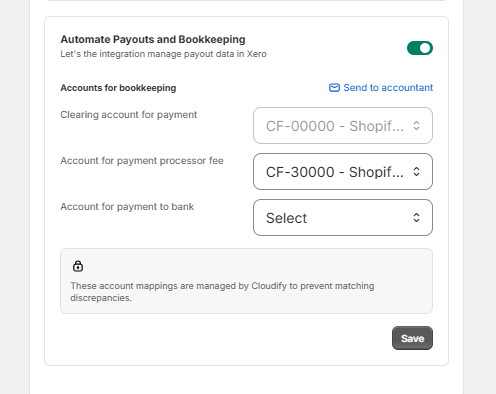 Once enabled, configure your bookkeeping accounts:
| Account | Default Xero Account |
| ------------------------------------- | -------------------------------------- |
| **Clearing account for payment** | `CF-00000` — Shopify-Payments Clearing |
| **Account for payment processor fee** | `CF-30000` — Shopify Fees |
| **Account for payment to bank** | Select your bank account |
You can also click **"Send to accountant"** to share these settings with your accountant for review.
These account mappings are managed by Cloudify to prevent matching discrepancies. Click **Save** when you're done.
***
Once enabled, configure your bookkeeping accounts:
| Account | Default Xero Account |
| ------------------------------------- | -------------------------------------- |
| **Clearing account for payment** | `CF-00000` — Shopify-Payments Clearing |
| **Account for payment processor fee** | `CF-30000` — Shopify Fees |
| **Account for payment to bank** | Select your bank account |
You can also click **"Send to accountant"** to share these settings with your accountant for review.
These account mappings are managed by Cloudify to prevent matching discrepancies. Click **Save** when you're done.
***