

Before you start
- A Lighthouse account with access to Settings
- A HubSpot account — you need permission to install apps/connect integrations in that HubSpot portal
- About 5 minutes
Connect HubSpot to Lighthouse
1
Open Connections in Lighthouse
In Lighthouse, go to Settings → Connections in the left-hand menu. If you haven’t added any connections yet, you’ll see “No connections available”.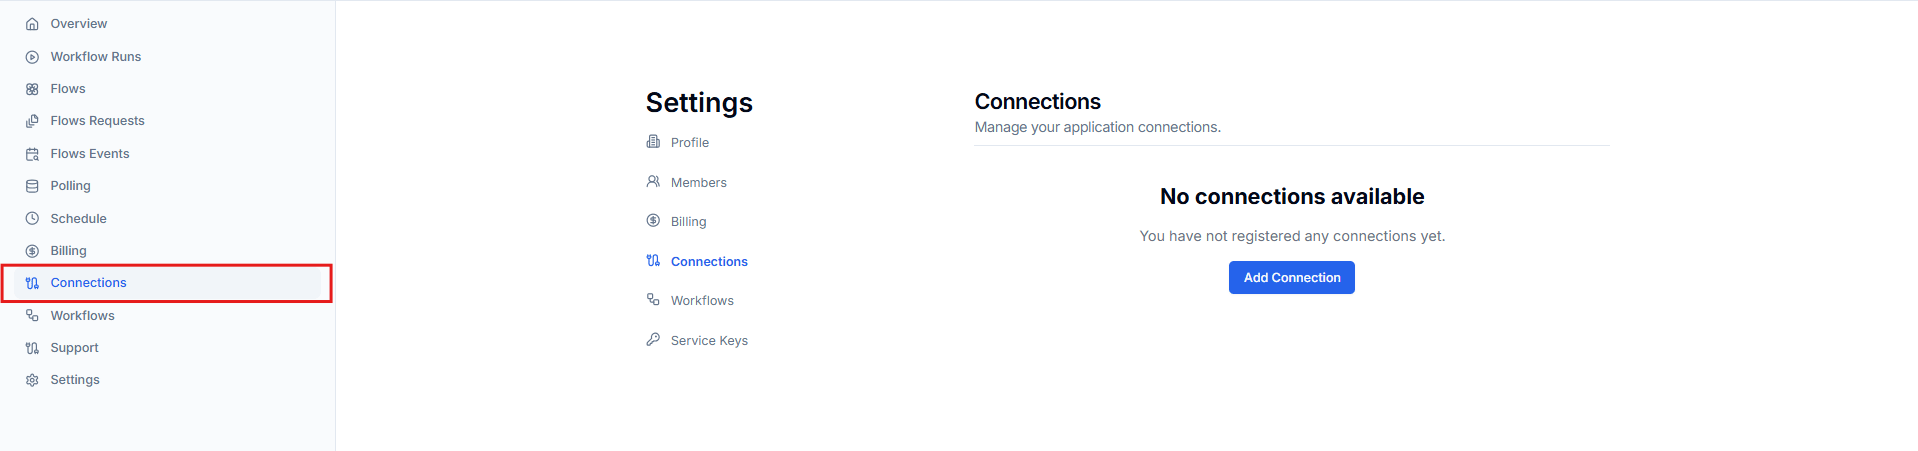
2
Add a new connection
Click Add Connection. A menu of available connections opens — type HubSpot in the Search connections box to find the HubSpot connection quickly.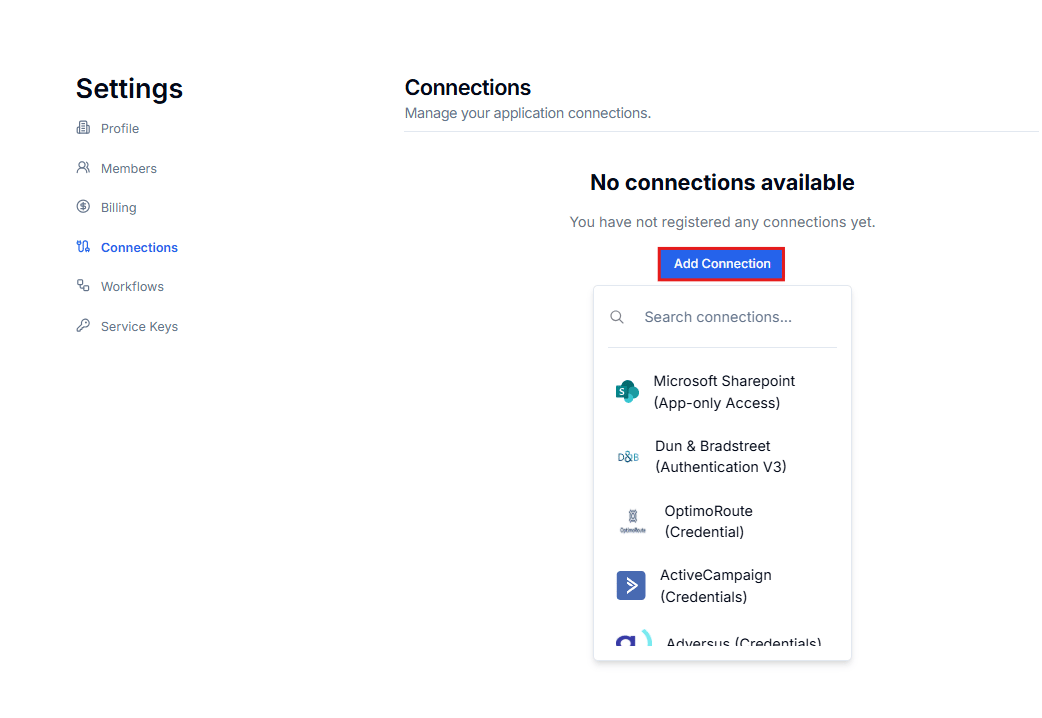
3
Select HubSpot (OAuth2)
Click HubSpot (OAuth2) in the search results.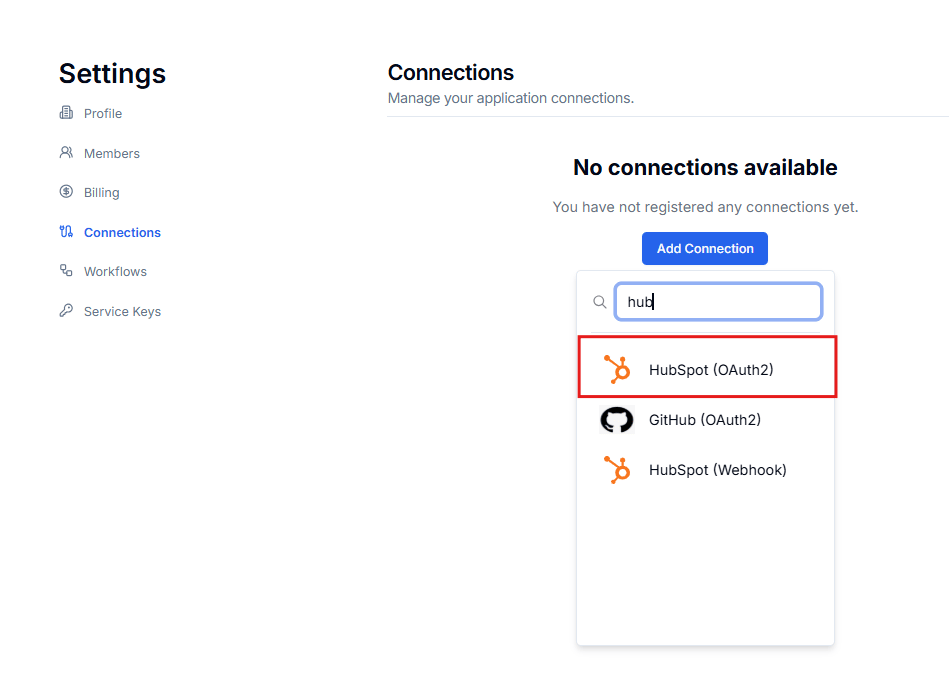
Choose HubSpot (OAuth2), not HubSpot (Webhook) — OAuth2 is the standard connection used for CRM monitoring.
4
Name the connection and review permissions
Enter a Name for the connection (for example,
HubSpot), then review Permissions & Scopes. The connection requests read-only access to your HubSpot data:-
crm.objects.companies.read— read company records -
crm.objects.contacts.read— read contact records -
crm.objects.deals.read— read deal records -
oauth— authorize the connection through HubSpot -
tickets— read ticket records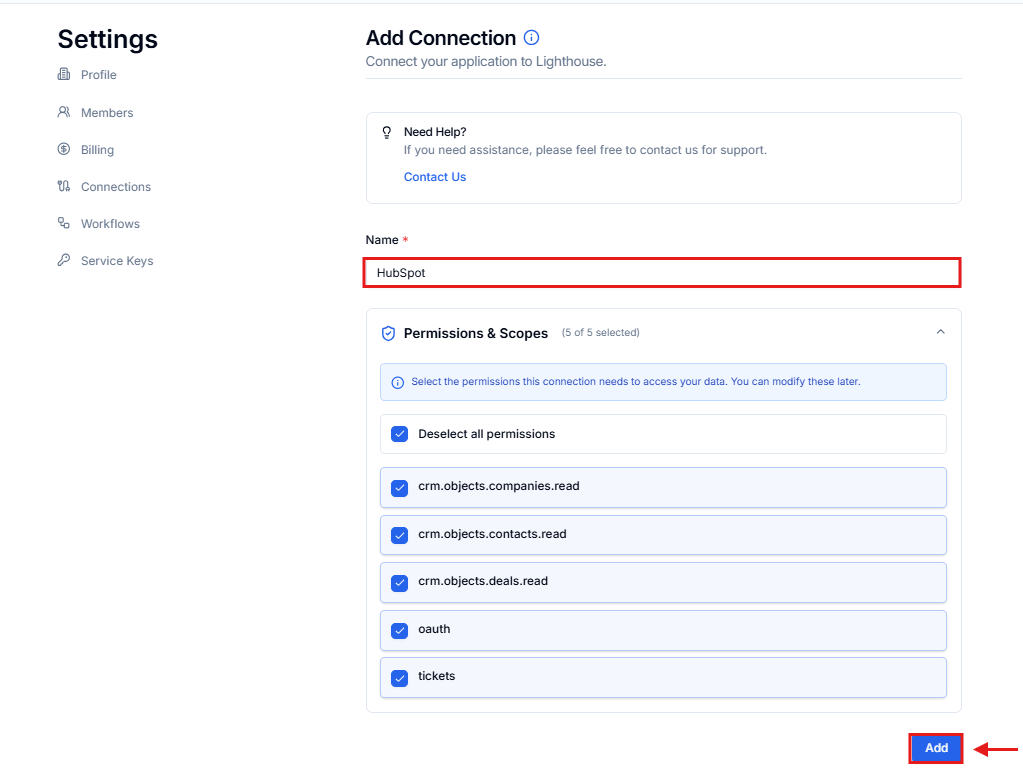
5
Confirm the redirect to HubSpot
A Review access before continuing dialog appears, explaining that you’ll be redirected to HubSpot to authorize the permissions you selected. Click Continue.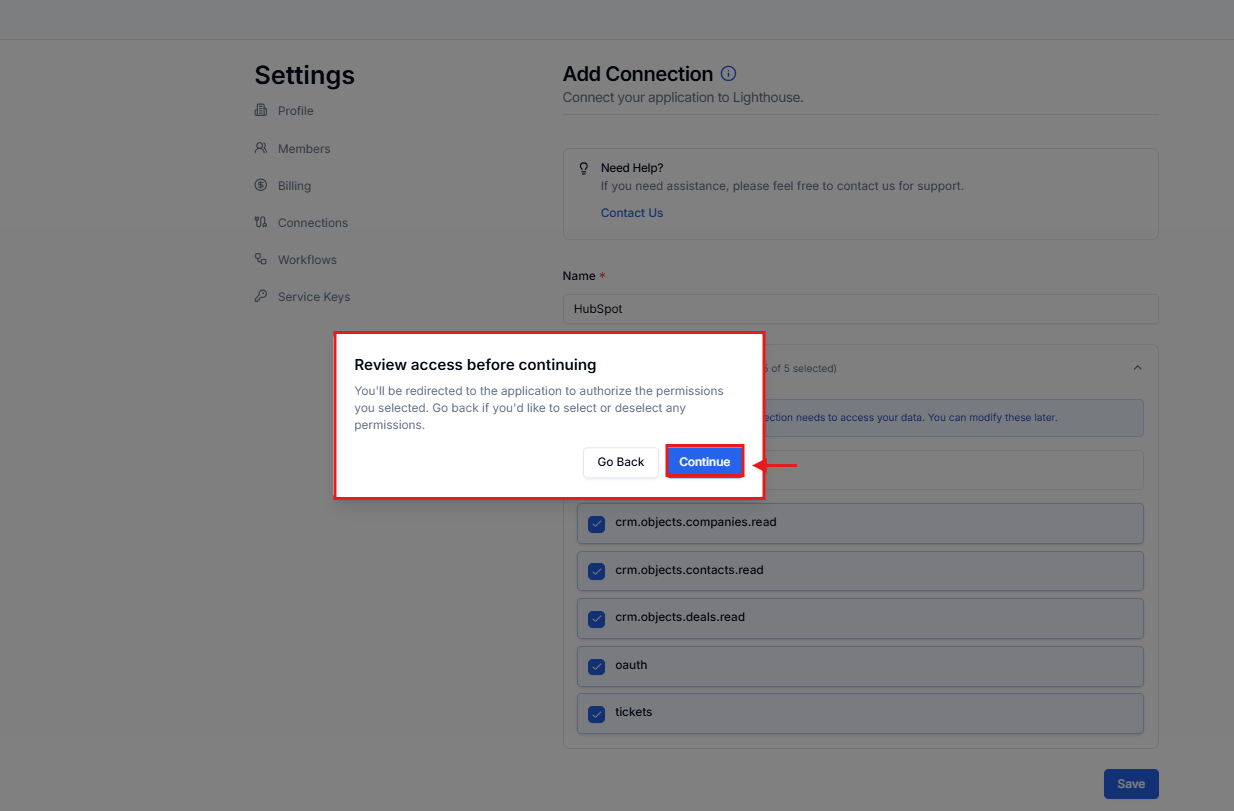
6
Choose your HubSpot account
You’re redirected to HubSpot (“Connecting Lighthouse by Cloudify to HubSpot”). Select the HubSpot account you want to connect and click Choose Account.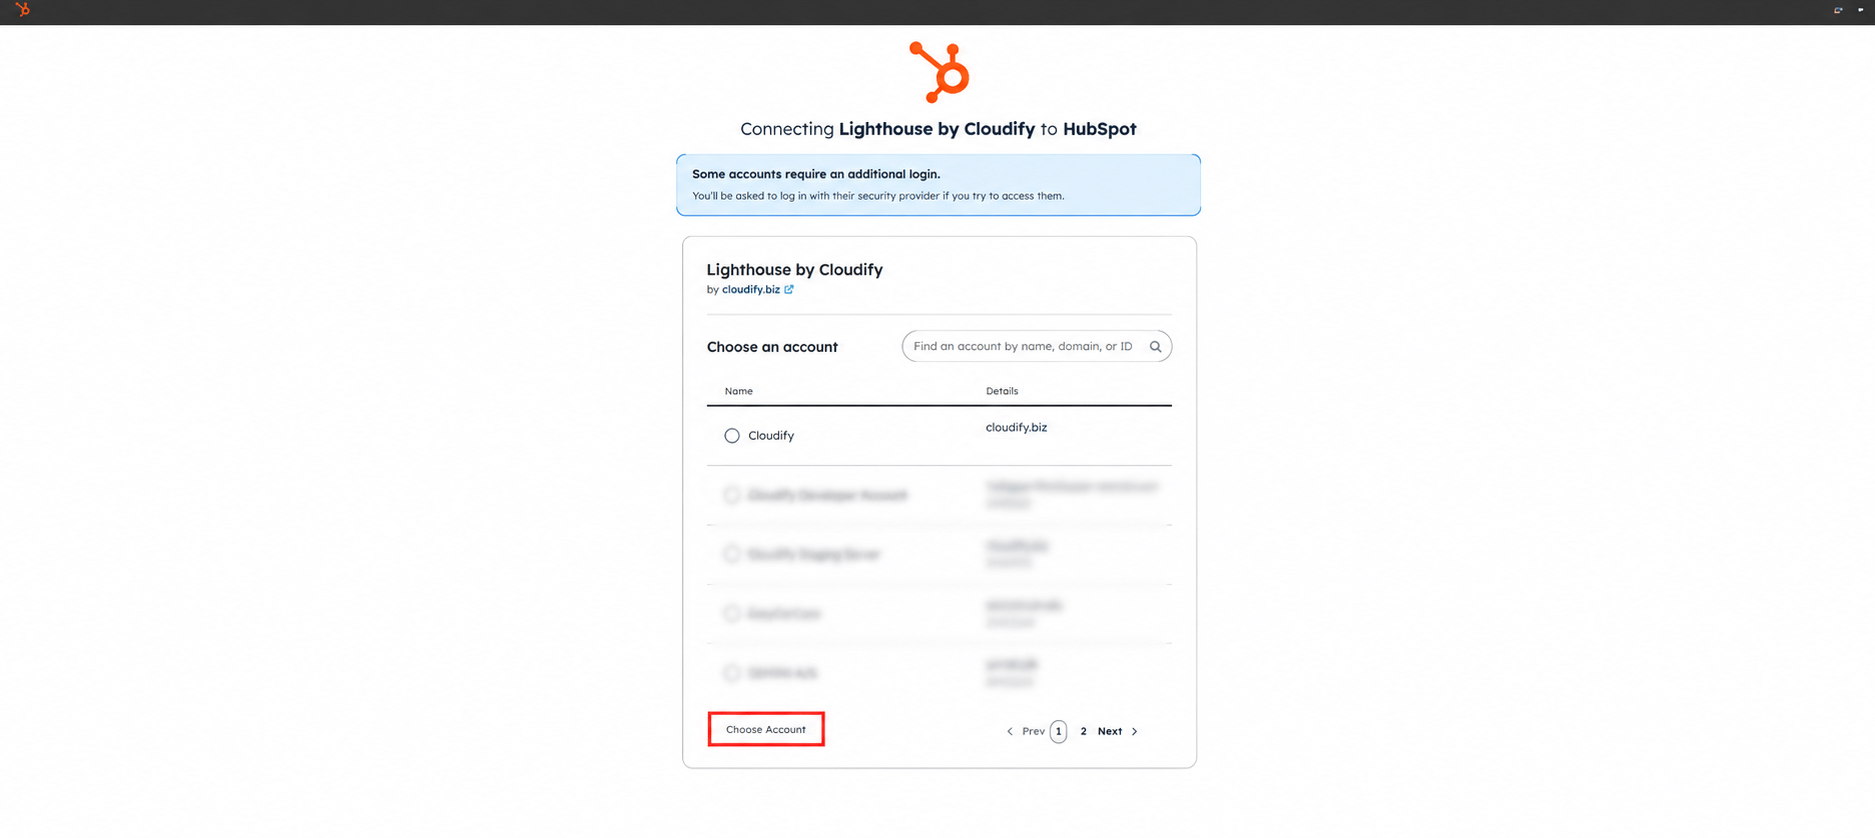
7
Authorize Lighthouse in HubSpot
Review what Lighthouse by Cloudify can access in your HubSpot account. Tick the acknowledgement checkbox, then click Connect app.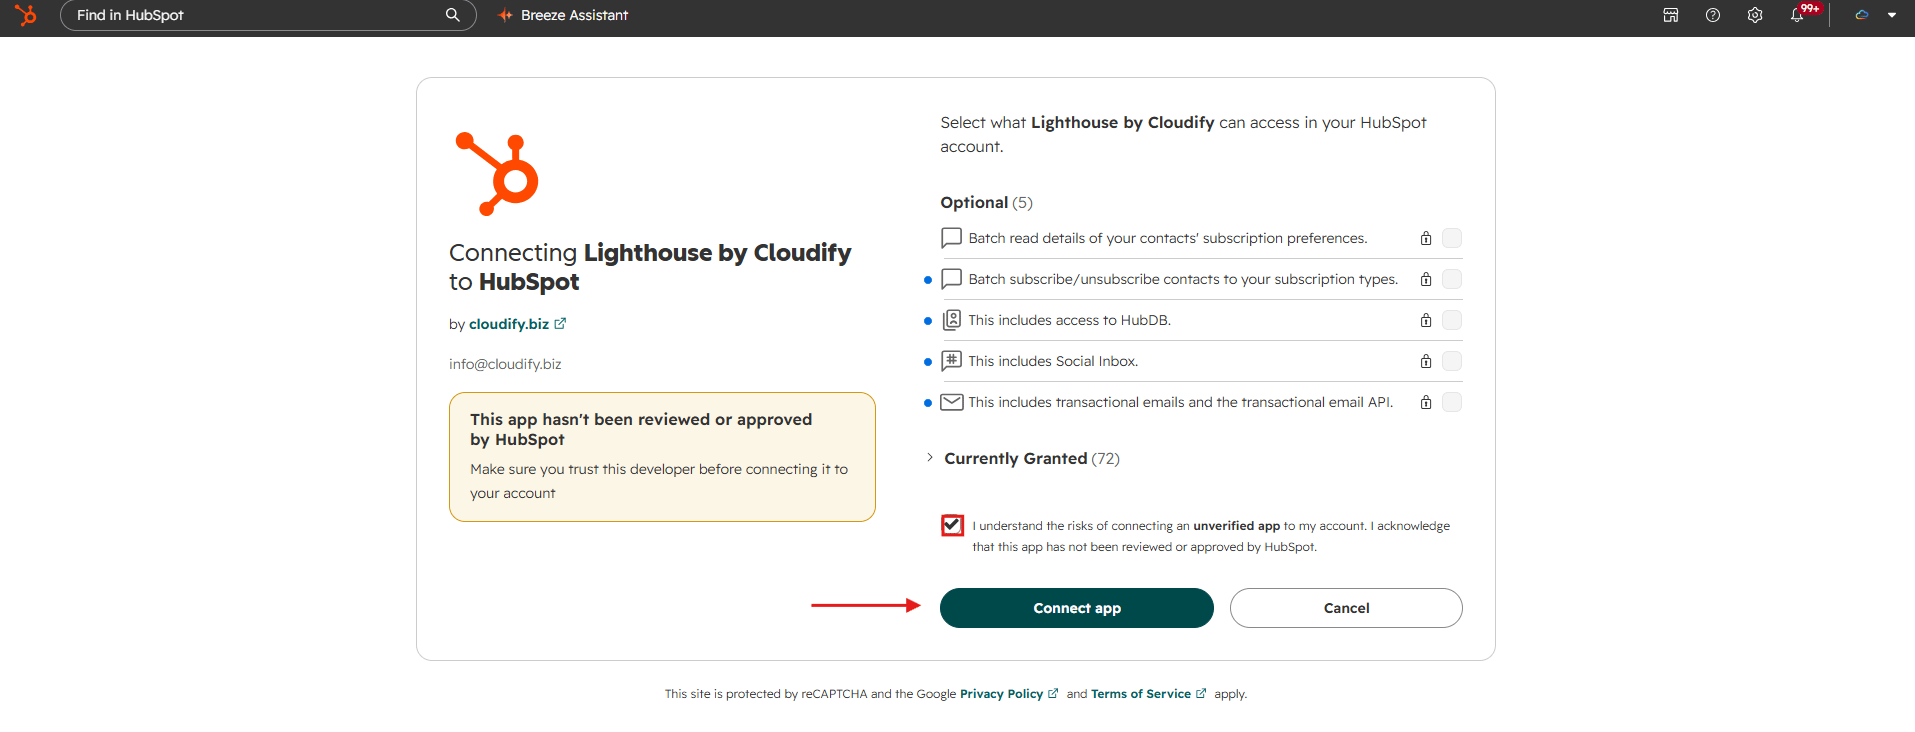
8
Verify the connection
You’re redirected back to Lighthouse. Under Settings → Connections, your HubSpot connection now appears with a green Connected badge and an OAuth2 label. The connection is live.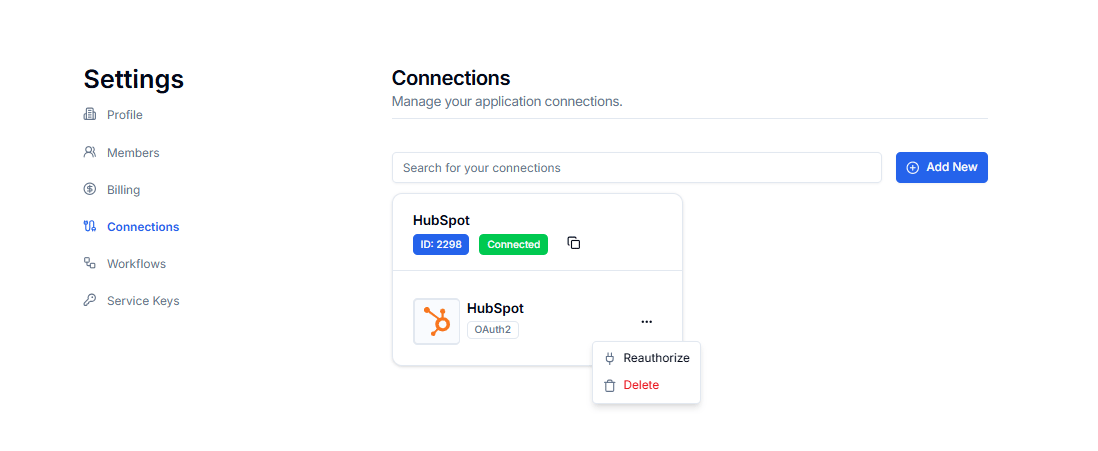
Managing the connection
- Reconnect: open the ••• menu on the HubSpot card in Settings → Connections and re-authorize.
- Disconnect: open the ••• menu on the HubSpot card and delete the connection.
Troubleshooting
I can't find HubSpot in the connection list
I can't find HubSpot in the connection list
Click Add Connection and type **HubSpot **in the Search connections box at the top of the menu. Select HubSpot (OAuth2) from the results.
The connection shows as disconnected
The connection shows as disconnected
Tokens can expire if permissions change in HubSpot. Reconnect from the ••• menu on the HubSpot card in Settings → Connections and complete the HubSpot authorization again.