1
Navigate to the Stripe App
2
Open the Stripe Invoice Sync app from the AppSource Marketplace.
3
Search for “Cloudify Business central”
4
Click on the ‘Install App’ button. You’ll be redirected to the Stripe app page.
1
Complete the authorization process for Stripe. Click “Install app”
2
Connect your Business central account when prompted. Click “Connect Business Central”
3
You’ll be guided to the Business Central authentication screen. Connect your Business Central account and proceed to the next step.
4
Choose the appropriate environment and company for your Business Central account and continue to the next step.
5
To sync with Stripe, you will first need to upload and deploy the extension in your Business Central account. Click “here” download the extension.
6
In Dynamics 365 Business Central. (Make sure you are logged into the same Company and Environment as selected in the previous window) use search to open the Extension Management page. Click on Grid and Click “Business Central”. 
7
Select the environment that you want to access. Click “Ok” 
8
Search Extension Management in Search bar. Click “Extension Management”
9
In Installed Extension you can search MS Business central sync. Click “MS Business central sync”. Click three dots & “Install” 
10
Click “Install” 
11
Click “Manage”. Click “Upload Extension” 
12
Click Three dots in “Select app file” section.
13
Click “Drop a file here to upload” to upload extension. 
14
After uploaded the extension click “Deploy”. 
15
Click “Ok” 
16
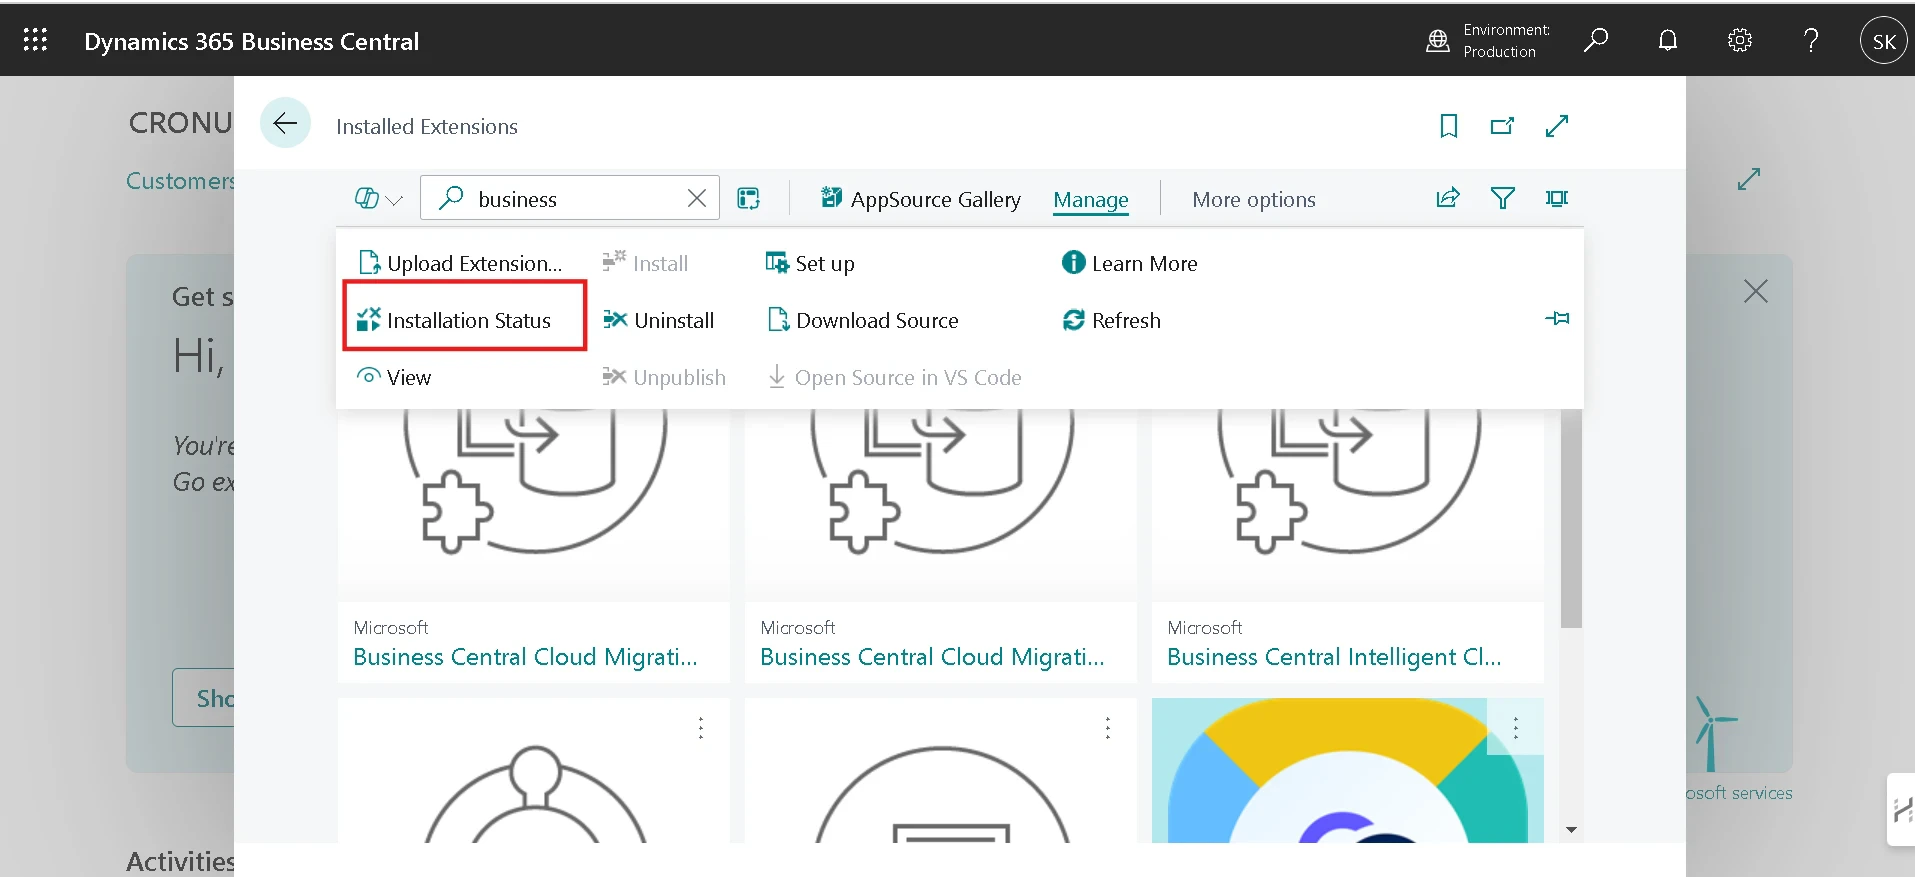
Click “Installation Status” to check the status for upload process for Extension.