

Setting Up the UI Extension
1
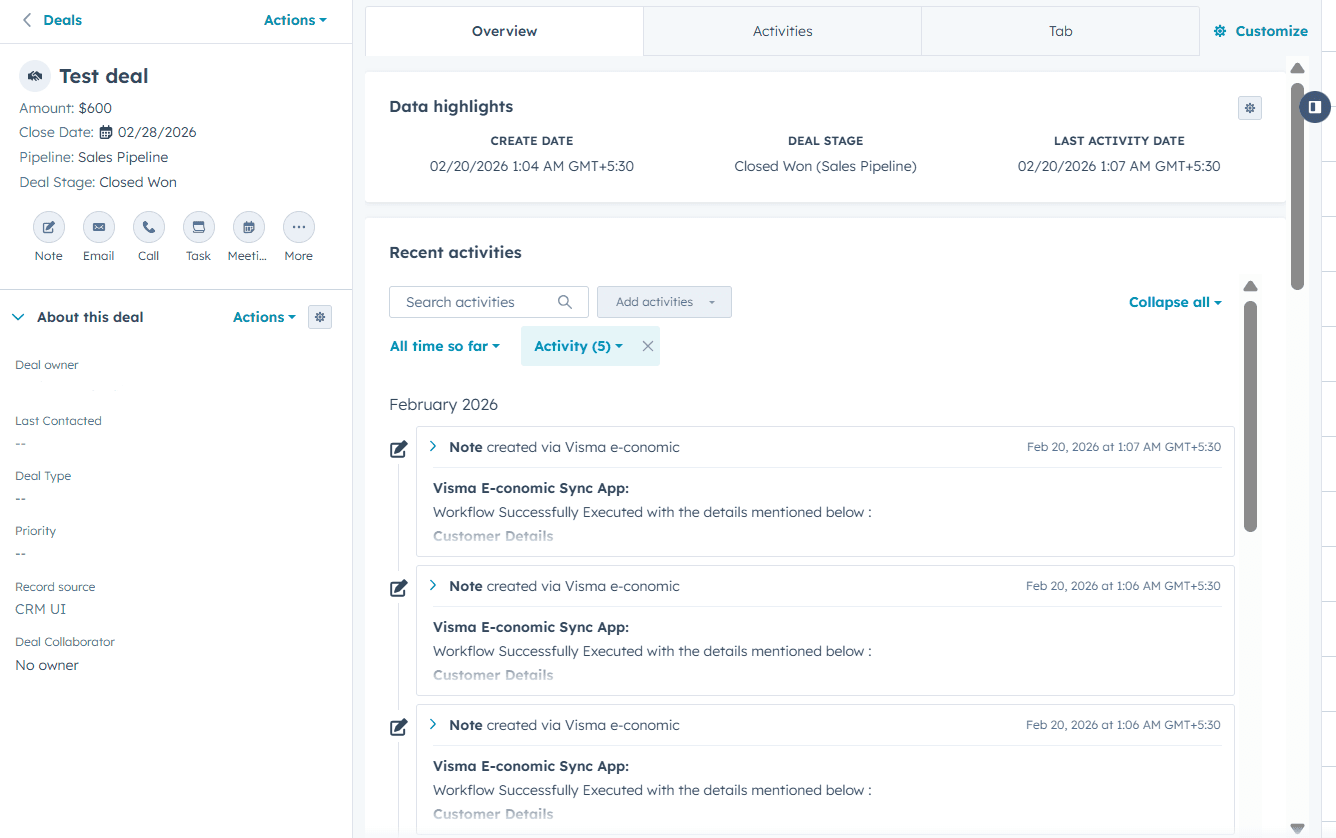
Open a Deal in HubSpot
2
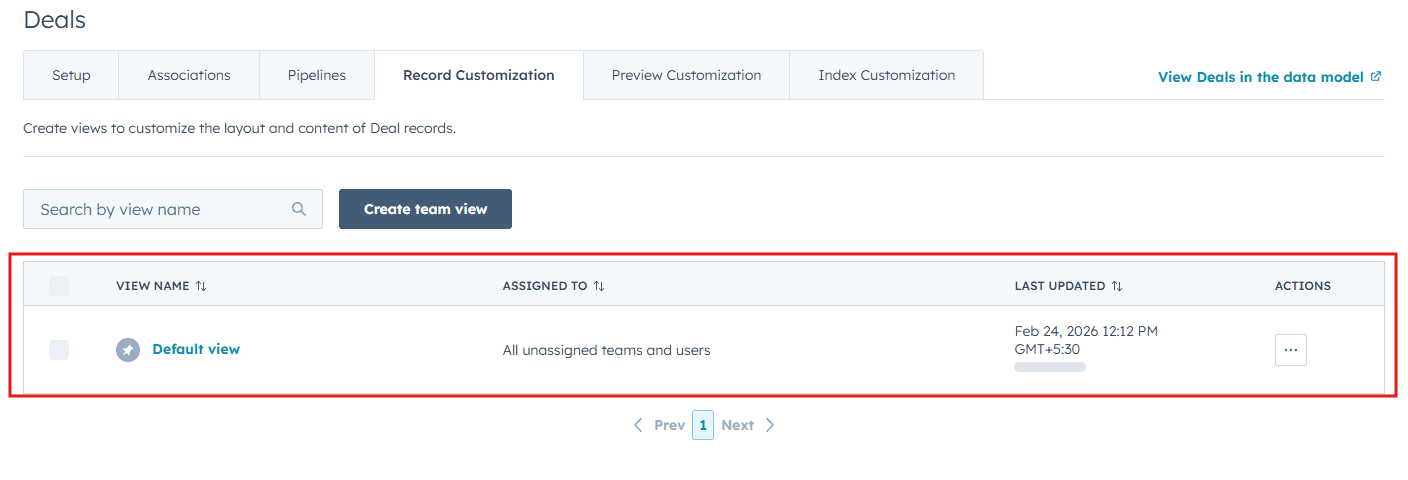
Customize the Default view
Click Customize and select Default view.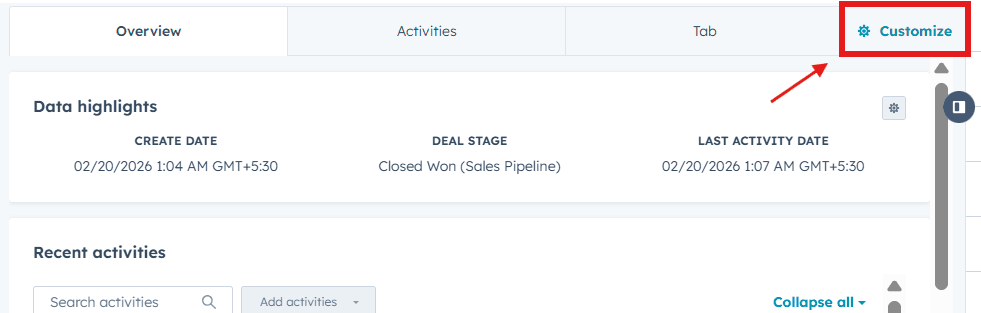
3
Add a new card
Under Edit layout, click the + icon where you want to place the card.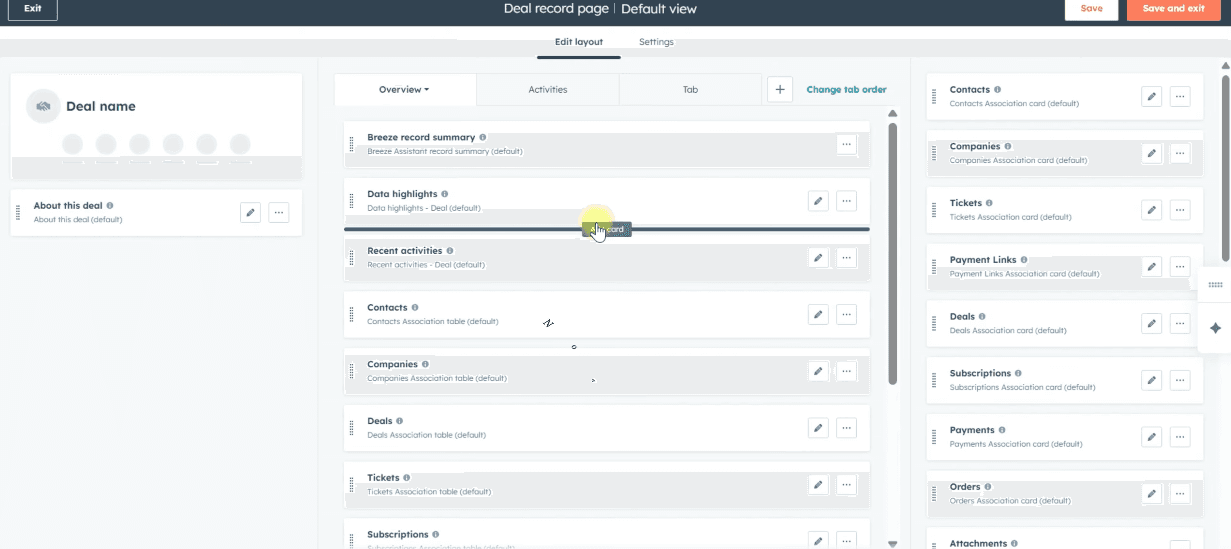
4
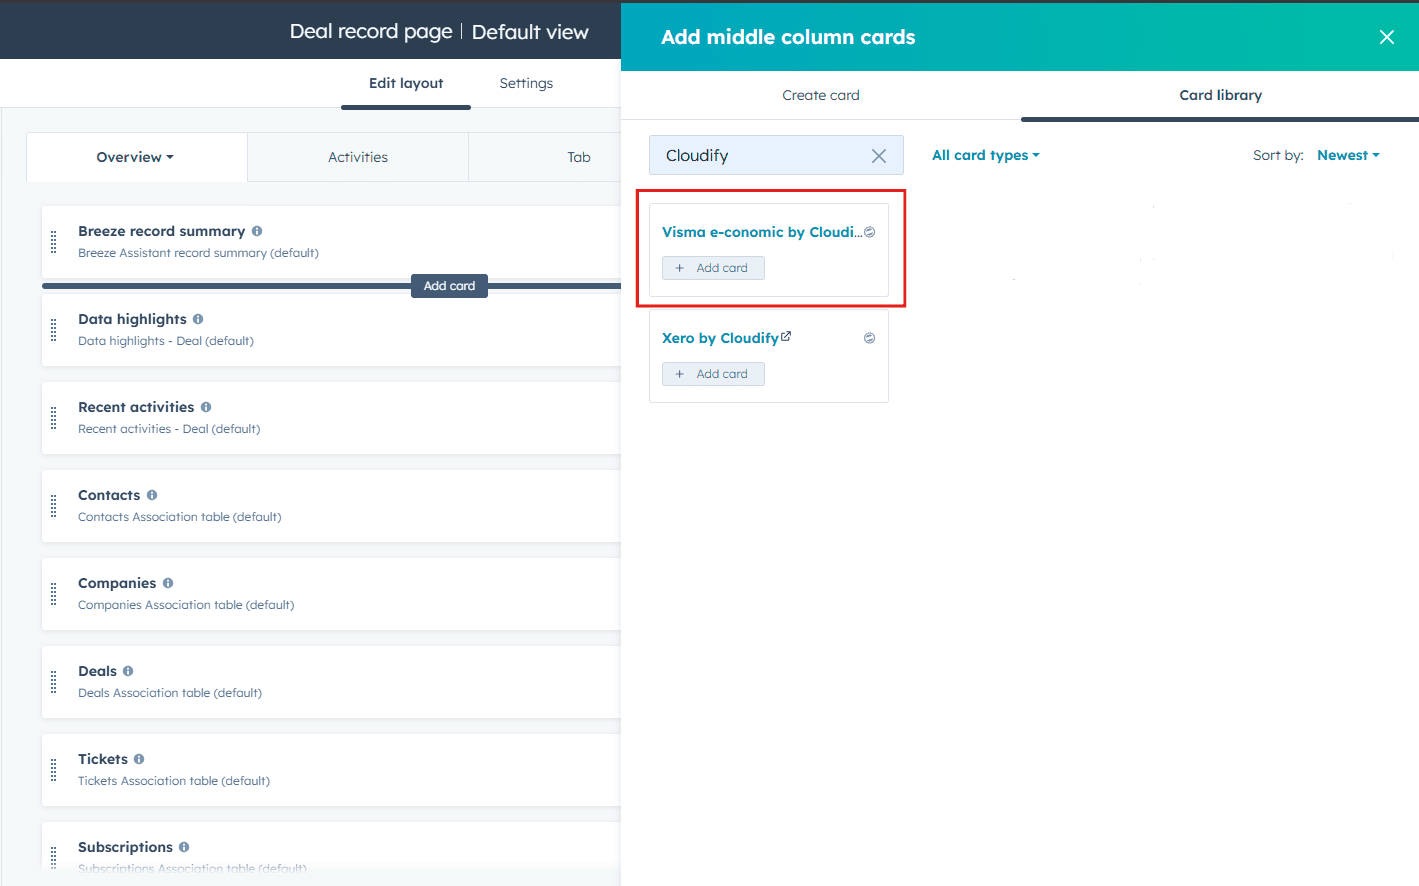
Search for and add the Cloudify card
Search for Xero by Cloudify in the Card Library, then click Add card.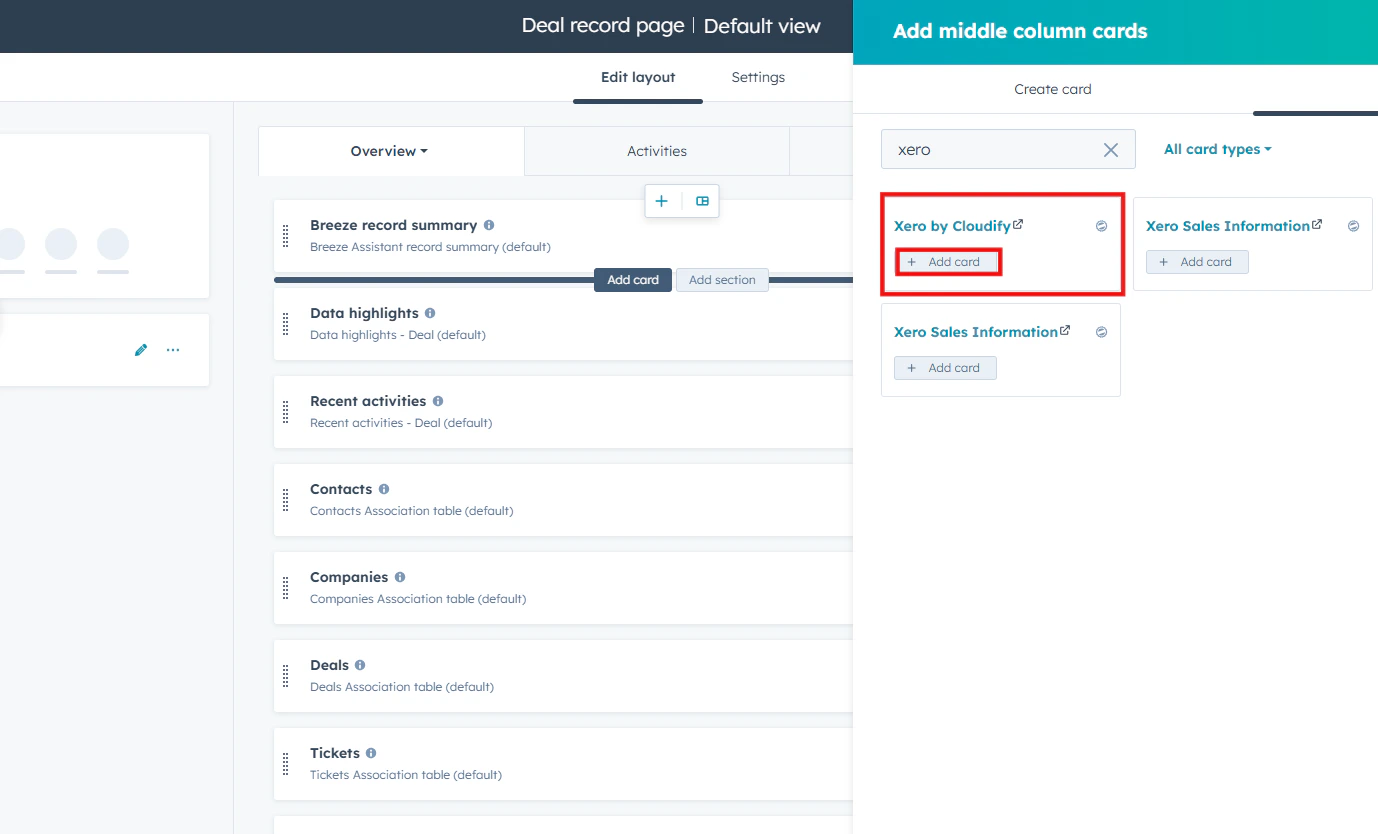
5
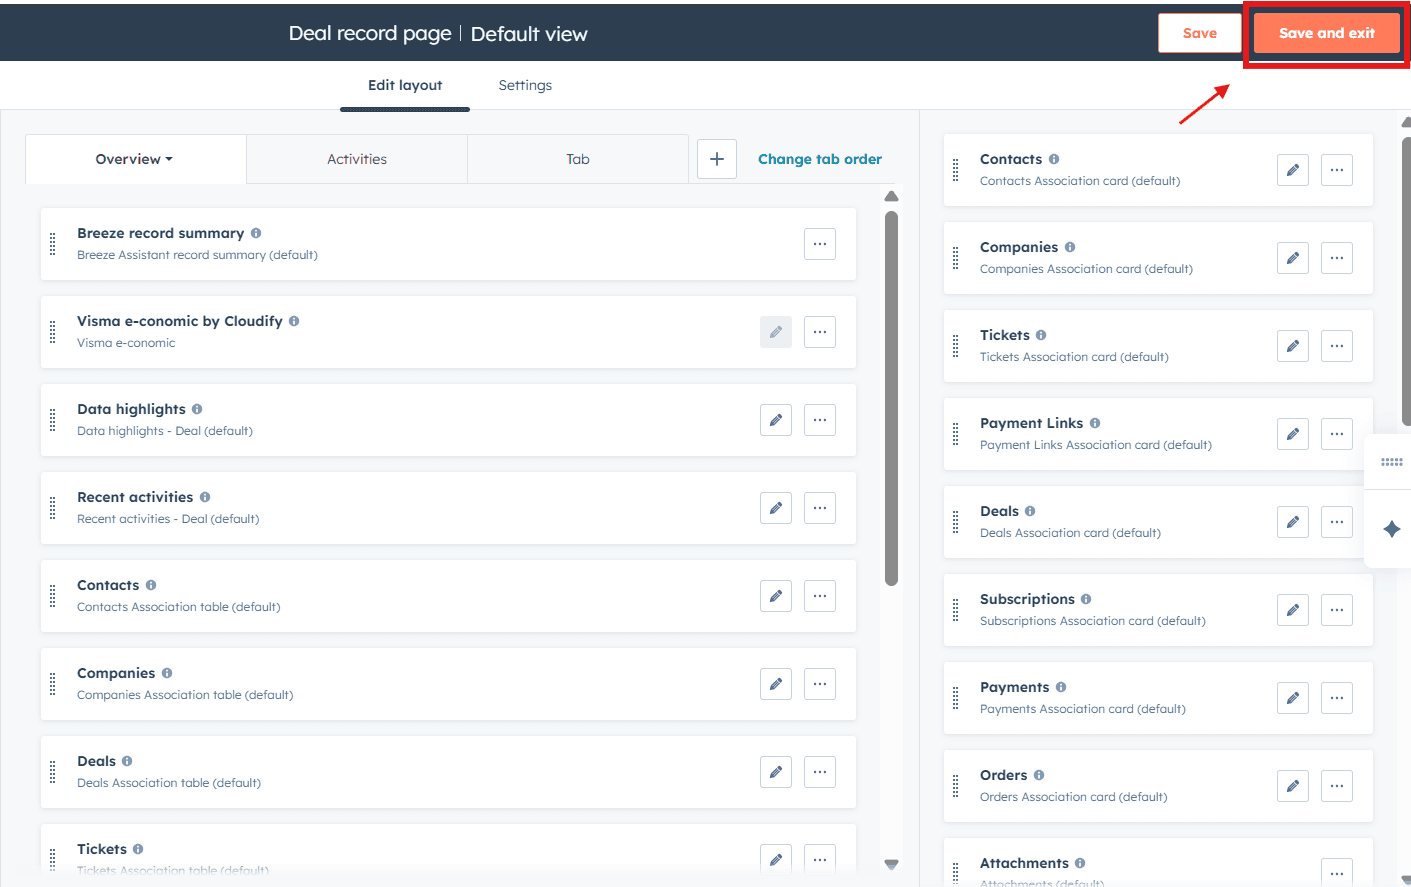
Save and Exit
Click Save and Exit to apply the layout changes.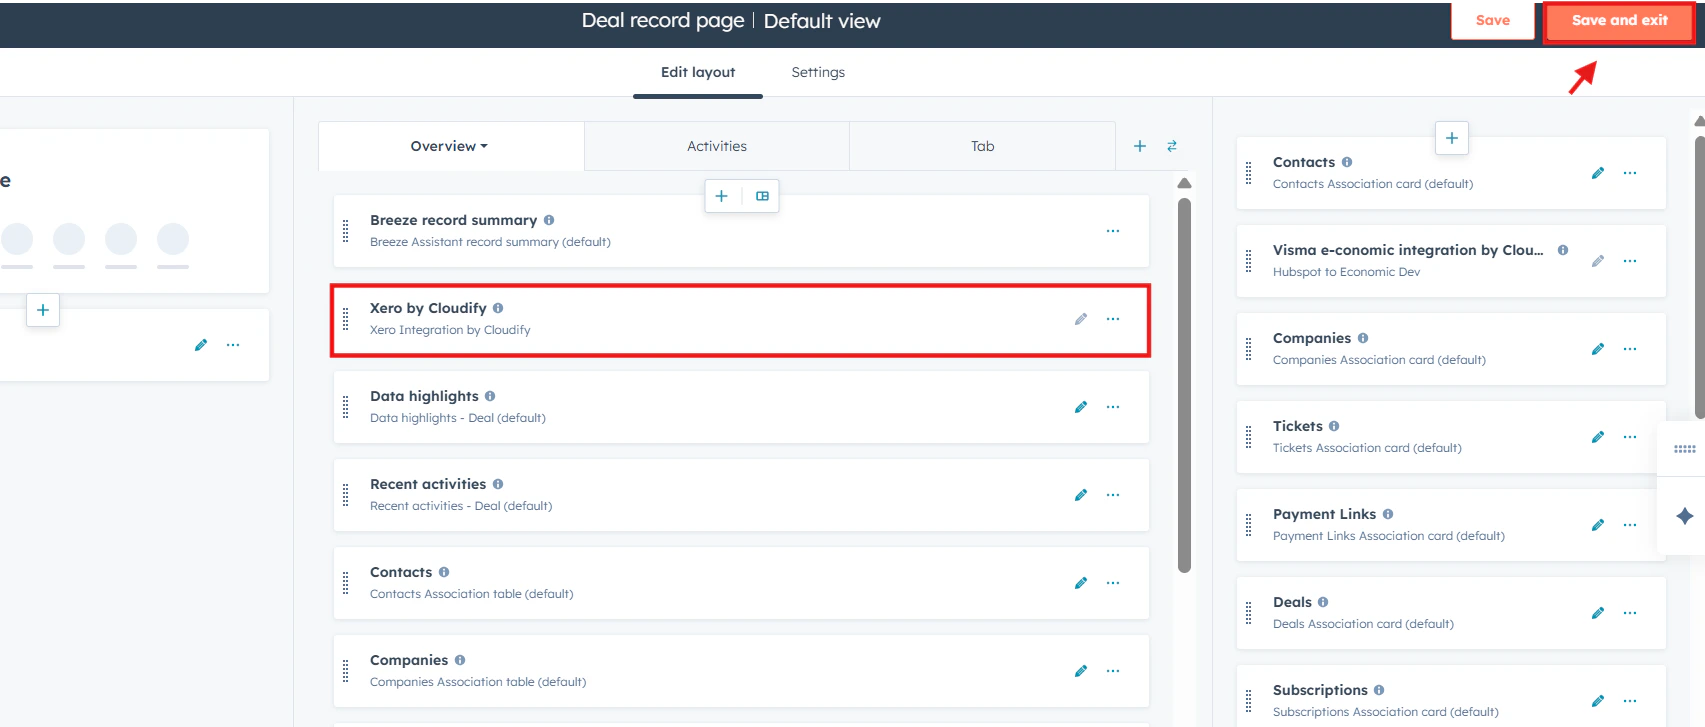
Creating an Invoice, Order, or Quote
1
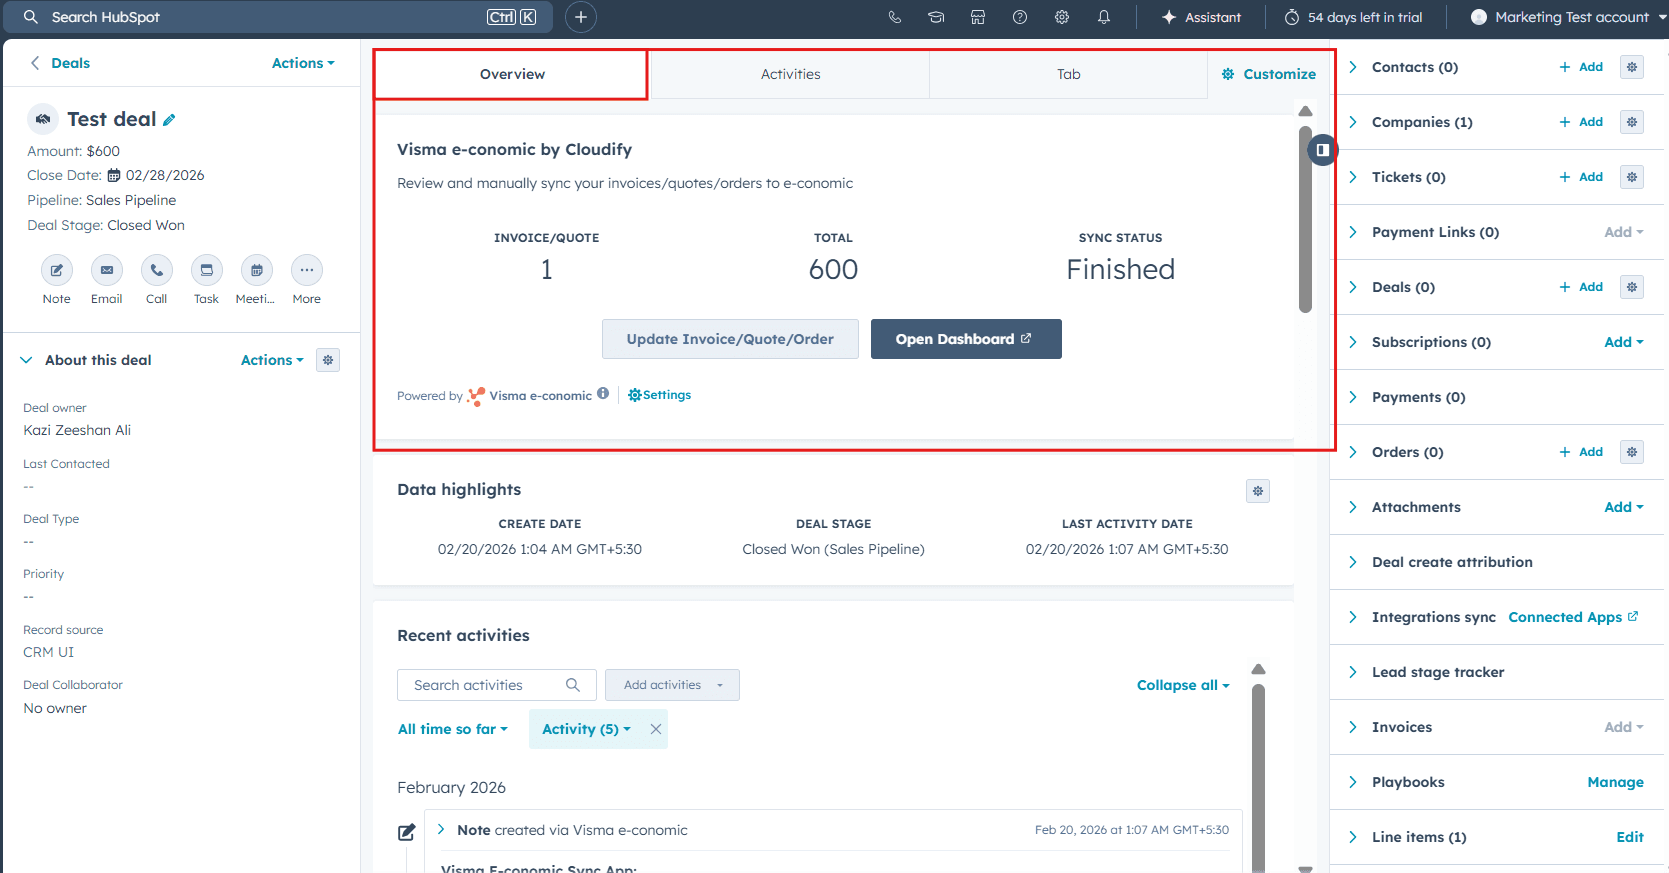
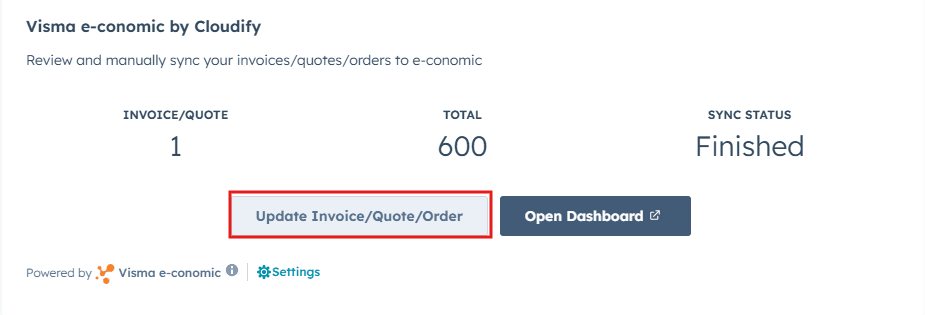
Access the UI extension
Access the UI extension under the Overview tab of any Deal.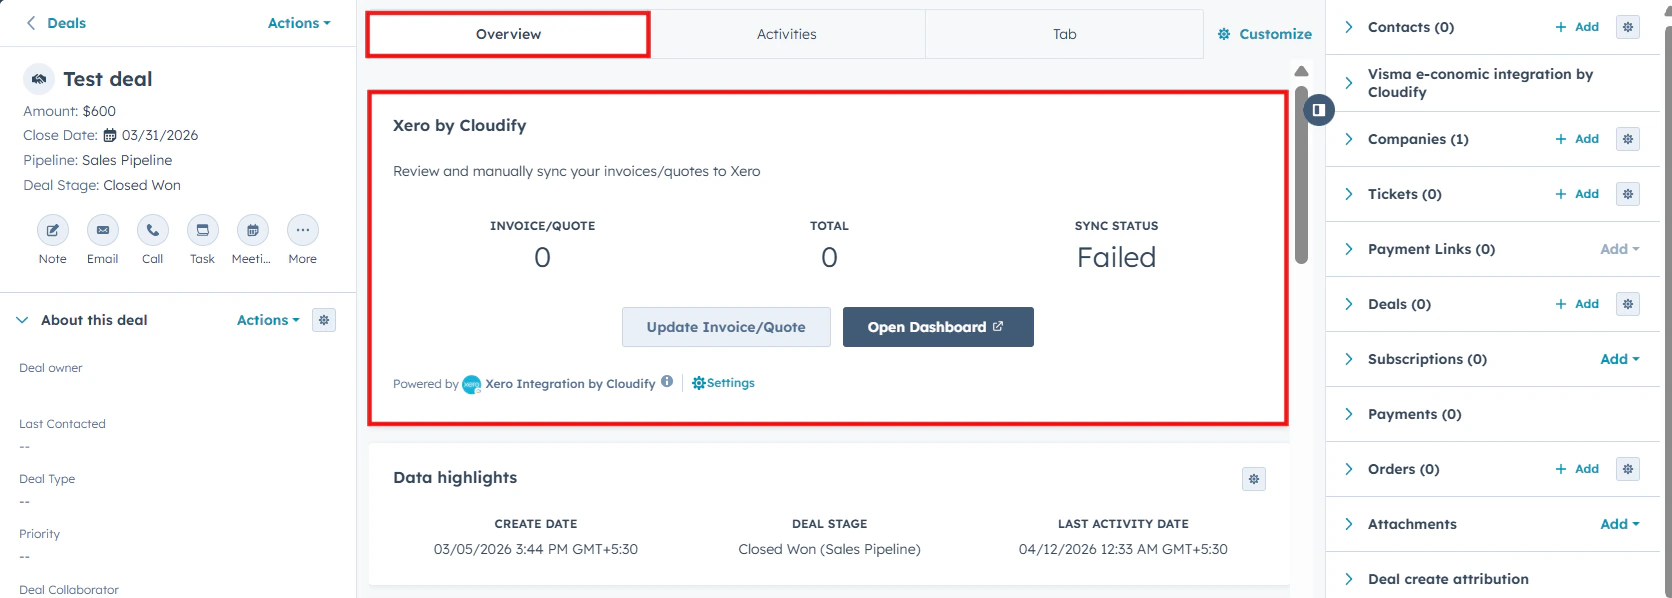
2
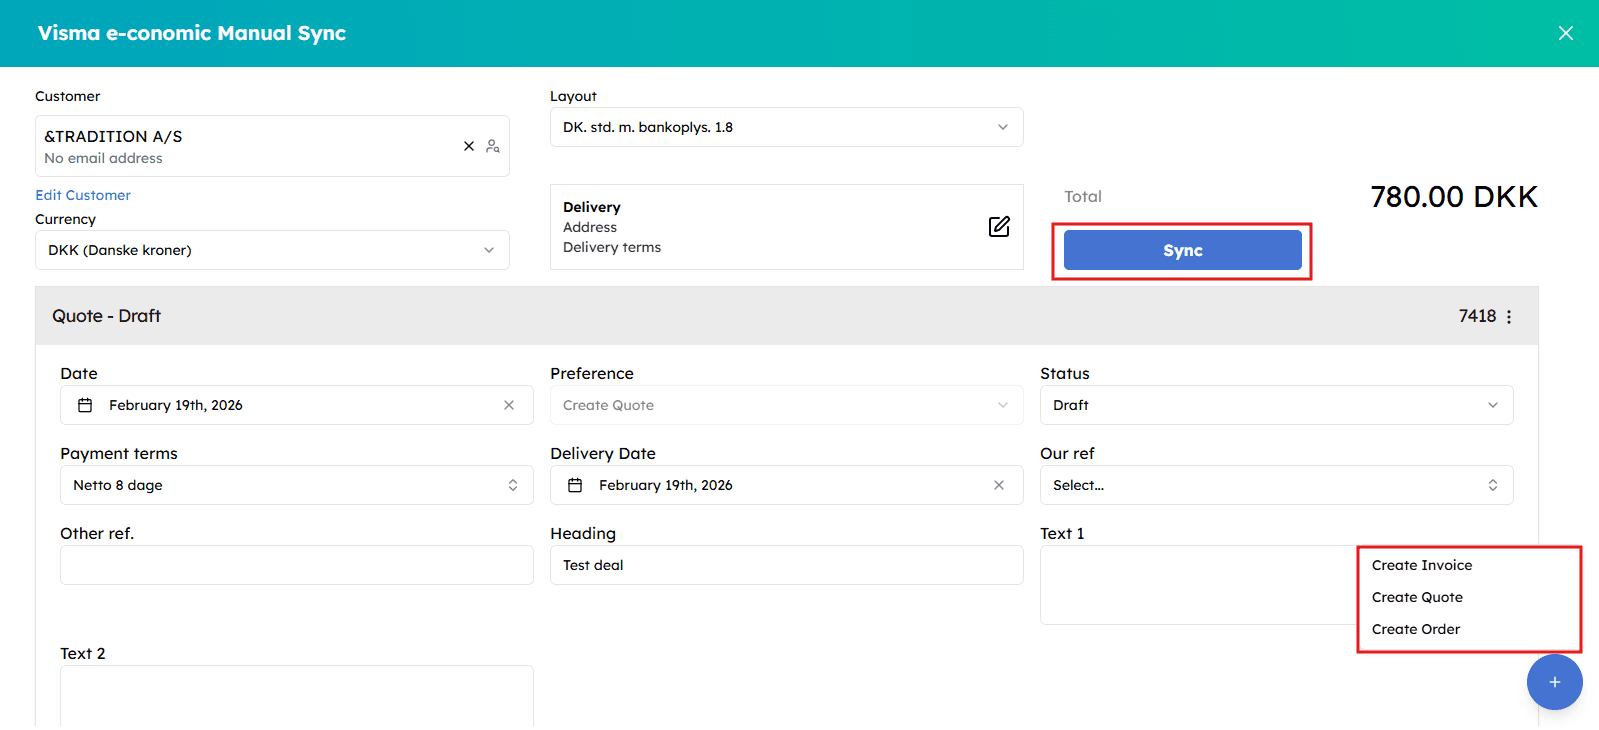
Create or update a record
Use Update or Create Invoice or Quote to manually sync your records to Xero.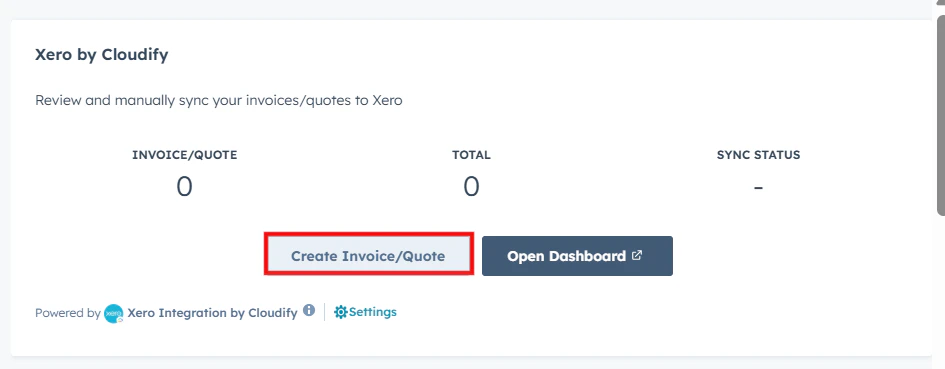
3
Finalize and sync
Finalize the changes, select Sync to synchronize the invoice or quote, then select Proceed.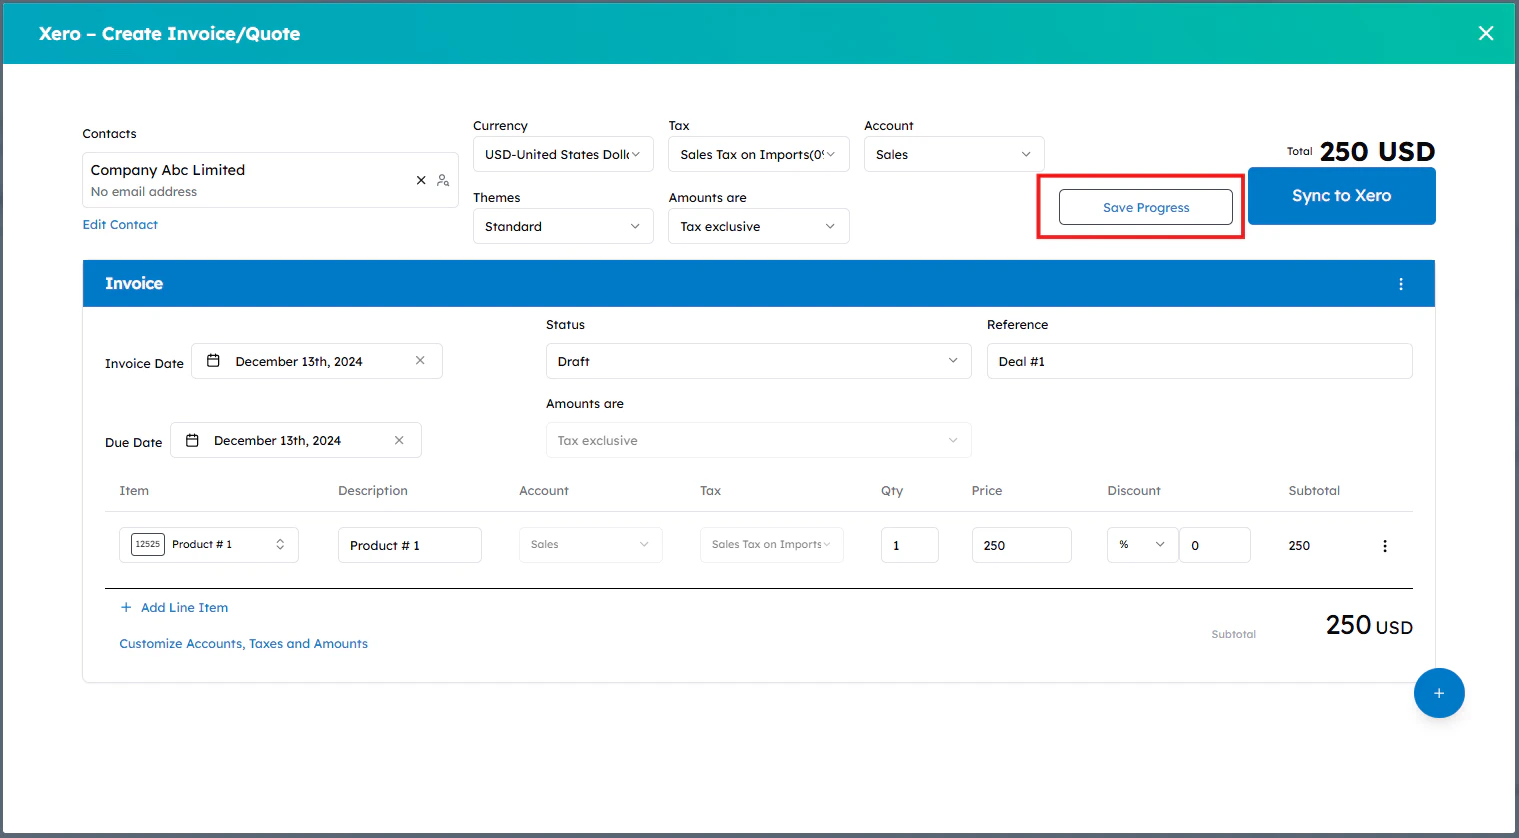
4
Confirm success
A success window will appear confirming that the sync has been triggered. Wait a few seconds and reload the page to check the updated status.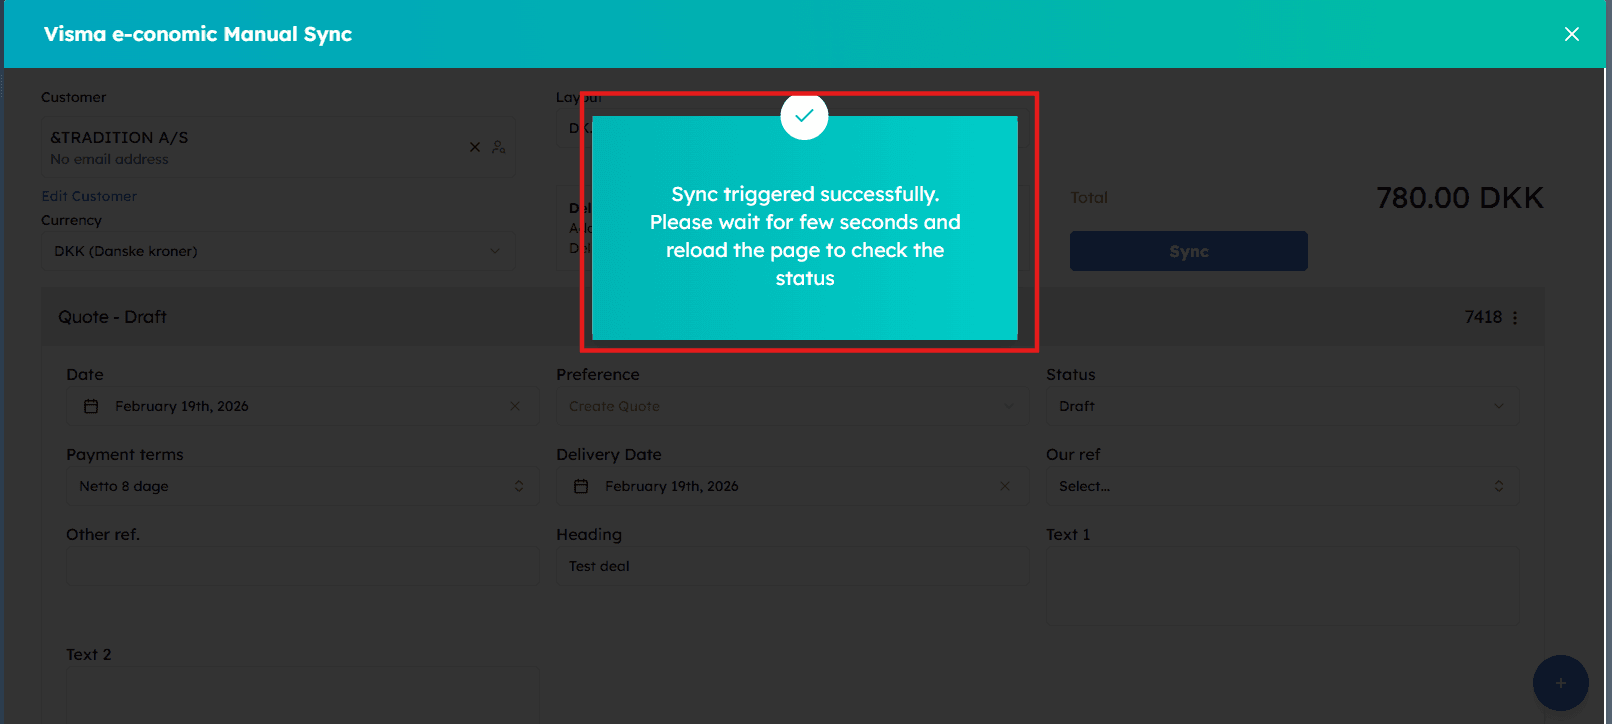 Your invoice or quote has been successfully created in Xero!