

- Customer Matching Rules
- Customer Default Mappings
- Field Mappings
Customer Matching Rules
Why Customer Matching Rules Matter
- Prevent duplicate customers: By accurately matching HubSpot companies and contacts to existing Fortnox customers, you avoid creating duplicate records in Fortnox.
- Ensure data consistency: Matching rules help maintain consistent customer data between HubSpot and Fortnox.
- Streamline customer creation: When a match is not found, the app automatically creates a new customer in Fortnox.
- Simplify customer management: Properly configured matching rules make it easier to manage your customer relationships across both platforms.
Setting Up Customer Matching Rules
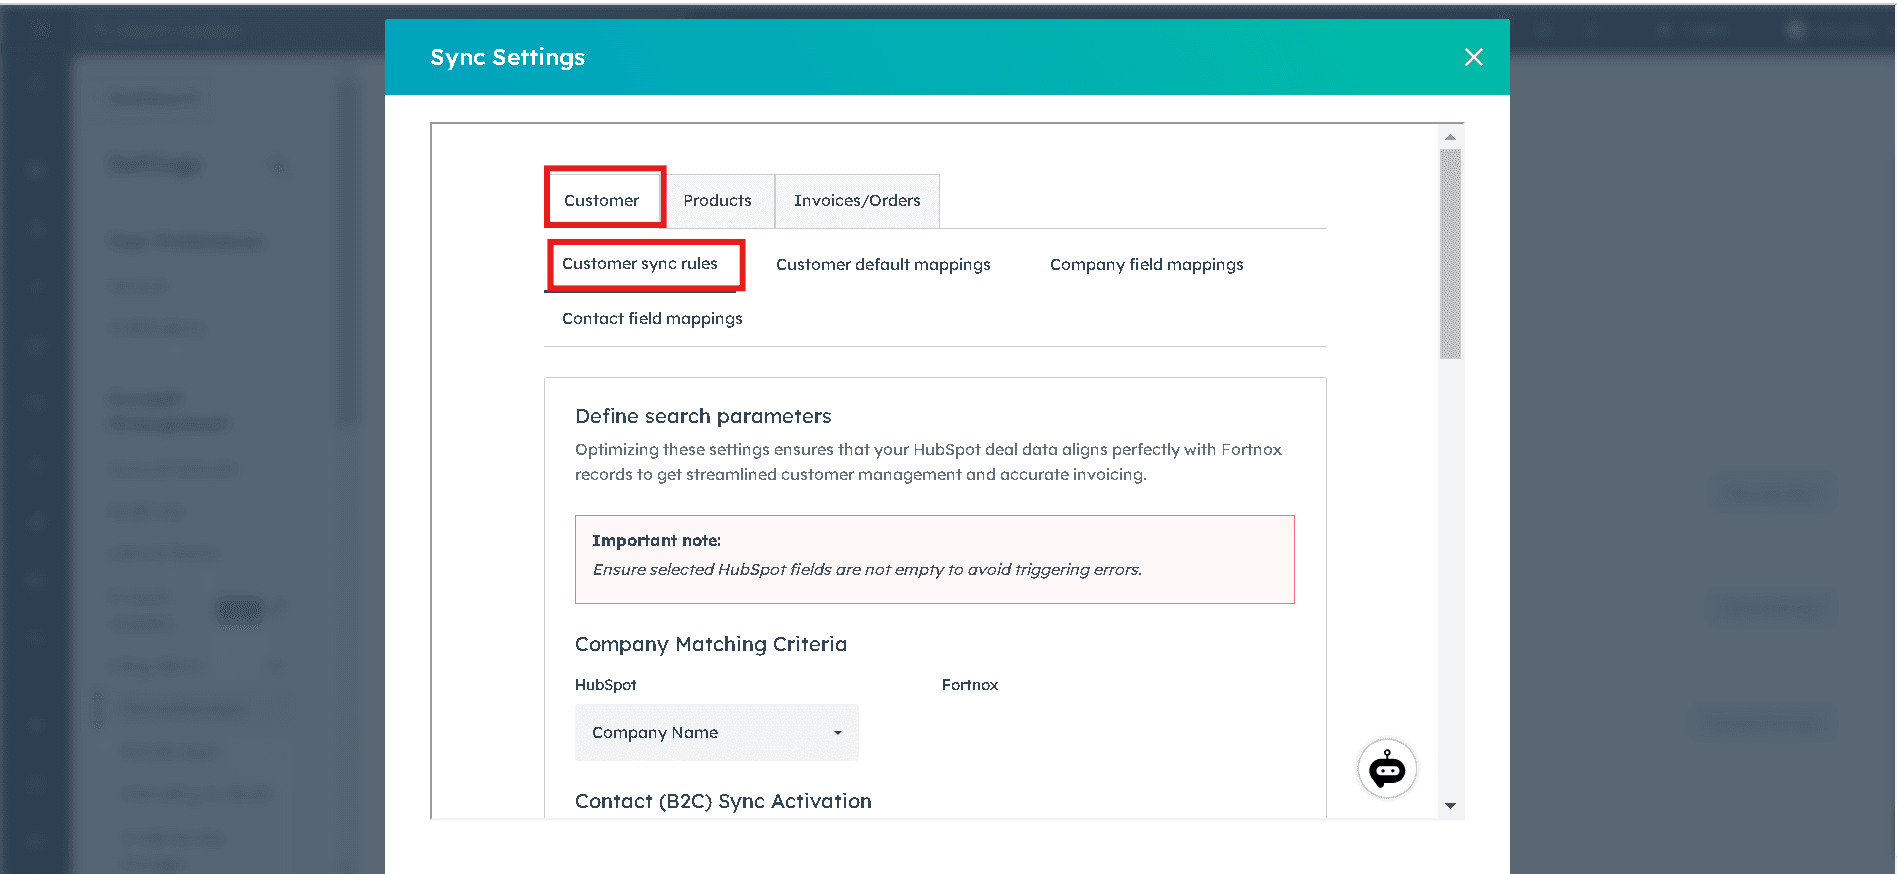
1
Define Company Matching CriteriaIn the “HubSpot” dropdown under “Company Matching Criteria”, select the company property you want to use to identify the customer (e.g., CVR). In the “Fortnox” dropdown, select the corresponding customer field (e.g., Corporate Identification Num.).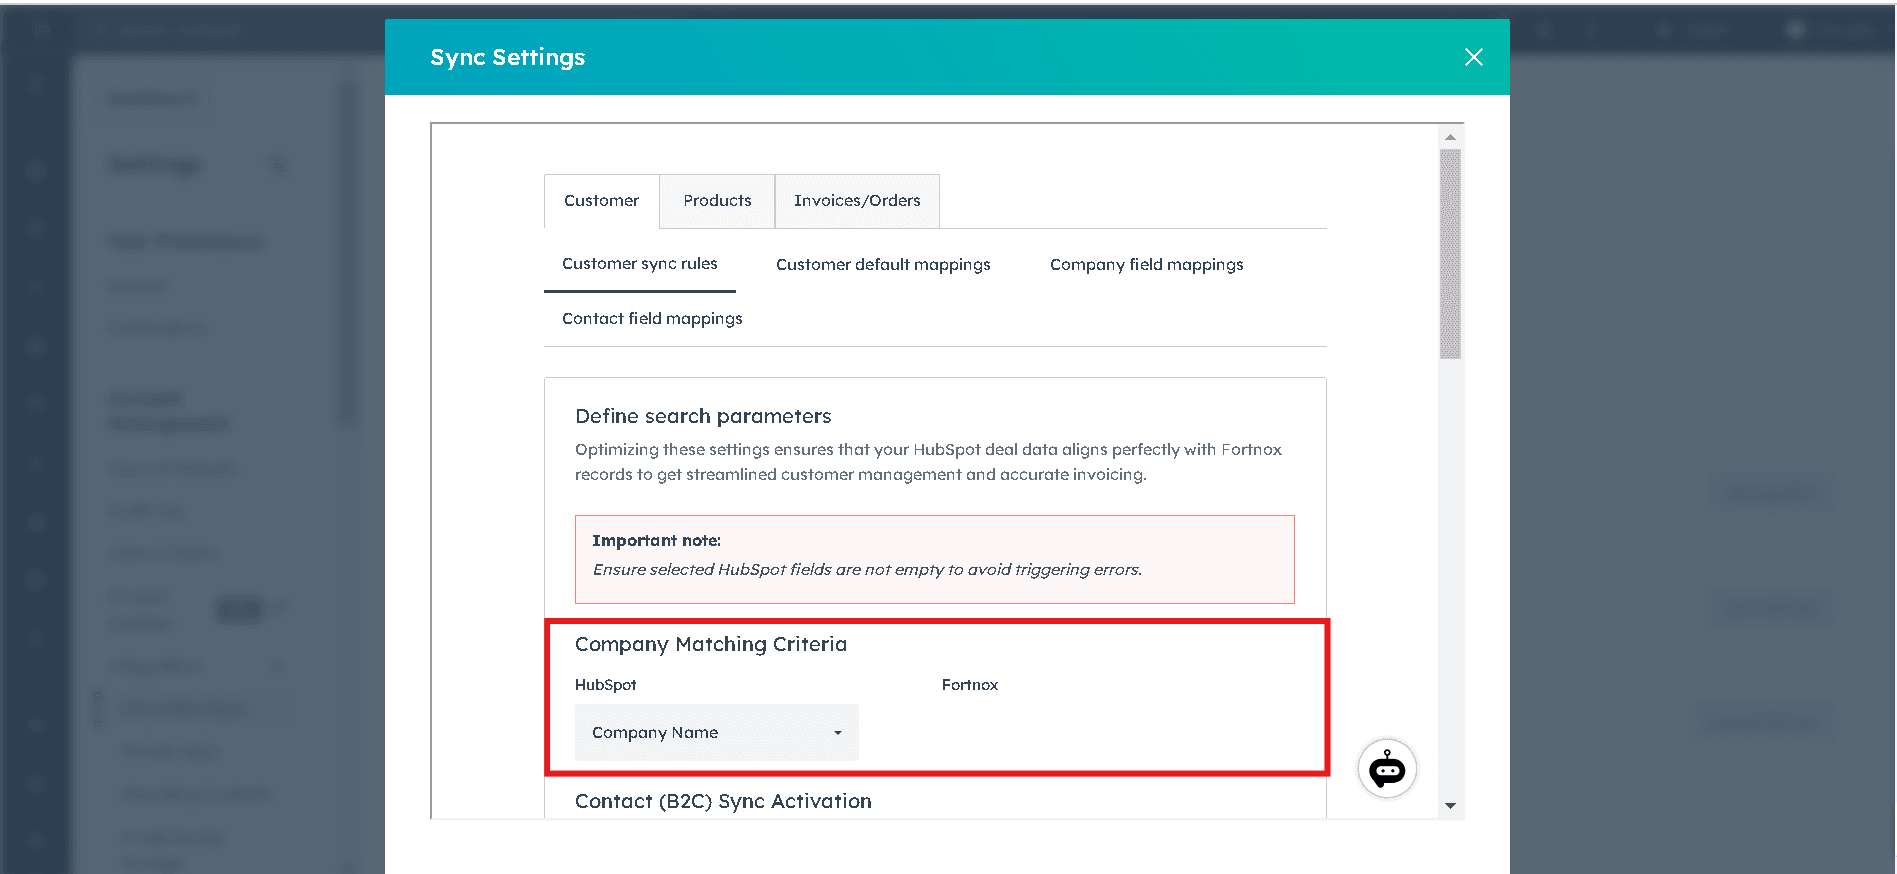
2
Define Contact Matching Criteria (Optional)Check the box labelled “Enable Primary Contact Sync”. In the “HubSpot” dropdown under “Contact Matching Criteria”, select the contact property (e.g., Phone number). In the “Fortnox” dropdown, select the corresponding customer field (e.g., Phone Number).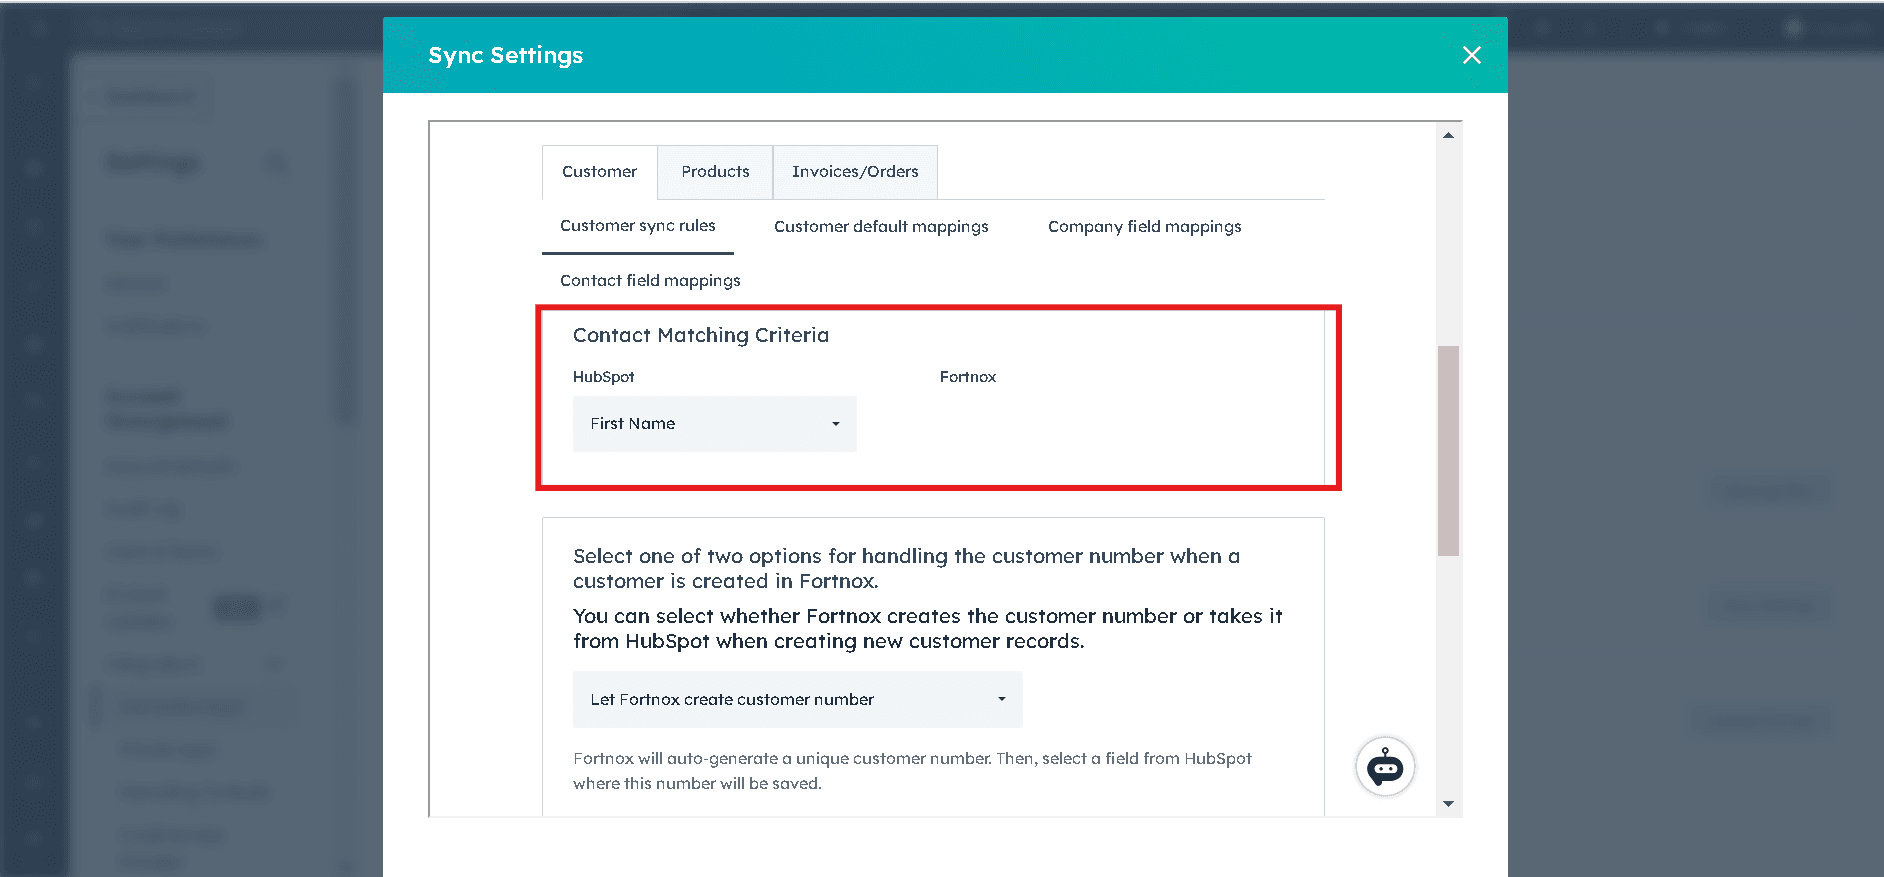
3
Choose How to Handle the Customer Number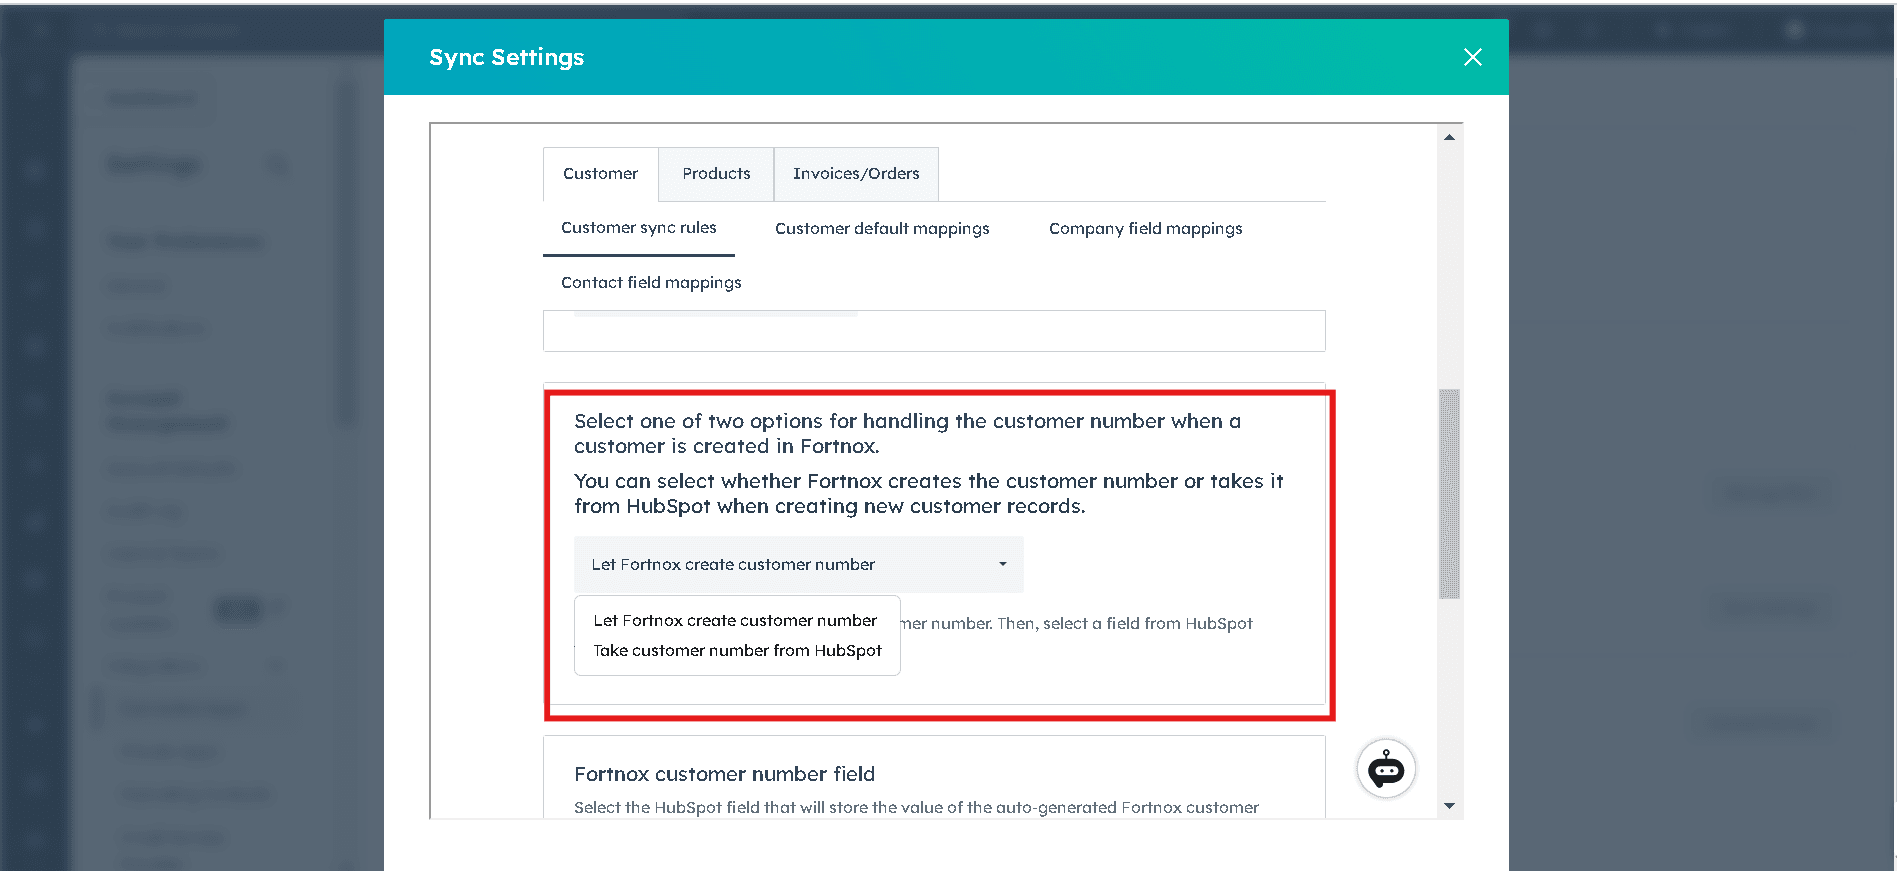
- Option 1 — Let Fortnox generate the customer number: Select “Let Fortnox create customer number” and choose whether to store the generated number in a HubSpot property.
- Option 2 — Use a number from HubSpot: Select “Use customer number from HubSpot” and select the HubSpot property that contains the number you want to use.
4
Review and SaveCarefully review your settings to ensure they align with your business requirements. Click “Save” to apply your changes.
Customer Default Mappings
Why Customer Default Mappings Are Important
- Ensure all required Fortnox fields are filled: These mappings provide values for fields that Fortnox requires to create a new customer.
- Streamline customer creation: By setting defaults, you reduce manual data entry and potential errors.
- Maintain consistency: All new customers will have the same baseline settings unless overridden by HubSpot data.
Setting Up Customer Default Mappings
1
Navigate to the Customer Default Mappings section in your integration settings.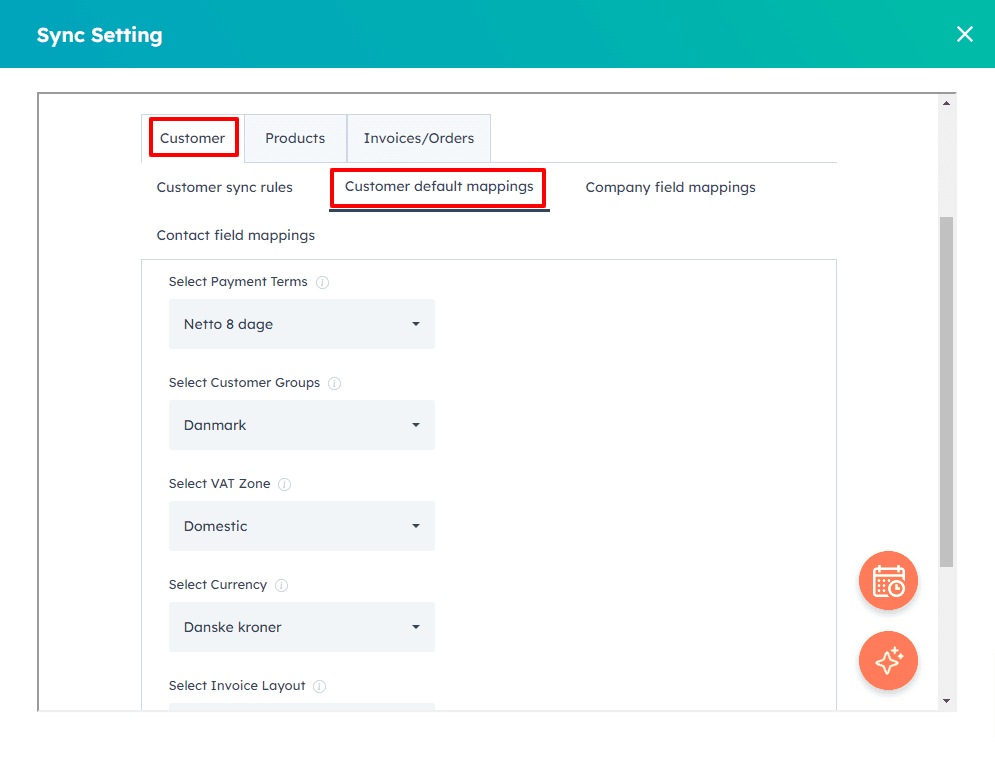
2
You’ll see a list of required Fortnox fields: Payment Terms, Customer Group, VAT Zone, Currency, and Invoice Layout.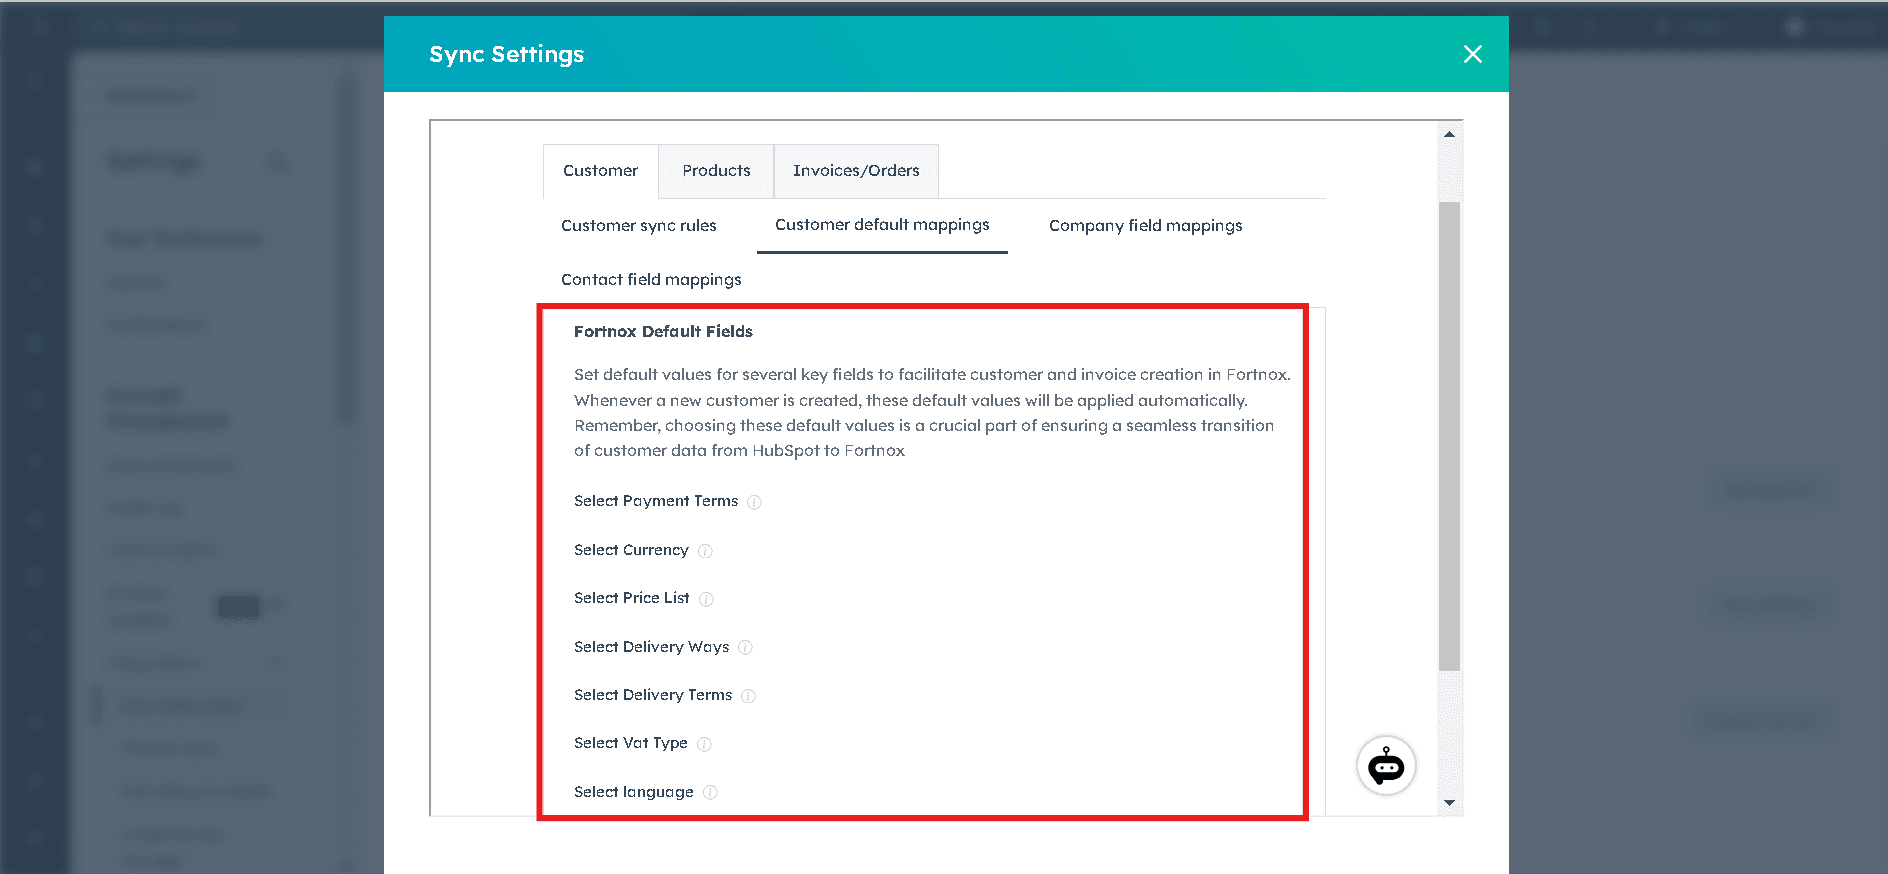
3
For each field, click on the dropdown menu next to the field name and select the appropriate default value.
4
After setting your preferred defaults for all required fields, click “Save” to apply your changes.
Field Mappings (Company and Contact)
Why Field Mappings Matter
- Ensure data consistency: Match the right information between HubSpot and Fortnox.
- Customize for your needs: Adapt the integration to fit your unique business processes.
- Save time: Automate the transfer of customer data, reducing manual entry.
- Improve data quality: The more fields you map, the more comprehensive your customer profiles will be in both systems.
Setting Up Company Field Mappings
1
Navigate to the Company Field Mappings section in your integration settings.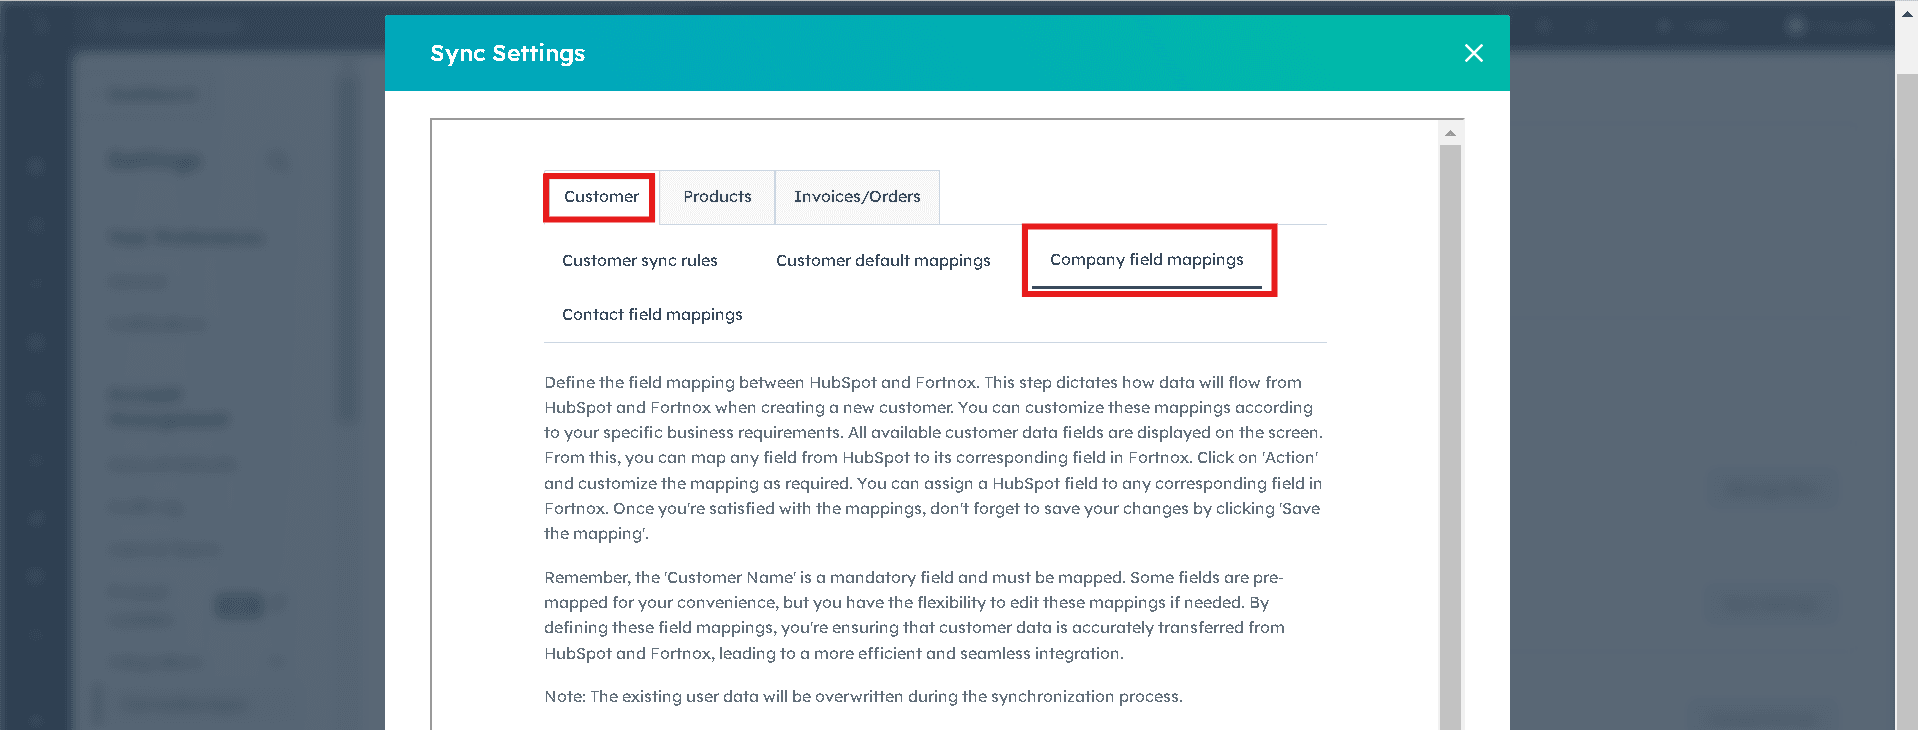
2
For each Fortnox field, the default HubSpot field will be shown (if applicable). Click “Edit” to change the mapping or “Delete” to remove it.
3
To add a new mapping, use the search bar to find specific fields. If a field doesn’t exist in HubSpot, click “Create Property” to add a new custom property.
4
Key fields to prioritize:
- Customer Name (mandatory)
- CVR Number (or equivalent business identifier)
- Phone Number
- Address
5
After setting your preferred mappings, click “Save” to apply your changes.
Setting Up Contact Field Mappings
1
Navigate to the Contact Field Mappings section in your integration settings.
2
Follow the same process as for Company field mappings, paying special attention to these key fields:
- Customer Name — map to the HubSpot “Full Name” field
- Phone Number
- Address
Using “Full Name” is preferable to mapping separate “First Name” and “Last Name” fields, as it ensures the complete name is transferred correctly.
3
After setting your preferred mappings, click “Save” to apply your changes.