Getting Started
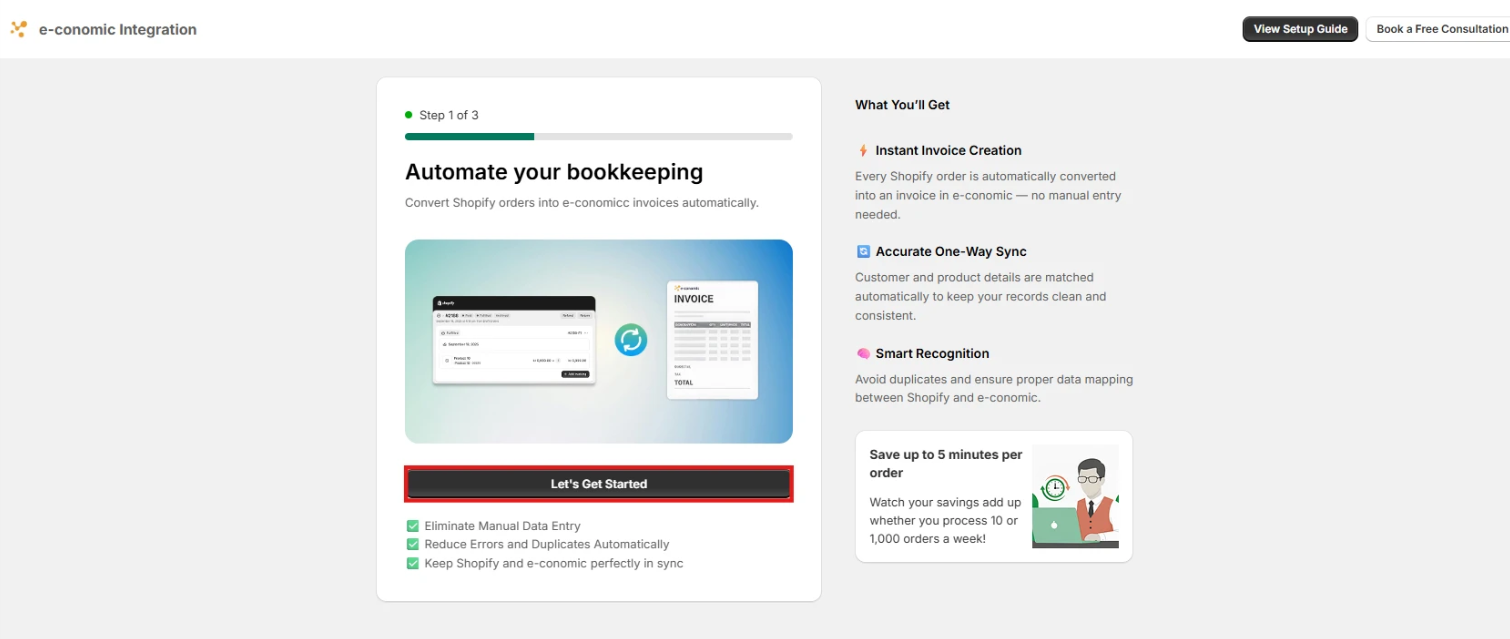
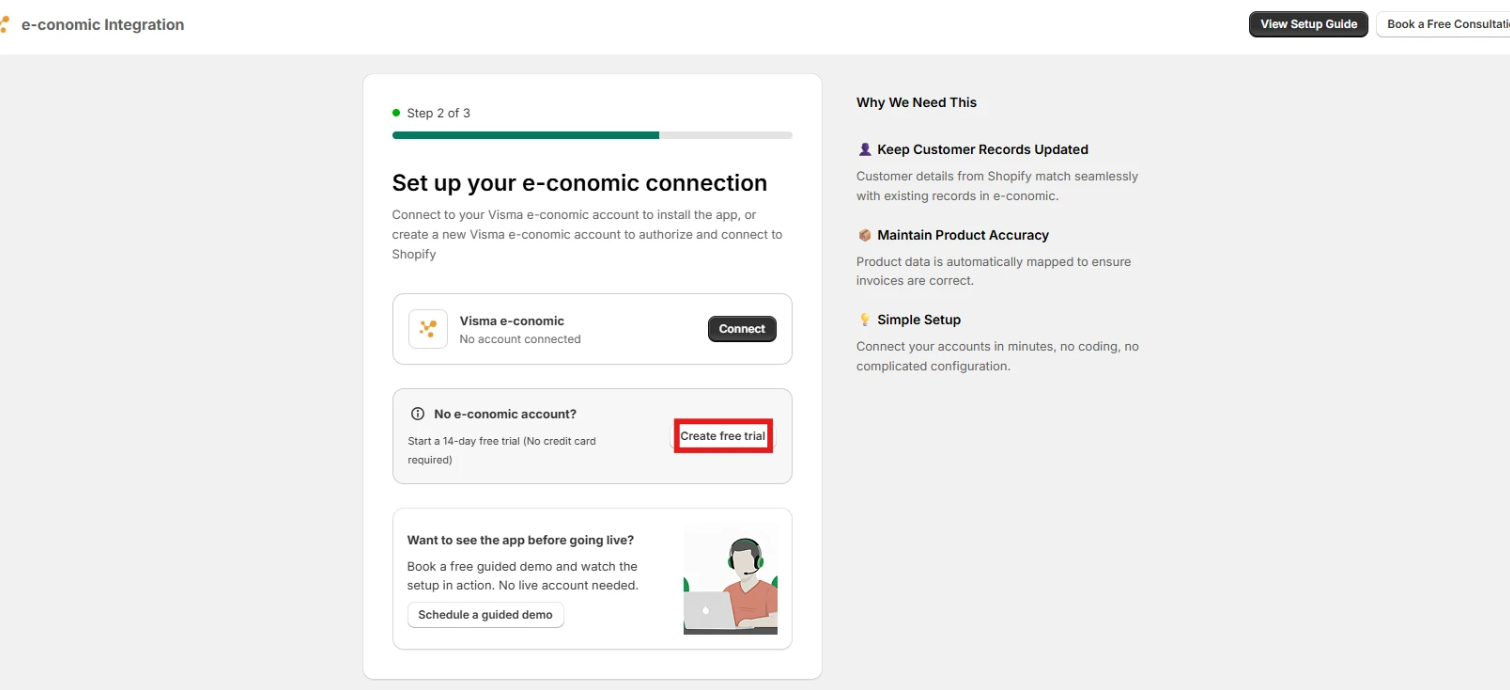
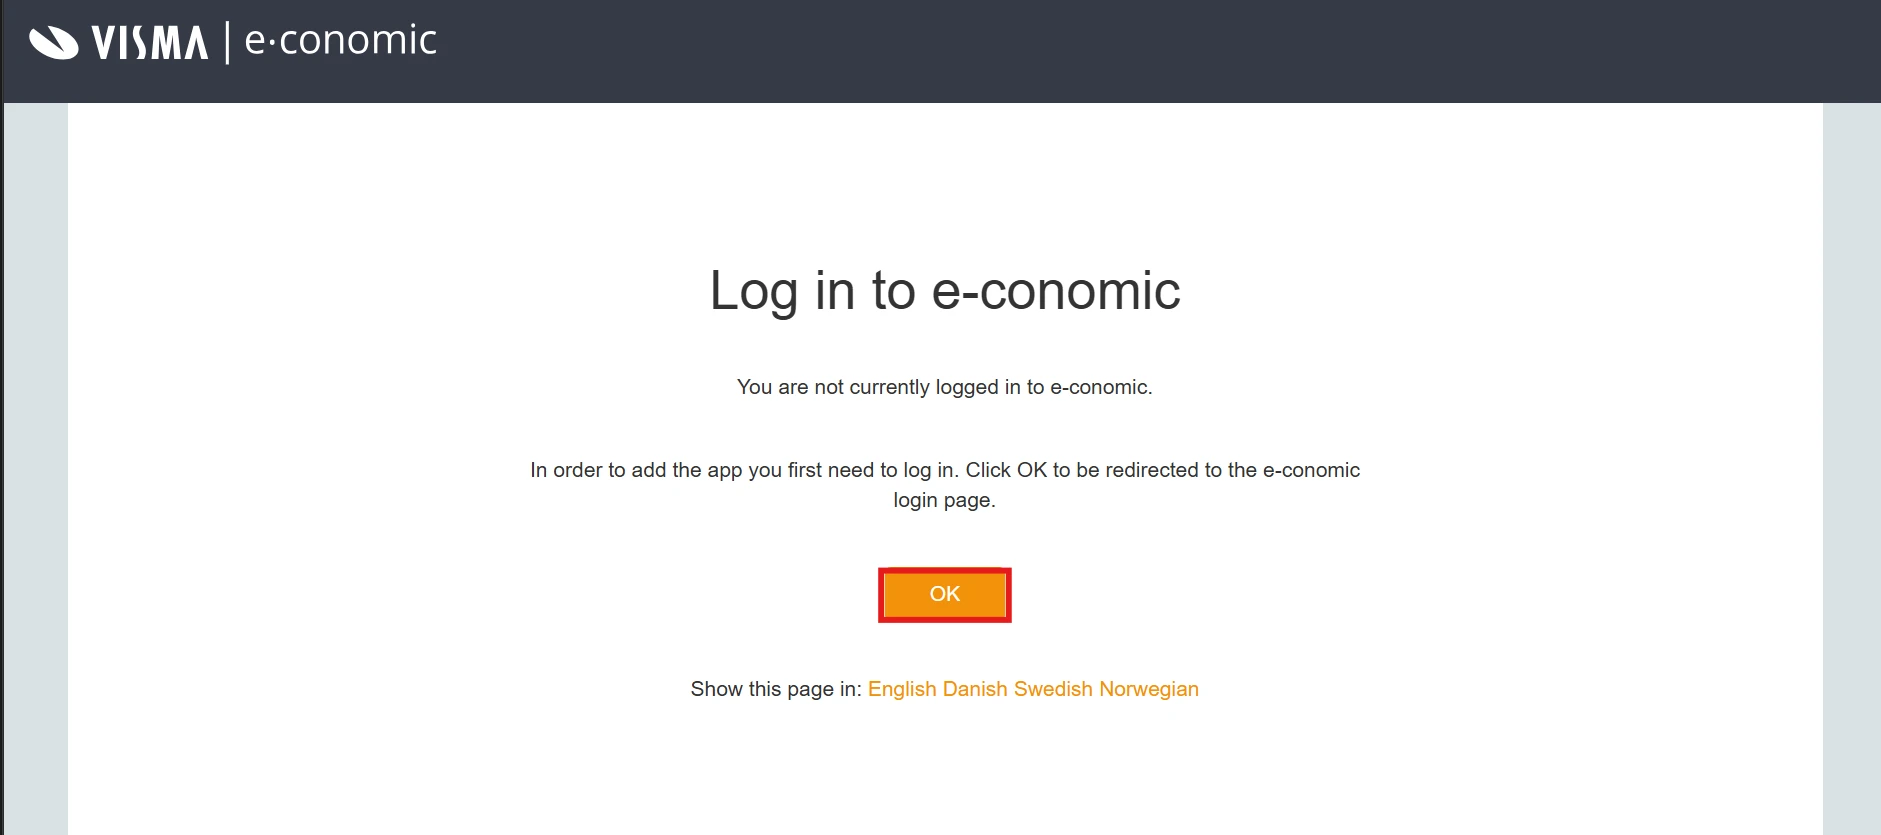
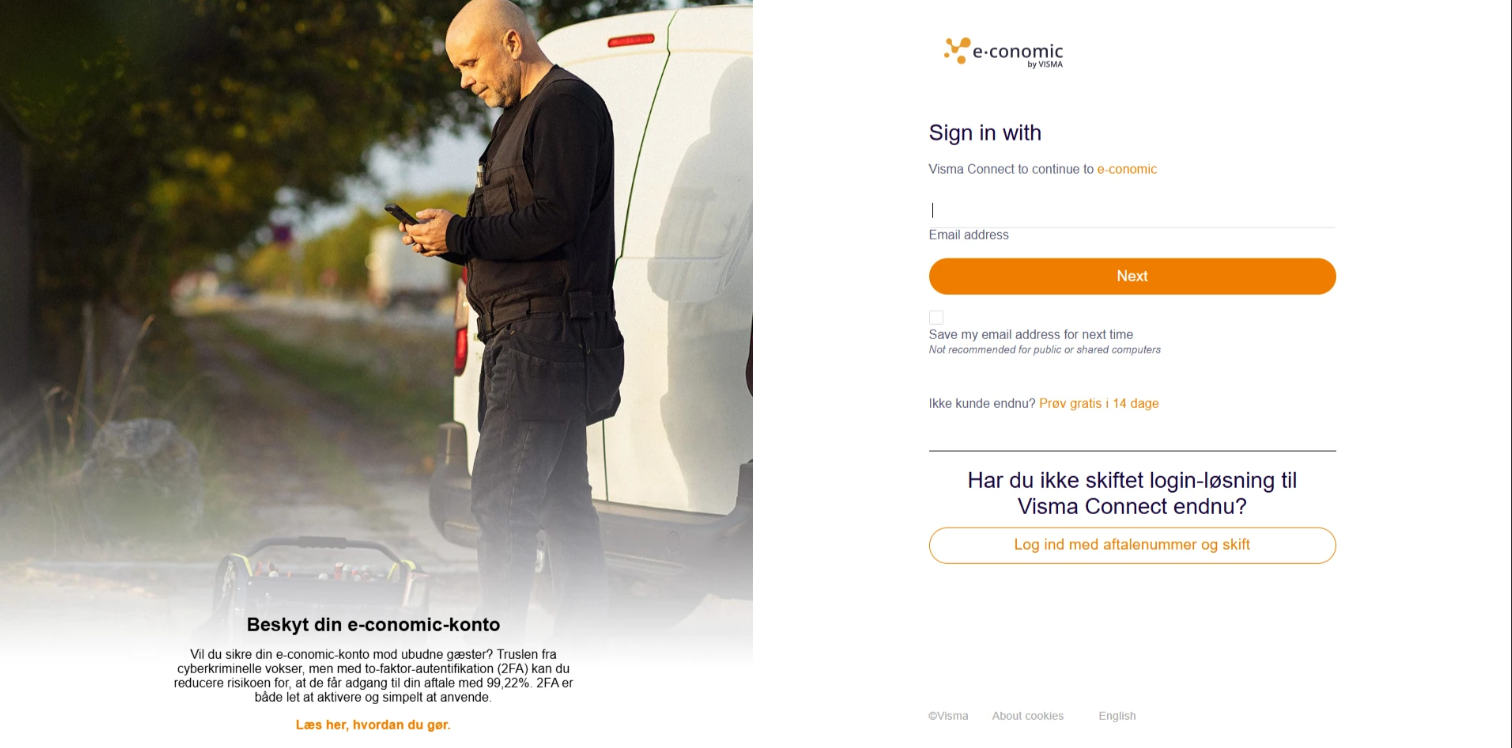
Connecting e-conomic
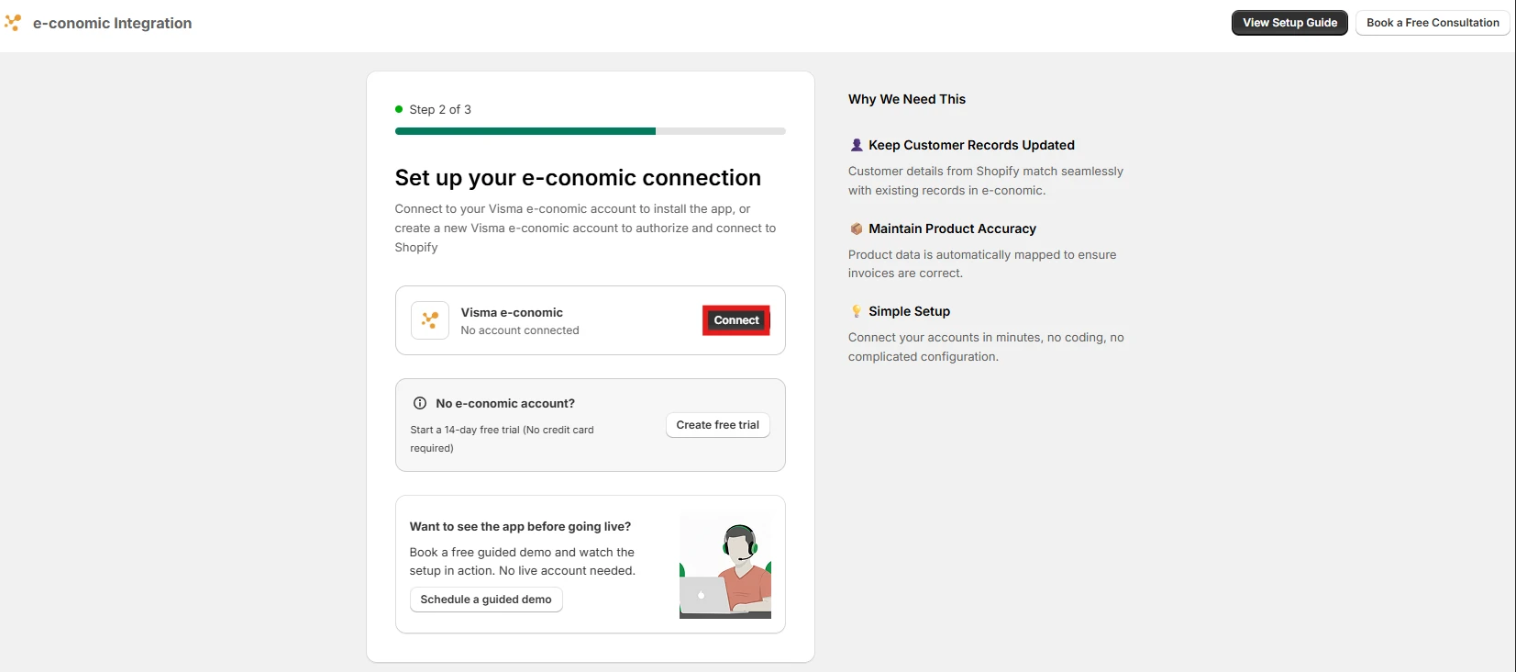
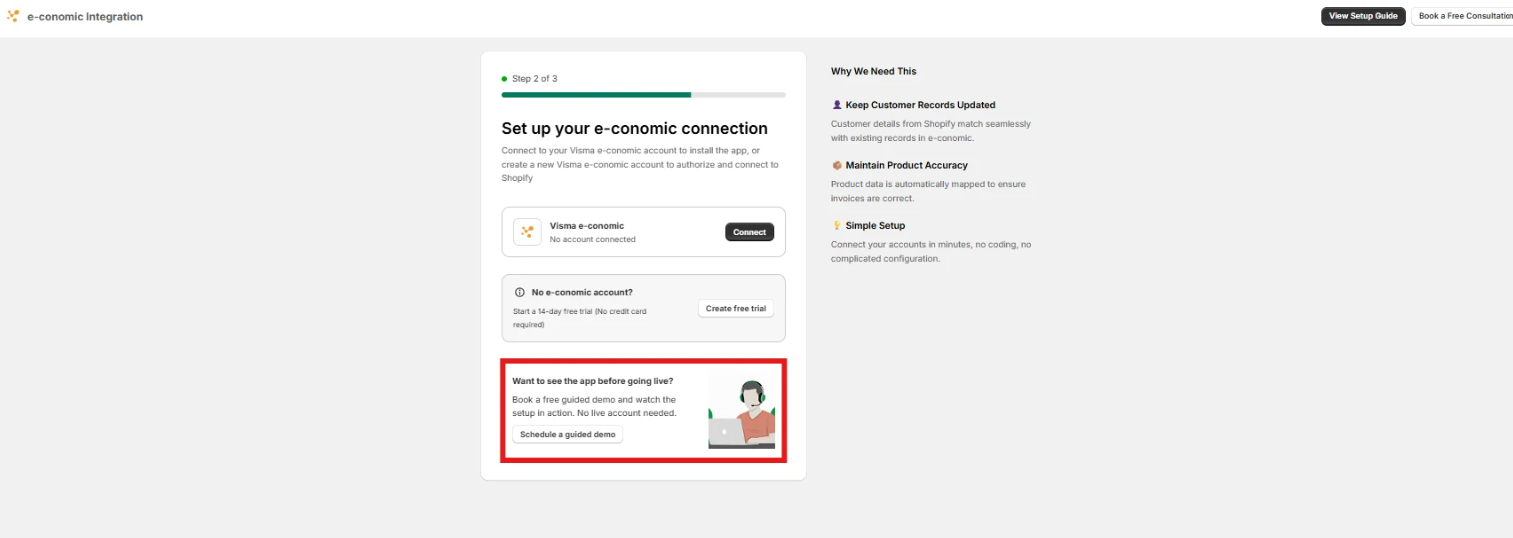
Note: If you’d like to explore the app before going live, you can book a free guided demo. In this session, you can go through the setup step by step and see the sync working in real time. No live account is required.
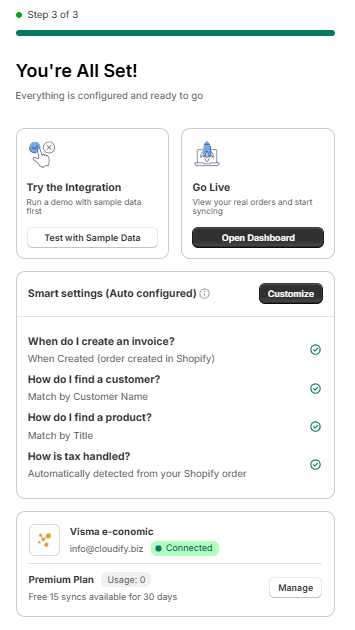
Everything is configured and ready to go.
- To test the integration, click Test with Sample Data under Try the Integration. This will run a test sync and show you how your Shopify data will sync with e-conomic.
- To adjust your sync preferences, click Customize under Smart Settings and configure rules based on your business needs (for example, how invoices are created or how customers and products are matched).
-
When you’re ready to start syncing real orders, click Open Dashboard. This will activate the automation and begin processing your Shopify → e-conomic sync.