

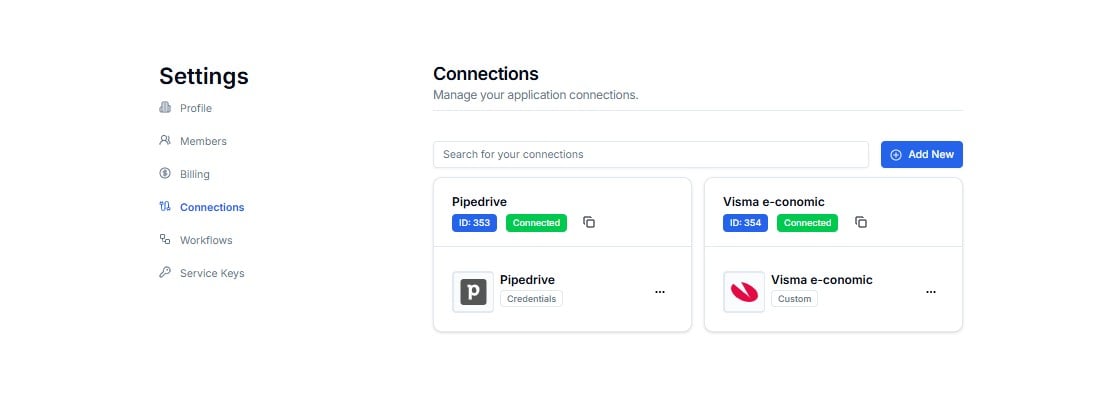
Connections — all apps connected to Lighthouse in your account
Connections are set up by the Cloudify team during onboarding. You do not need to configure them manually — this page is for viewing status and managing existing connections.
Reading a Connection Card
Each card on the Connections page shows one linked application.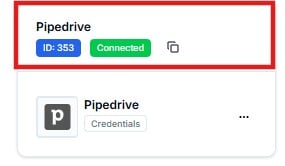
A connection card showing name, ID, status badge, app logo, and auth method
Auth Methods Explained
Your Connections
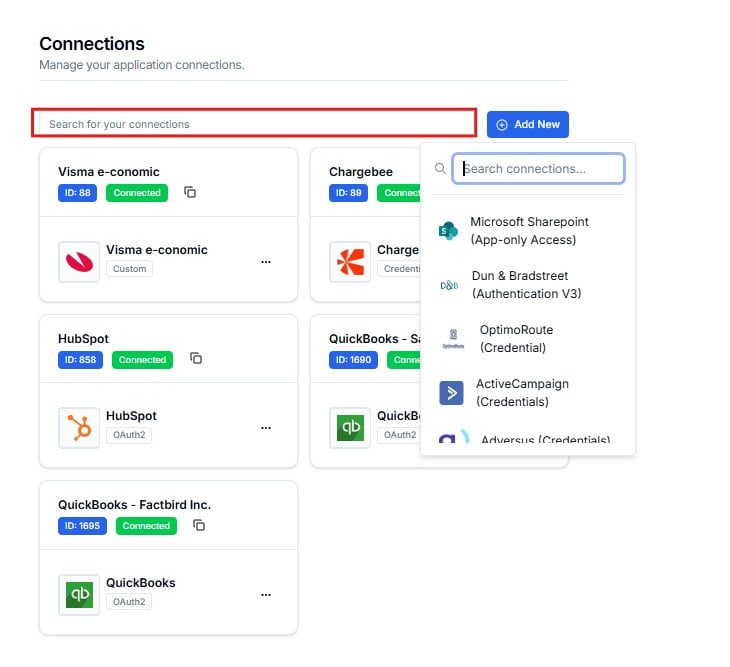
Every app connected to your Lighthouse account appears here as a card. The exact connections you see will depend on your integration setup — each client account is different.Connections are configured by Cloudify during your onboarding. You will only see the apps that are part of your specific integration. Contact Cloudify if you expect to see a connection that isn’t listed here.
The Three-Dot Menu
Every connection card has a ⋯ menu in the bottom-right corner with two actions.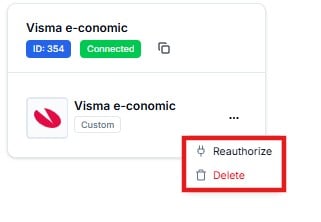
Three-dot menu — Reauthorize and Delete options
Reauthorize
Use this when a connection has lost its authentication — for example, after a password change or an expired OAuth token.Reauthorizing restores the connection without deleting it or affecting your workflows.
Delete
Permanently removes the connection from Lighthouse.Only delete a connection if you are certain it is no longer needed. Any workflow using a deleted connection will immediately stop working.
Adding a New Connection
Click + Add New in the top-right corner to request a new app connection.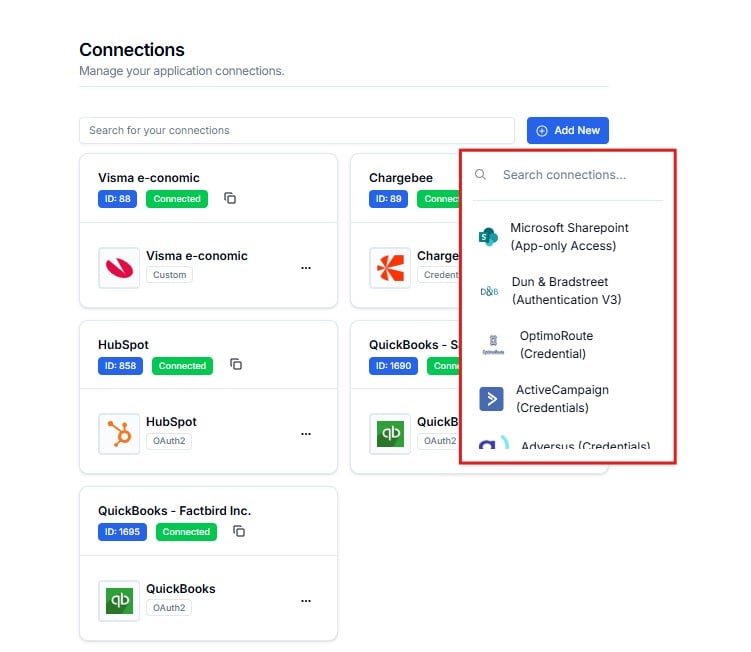
Adding a connection does not automatically create a workflow. Contact Cloudify after adding a new connection so they can build and deploy the workflow that uses it.
Searching & Pagination
- Use the Search for your connections field to find a connection by name.
- If you have more than one page of connections, use the pagination bar at the bottom to navigate.
Pagination — navigate across multiple pages of connections
Frequently Asked Questions
My workflows are failing — could it be a connection issue?
My workflows are failing — could it be a connection issue?
Check the Connections page and confirm all connections show a Connected badge. If any are missing or show a different status, use the ⋯ → Reauthorize option or contact Cloudify with the connection ID and the affected workflow name.
What does 'Custom' authentication mean?
What does 'Custom' authentication mean?
Some apps like Visma e-conomic use a proprietary method instead of standard OAuth2. Cloudify sets up and maintains these connections on your behalf — you do not need to manage them manually.
Why do I see multiple connections for the same app?
Why do I see multiple connections for the same app?
Multiple connections for the same app (e.g. two Xero connections) are normal when you have separate credentials for different accounts or environments. Each has its own ID and status.
Can I delete a connection I no longer need?
Can I delete a connection I no longer need?
Contact Cloudify before deleting any connection. They will confirm whether any active workflows depend on it and deactivate them first to prevent failures.