

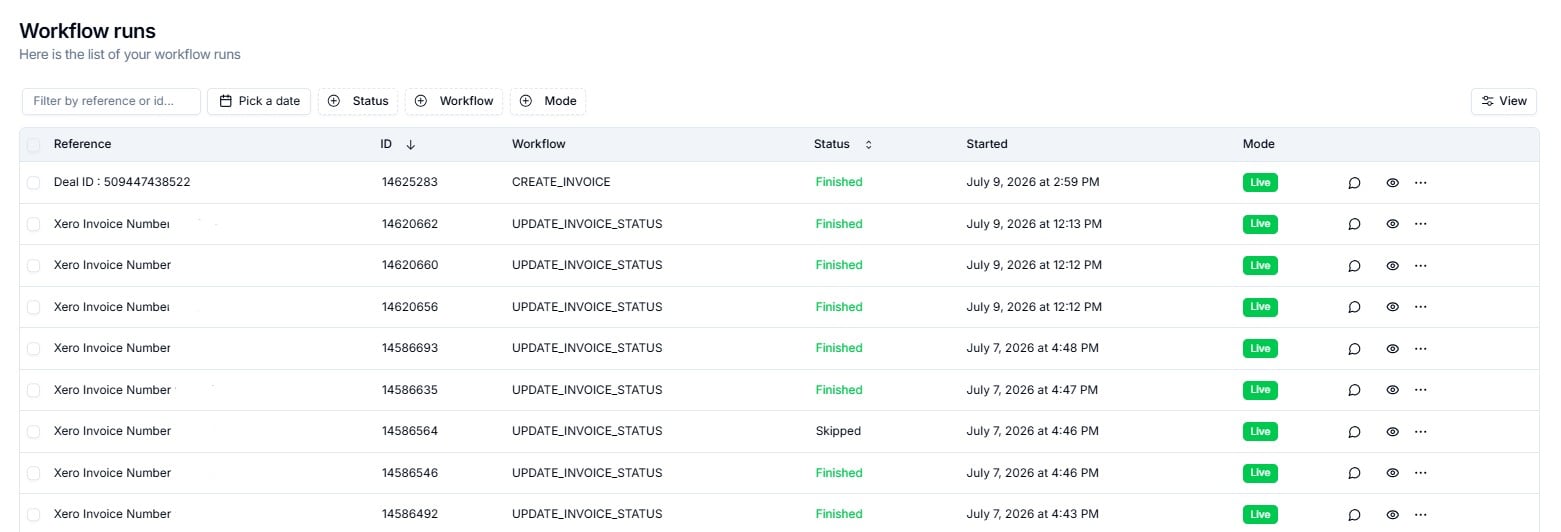
Workflow Runs — the full execution log for your integrations
- Did my integration run successfully?
- If something went wrong — which step failed and why?
- Can I replay a run without waiting for the next trigger?
Reading the Runs List
Each row in the table represents a single workflow execution.Run Status Reference
Row Controls
Every row has three interactive controls on the right-hand side. Together they give you full visibility and recovery capability without leaving the page.
Row controls — Explain (speech bubble), View (eye), and Actions menu (three dots)
Explain
Click the speech-bubble iconGenerates a plain-English AI summary of the run — what happened, which step failed, and likely cause. Use this first before reading technical logs.
View
Click the eye iconOpens the full Workflow Run detail page — event payload, step-by-step execution log, duration, and the Re-run button.
Actions
Click the three-dot menuDropdown with two options: Retrigger (replay the run) and View (same as the eye icon).
💬 The Explain Button
Clicking the speech-bubble icon on any row generates an AI-powered plain-English explanation of that run — no JSON reading required. The explanation typically covers:- Which step succeeded or failed
- The specific reason for the failure (e.g. a missing required field, an API authentication error, or a duplicate record check)
- Whether the failure is likely to resolve on retrigger or requires a data fix first
👁 The Run Detail Page
Clicking the eye icon — or selecting View from the Actions menu — opens the full detail view for that run.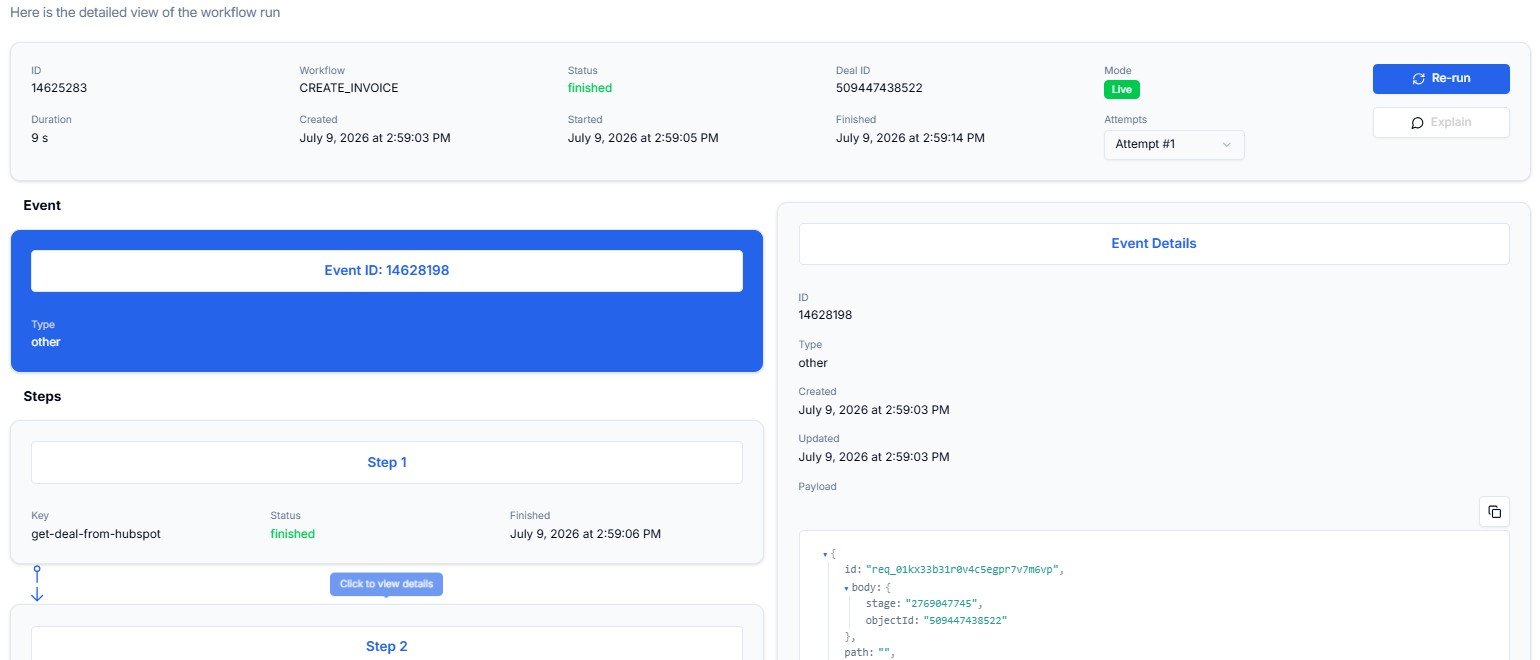
Workflow Run detail page — metadata header, event block, step execution log, and event payload panel
Run Metadata Header
The top section shows everything you need to know about the run at a glance.The Re-run Button
The blue Re-run button in the top-right replays the run using the original stored event payload.The Event Block
The Event block identifies what triggered this run:- Event ID — the internal ID of the incoming event that caused the workflow to start
- Type — the event category (e.g.
other,contact.created,deal.propertyChange) - Click to view details — expands the raw event payload panel on the right, showing the full JSON data Lighthouse received from the source app
Steps — The Execution Log
The Steps section shows each action inside your workflow in sequence.Event Details Panel
The right-hand panel shows the raw JSON payload of the selected event or step — the exact data Lighthouse received from or sent to the connected system. Use this panel to:- Verify that the correct HubSpot deal properties were captured
- Check that field values match what your destination app (e.g. Xero) requires
- Copy the payload to share with the Cloudify support team
The Actions Menu
Click the three-dot menu on any row to access two actions: Retrigger and View.
Actions menu — Retrigger and View options
Retrigger vs Re-run — Which to Use
Customising the Table View
Click View in the top-right corner of the Workflow Runs list to open the Toggle columns panel. Use it to show or hide columns based on what you need.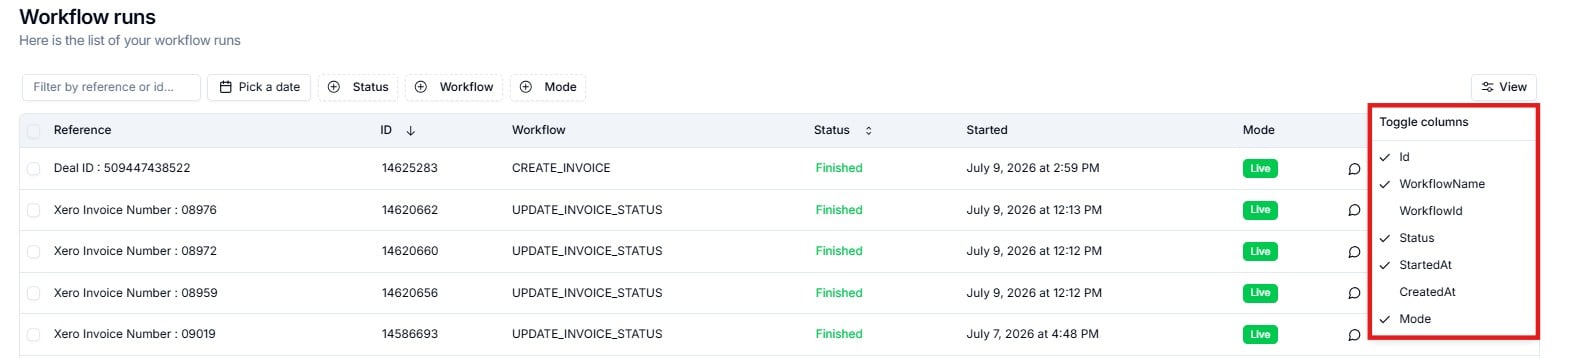
Toggle columns panel — customise which fields are visible in the runs list
Filtering Runs
Use the filter bar at the top of the list to narrow down what you see.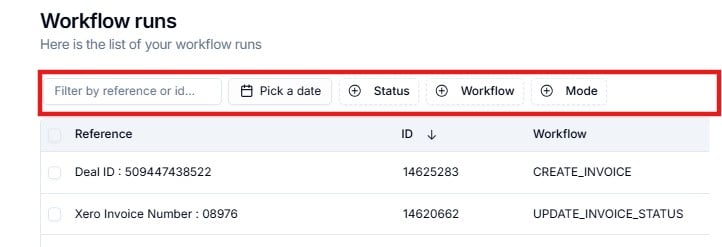
Quick Reference — Common Scenarios
A run shows Failed and I don't know why
A run shows Failed and I don't know why
- Click 💬 Explain (speech-bubble icon) on the row for a plain-English summary.
- Click 👁 View (eye icon) to open the detail page.
- In the Steps section, find the first step with a red status.
- Expand it using Click to view details to read the error message.
- Fix the root cause in the source system (e.g. HubSpot), then use ⋯ → Retrigger.
I fixed the data in HubSpot and want to retry the run
I fixed the data in HubSpot and want to retry the run
Use ⋯ → Retrigger from the Actions menu. This re-fetches the latest record from HubSpot and runs the workflow from scratch using the updated data. Do not use Re-run — it replays the original (now outdated) payload.
A run failed due to a temporary error (timeout or API rate limit)
A run failed due to a temporary error (timeout or API rate limit)
Open the detail page using 👁 View and click the blue Re-run button. This replays the original event payload without re-fetching from HubSpot — correct when the data was fine but the execution failed transiently.
I need to find all failed runs from a specific date
I need to find all failed runs from a specific date
In the filter bar, set Status to
Failed and click Pick a date to select the relevant date. The list will show only failed runs from that day.I want to verify exactly what data was sent to Xero
I want to verify exactly what data was sent to Xero
Open the detail page using 👁 View. In the Steps section, find the step that writes to Xero (e.g.
create-xero-invoice). Expand it using Click to view details. The right-hand Event Details panel shows the exact output data that was sent.I see a run in Pending status — is something wrong?
I see a run in Pending status — is something wrong?
Pending means the run is queued and waiting for Lighthouse to start processing it. This is typically temporary — refresh the page after a few moments. If a run stays Pending for an extended period, raise a support ticket.