


What Is Lighthouse?
Lighthouse works on two levels — one for you, one for us.Your Dashboard
A clear window into your integrations — no technical expertise required.
- See all connected apps at a glance
- Monitor workflow run status
- Replay failed workflows in one click
- Get email alerts when something needs attention
Our Infrastructure
The powerful backend where Cloudify builds and manages everything.
- Custom integrations coded and deployed by our team
- Event-driven architecture for real-time processing
- 24/7 monitoring with automatic error detection
- Technical issues resolved immediately by Cloudify
You never need to touch the technical side. Cloudify handles all infrastructure, field mapping, and deployment — your dashboard is simply your window into what’s running.
Step 1 — Create Your Account
Go to app.cloudify.biz/auth/signup to create your Lighthouse account.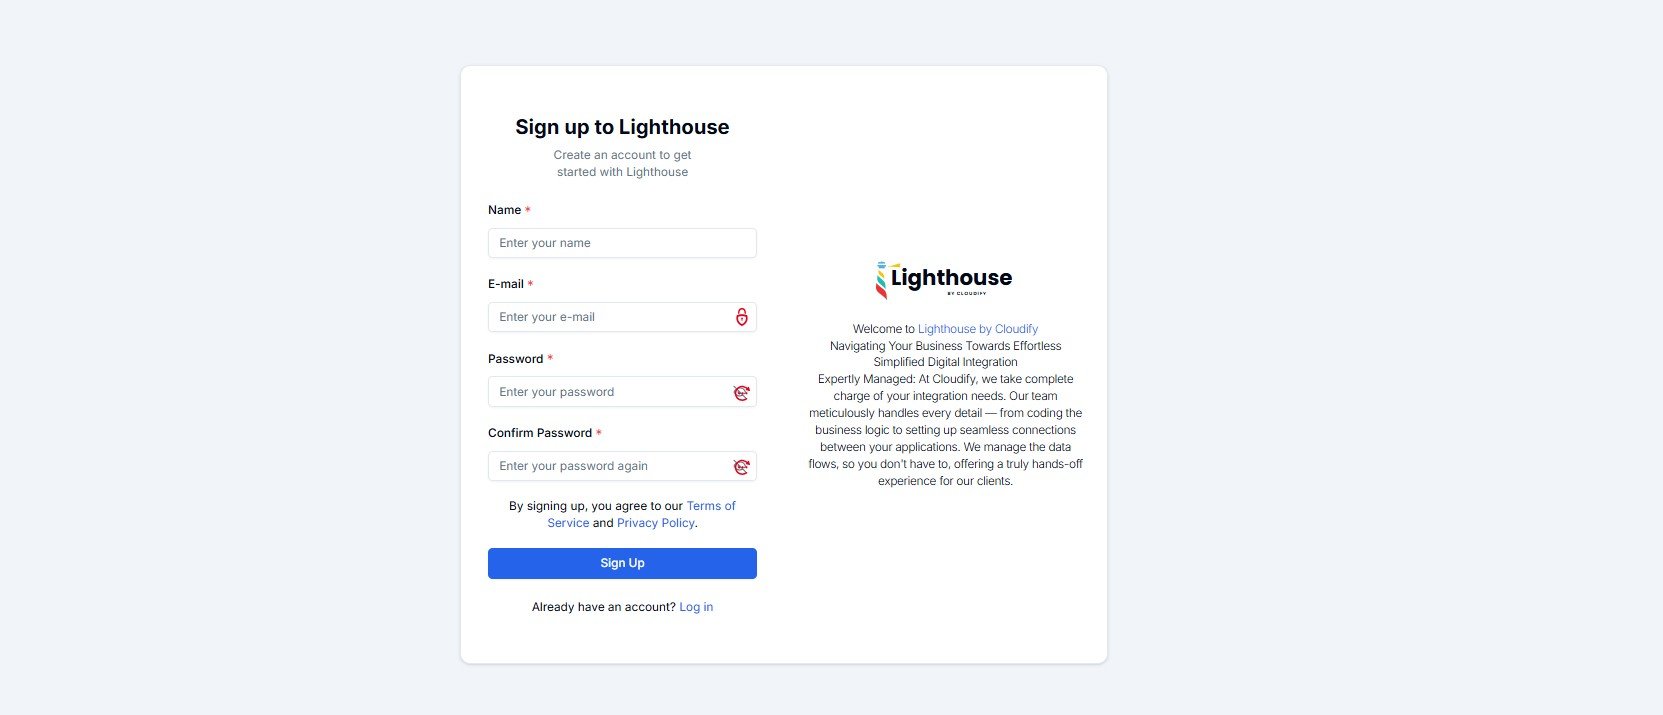
| Field | Notes |
|---|---|
| Name | Your full name |
| You’ll receive a verification code here | |
| Password | Choose a secure password |
| Confirm Password | Re-enter your password to confirm |
Step 2 — The Welcome Screen
Once your account is verified, you’ll land on the Welcome Screen.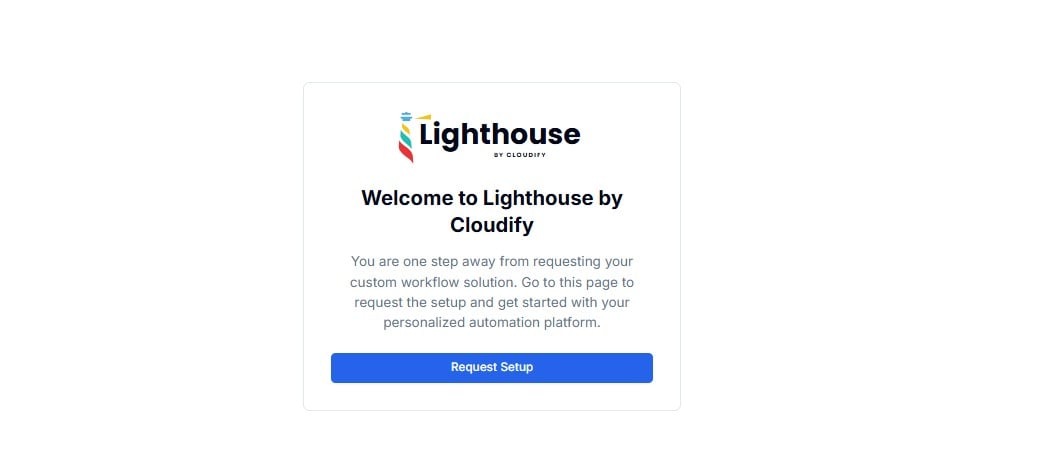
No payment is required at this stage. Requesting setup simply starts a consultation with the Cloudify team — you’ll receive a tailored quote before any commitment is made.
Step 3 — Configure Your Integration
After clicking Request Setup, you’ll land on the integration configuration page. This has three sections — work through them top to bottom.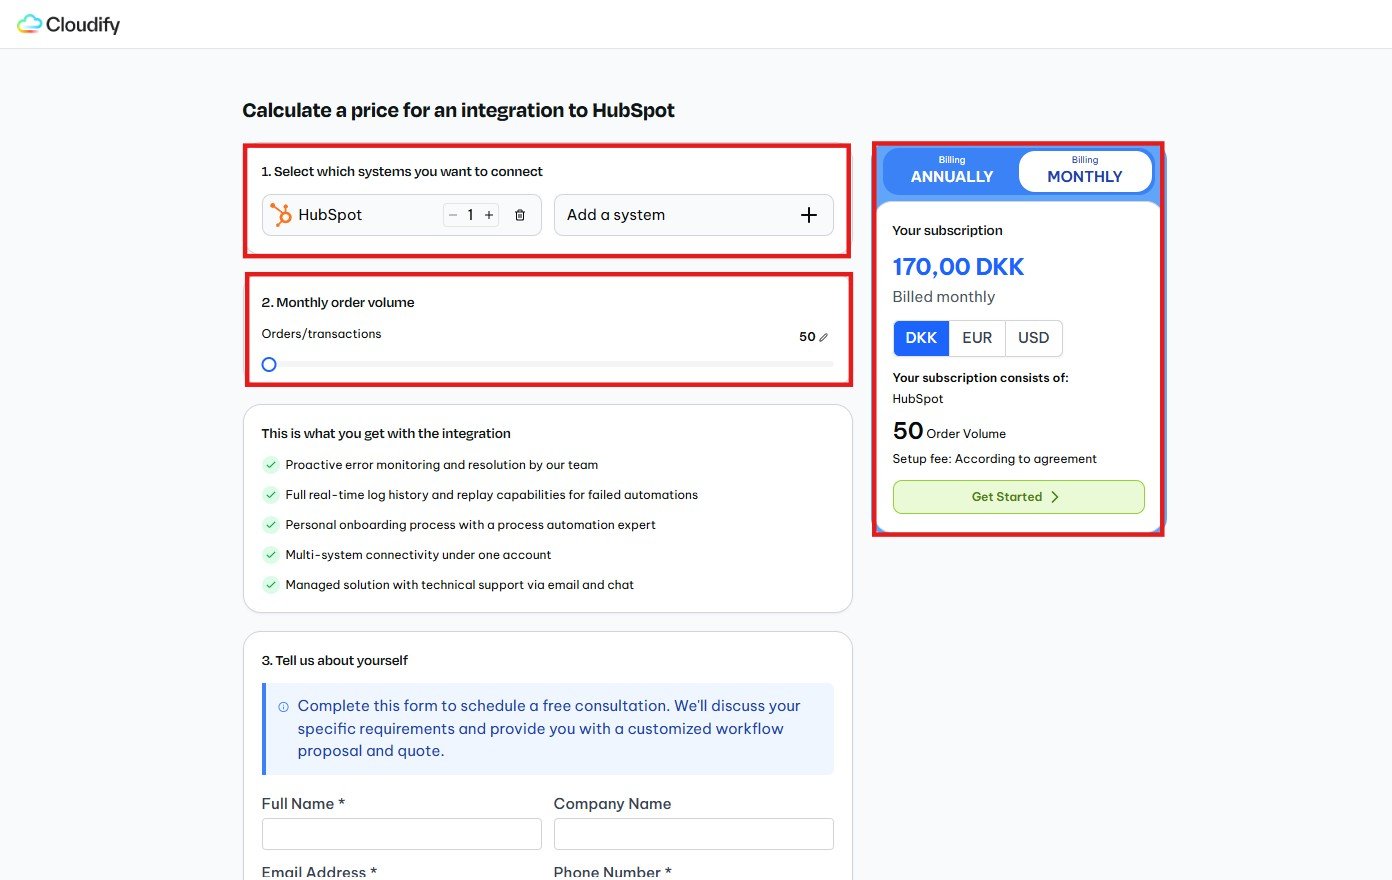
1. Select Which Systems You Want to Connect
Click + Add a system and choose the applications you need to integrate.If a standard marketplace integration exists for your app combination, Lighthouse will surface it automatically. For anything beyond a standard integration, Cloudify will build a custom workflow tailored to your business logic.
| Source App | Destination App | Use Case |
|---|---|---|
| HubSpot | Xero | CRM deals → Accounting invoices |
| Pipedrive | e-conomic | Pipeline activity → Finance sync |
| Shopify | Xero | E-commerce orders → Accounting |
| HubSpot | Business Central | CRM → ERP data flow |
2. Set Your Monthly Order Volume
Use the Orders/Transactions slider to set your expected monthly volume. The subscription summary card on the right updates in real time.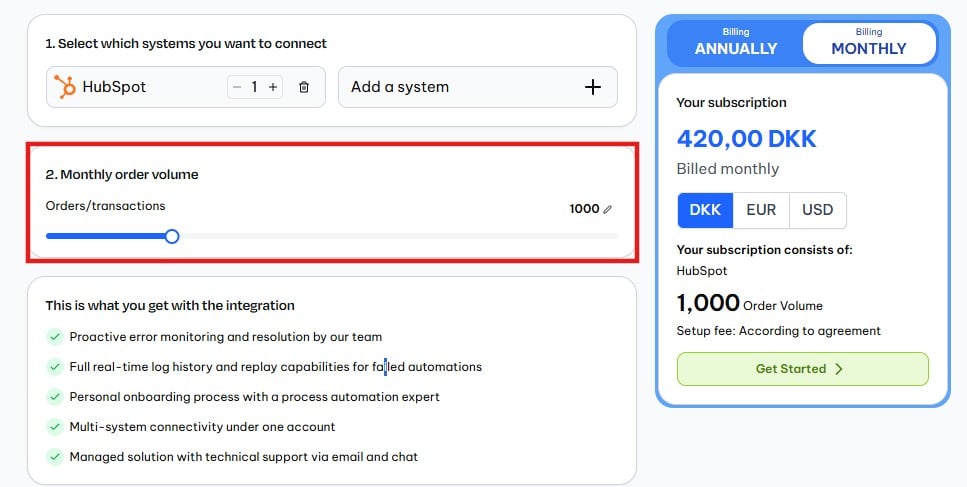
| Option | What It Does |
|---|---|
| Annual / Monthly toggle | Switch billing frequency — annual gives a discounted rate |
| DKK / EUR / USD | View your price in your preferred currency |
| Order Volume | Your monthly transaction count — directly affects your price |
| Setup fee | Confirmed during your consultation — shown as “According to agreement” |
3. Tell Us About Yourself
Fill in the short contact form to schedule your free consultation.| Field | Required | Notes |
|---|---|---|
| Full Name | Yes | Your name |
| Company Name | No | Your organization |
| Email Address | Yes | Where your consultation invite will be sent |
| Phone Number | Yes | For scheduling your discovery call |

Step 4 — Submission Confirmed
After clicking Get Started, you’ll see a success confirmation.
“Thank you for your submission. You will shortly receive an email explaining the process going forward.”Your request is in. The Cloudify team will be in touch to arrange your consultation.
What Happens Next
Schedule a Consultation
You’ll receive an email to book a complimentary call with one of Cloudify’s integration specialists at a time that suits you.
Discuss Requirements
Join a discovery call where our experts learn about your specific business processes and integration goals.
Get Your Integration Plan
Receive a personalised integration plan — including a custom workflow proposal and a detailed quote.
Connect Applications
After you approve the plan, Cloudify begins implementation — connecting your apps to Lighthouse and mapping all data fields.
Frequently Asked Questions
Do I pay anything when requesting setup?
Do I pay anything when requesting setup?
No. Submitting your setup request is completely free. You’ll only receive a quote during your consultation and commit after reviewing and approving your integration plan.
What if I don't see my app in the system selector?
What if I don't see my app in the system selector?
Contact your Cloudify account manager. Lighthouse supports a wide range of custom integrations, including apps not listed in the standard selector.
What is 'Order Volume'?
What is 'Order Volume'?
Order volume is the number of transactions, records, or events your integration will process each month — for example, orders synced from Shopify to Xero, or deals in HubSpot that trigger invoice creation.
How long does setup take after my consultation?
How long does setup take after my consultation?
Timelines vary depending on integration complexity. Cloudify will provide an estimated delivery timeframe as part of your integration plan.
Can I change my apps or volume after submitting?
Can I change my apps or volume after submitting?
Yes. Discuss any changes during your consultation call. Volume and app configuration can be adjusted before your integration goes live.