Cancelling stops all active syncs immediately. If you’re on a paid plan, you won’t be charged again but no refunds are issued for the current billing period.

Steps to cancel

1

Open the integration settings

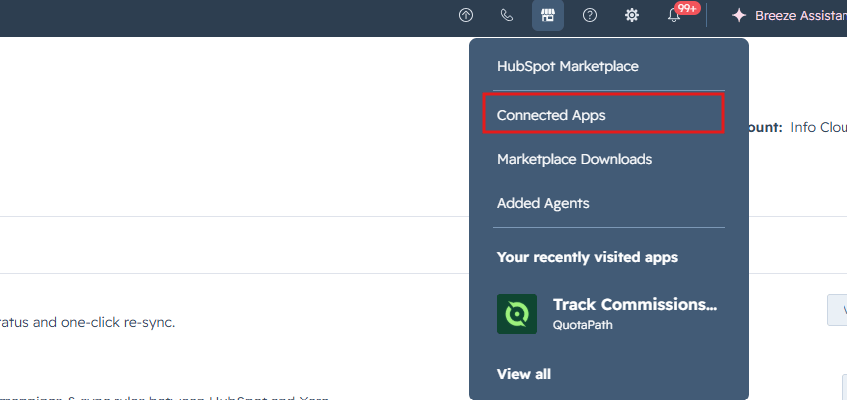
In HubSpot, click the gear icon in the top navigation bar to open Settings.Screenshot 2026 08 24 130533 1Then navigate to Integrations → Connected Apps.7dbe7dab Ad93 4ada 8736 12586f718f6c
2

Find Xero Integration by Cloudify

In the Connected Apps list, search for Xero Integration by Cloudify and click the app to open its detail page.
3

Go to settings inside the app

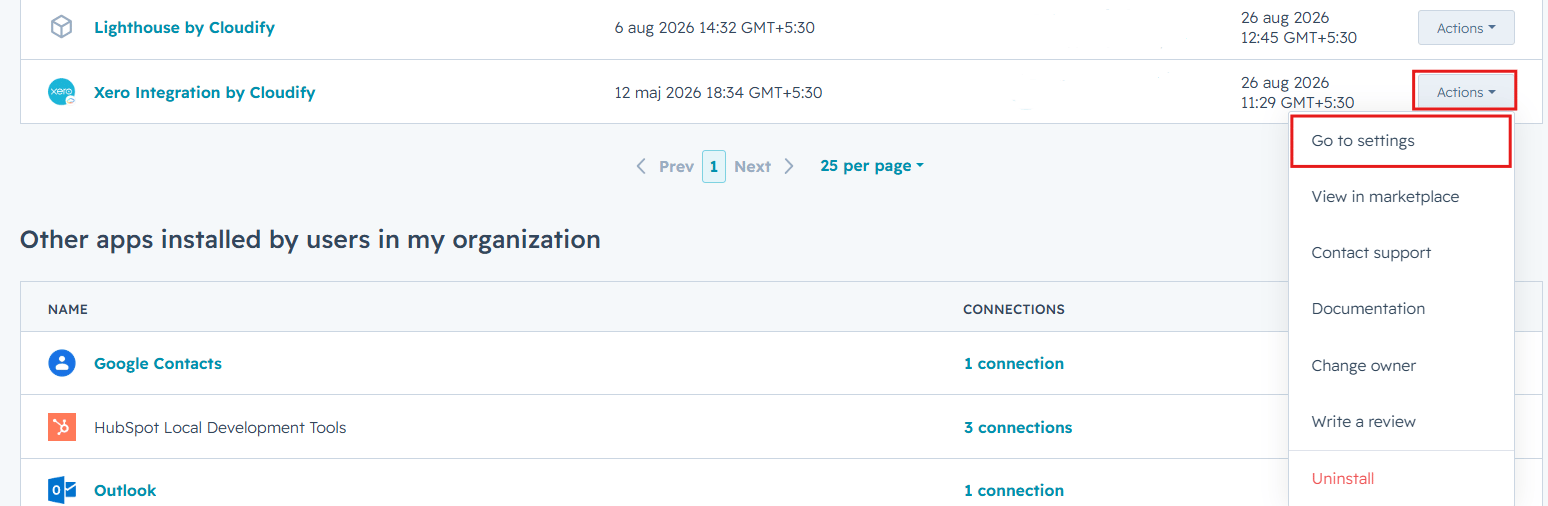
Inside the Cloudify app detail page, click Actions → Go to settings.This opens the Cloudify subscription management page.Screenshot 2026 08 24 131858
4

Open subscription management

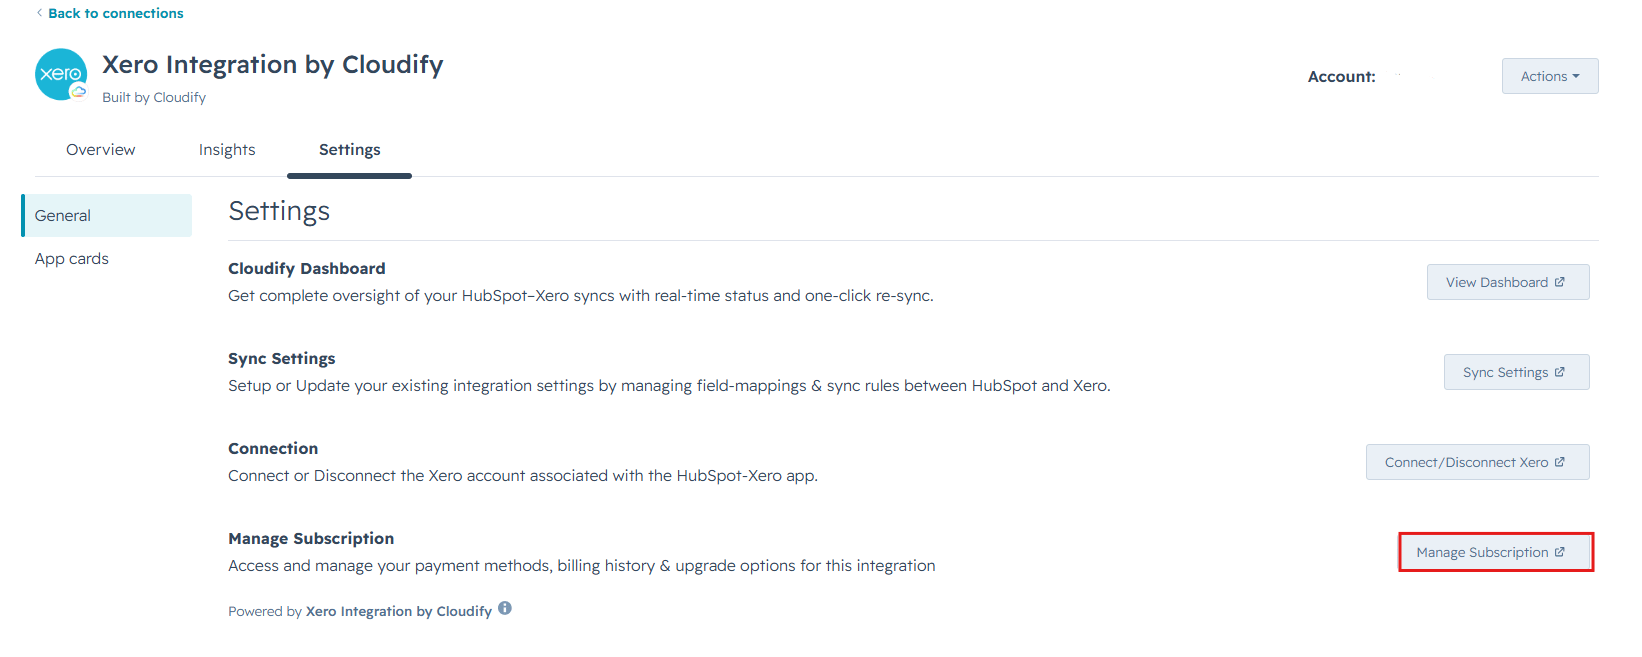
Click Manage subscription. You’ll see your current plan details, billing cycle, and usage.
5

Cancel your plan

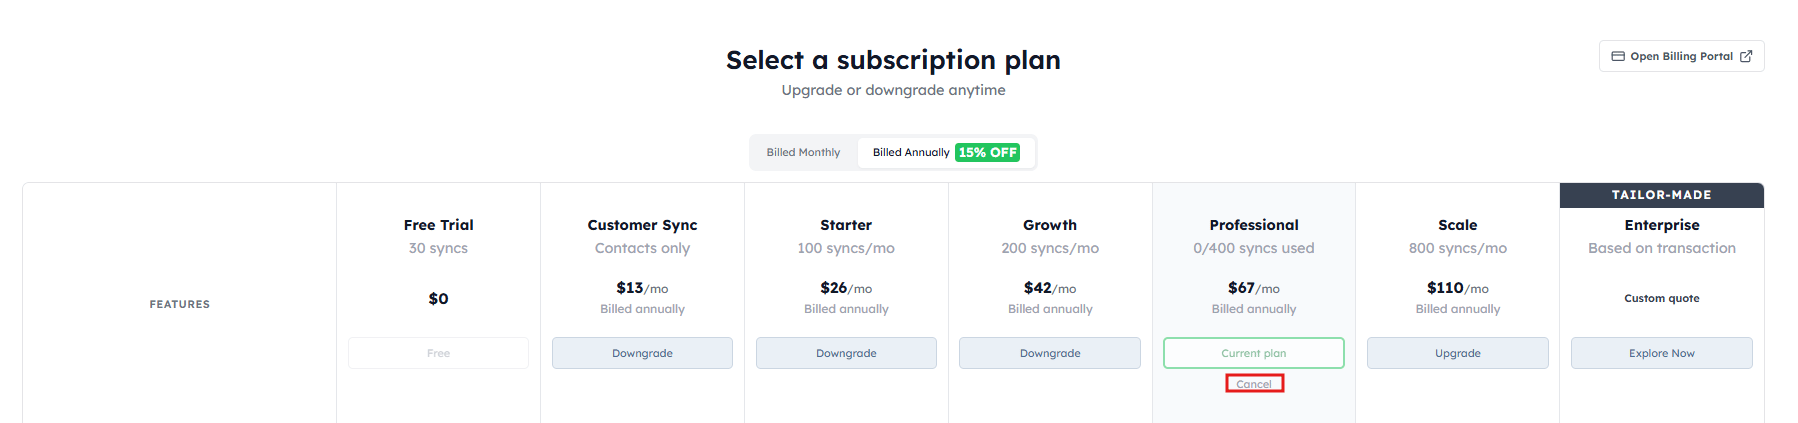
Click Cancel subscription. A confirmation prompt will appear — confirm to complete cancellation.You’ll receive an email receipt at your billing address.Screenshot 2026 08 24 132010
This action is immediate and cannot be undone. Your syncs will stop as soon as you confirm.

What happens after cancellation

Active syncs

All syncs stop immediately upon cancellation.

Your data

Retained for 30 days. Reactivate within this window to restore everything.

Billing

No further charges. Your plan runs to the end of the current billing period.

Reactivation

You can reactivate your plan at any time within 30 days of cancellation.

Custom solutions

Not finding a plan that fits your sync volume, workflow, or team structure? We build tailored integrations for companies with specific requirements — custom field mapping, enterprise data volumes, dedicated support, or bespoke automation logic.

Talk to our team

Get a custom quote for your business. We’ll scope out exactly what you need.

Help us improve

Before you go, we’d love to hear what we could have done better. Your feedback directly shapes what we build next — it takes about 2 minutes.