Automatically create (e-conomic) Invoices
This setting determines when the integration creates an invoice in e-conomic, based on the status of your Shopify order. Choose one:- When Fulfilled (after shipping) – the invoice is created once the order has been fulfilled and shipped.
- When Paid (payment recorded in Shopify) – the invoice is created once payment is recorded on the order in Shopify.
- When Created (order created in Shopify) – the invoice is created as soon as the order is placed, regardless of payment or shipping status.
Using Shopify Flow? If you want Shopify Flow to trigger invoice creation instead — using any event you define in your Flow automation — turn this toggle off. Disabling it switches off the standard automation so it does not interfere with your Flow automation. Flow-triggered invoice creation only works when this toggle is disabled.
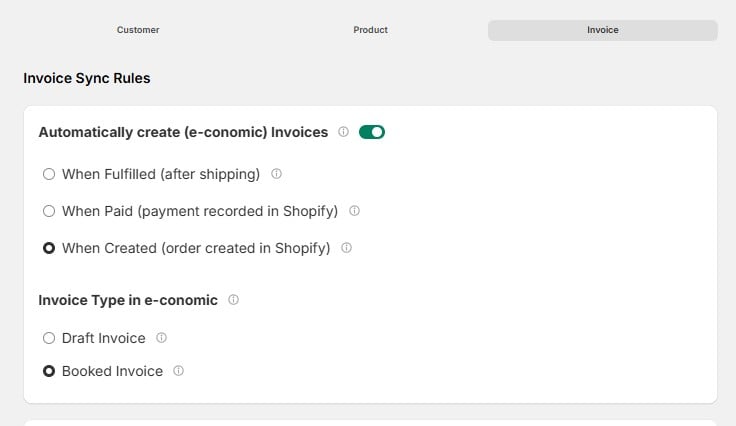
Invoice Type in e-conomic
Choose what kind of invoice the app creates:- Draft Invoice – the invoice is created as a draft in e-conomic. Nothing is finalized: you (or your accountant) review and book each invoice manually in e-conomic.
- Booked Invoice – the invoice is booked (finalized) automatically in e-conomic. No manual review step.
Additional Options
Include shipping charges
Enable this checkbox to include the shipping charges from the Shopify order on the e-conomic invoice. Once enabled, a dropdown appears. Select a product from the list — this product acts as the shipping line on the invoice, and the integration takes care of the shipping charges from there. The shipping amount itself always comes from the Shopify order. If this box is left unticked, shipping charges are not included on the e-conomic invoice.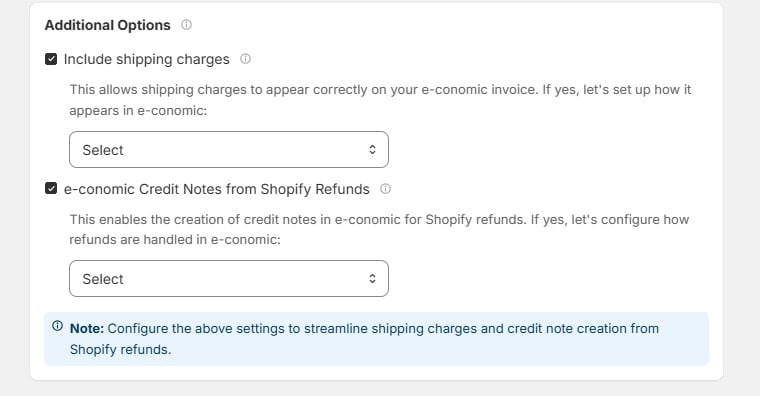
e-conomic Credit Notes from Shopify Refunds
Enable this checkbox to automatically create a credit note in e-conomic when a refund is issued in Shopify. A credit note is the accounting document that reverses (fully or partly) a previously issued invoice. Once enabled, a dropdown appears. Select a product from e-conomic to represent refunds — the actual refund amount always comes from Shopify, so the product is only a placeholder line on the credit note. If this box is left unticked, Shopify refunds are not sent to e-conomic, and you must create credit notes manually.Invoice Field Mappings
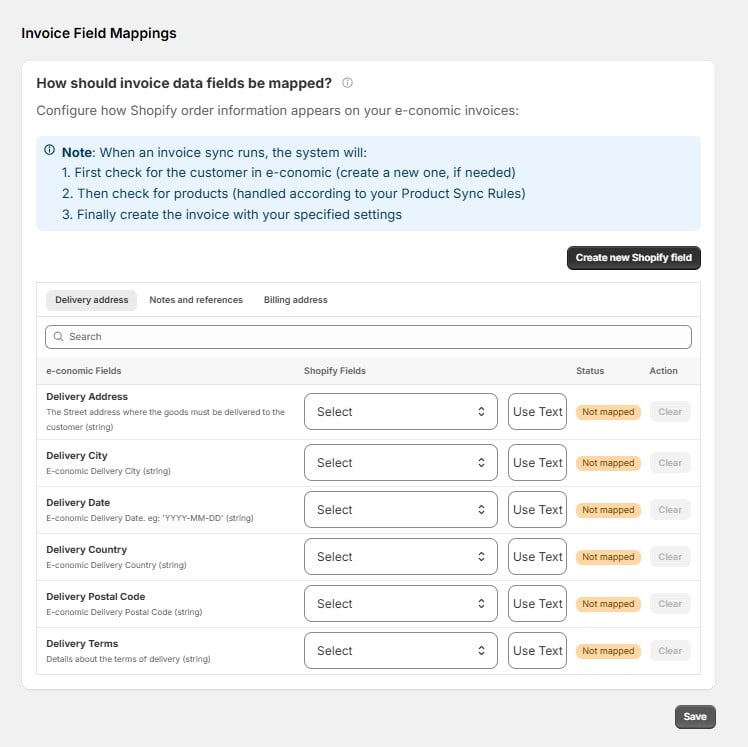
This section controls how Shopify order information appears on your e-conomic invoices.When an invoice sync runs, the system works in this order:
- First it checks for the customer in e-conomic (and creates a new one if needed, according to your Customer Sync Rules).
- Then it checks for the products (handled according to your Product Sync Rules).
- Finally it creates the invoice with the settings on this page.
- Delivery address – where the goods are delivered: Delivery Address (street), Delivery City, Delivery Date, Delivery Country, Delivery Postal Code, and Delivery Terms.
- Notes and references – text and reference fields on the invoice.
- Billing address – the customer’s billing address fields.